OpenMRS-OpenELIS Lab Communication Tutorial
This page provides a step-by-step tutorial for demoing the FHIR-based Lab Communication between OpenMRS and OpenELIS.
The tutorial focuses on a specific implementation of OpenMRS used in the Haiti health system called iSantéPlus, which runs on platform 2.0.5. To enable this communication, the iSantéPlus server we will use has the following two modules installed:
For more information on setting up the individual components, see this Implementation Guide section in the Wiki.
Overview of Lab Order Communication

To get more general information about this project:
- check out the Lab Integration Workflow page
- take a look at this slide deck: 2020_AMIA_CIC_Lab_Order_Communication.pptx
Step-by-step tutorial
1. Log in to iSantéPlus
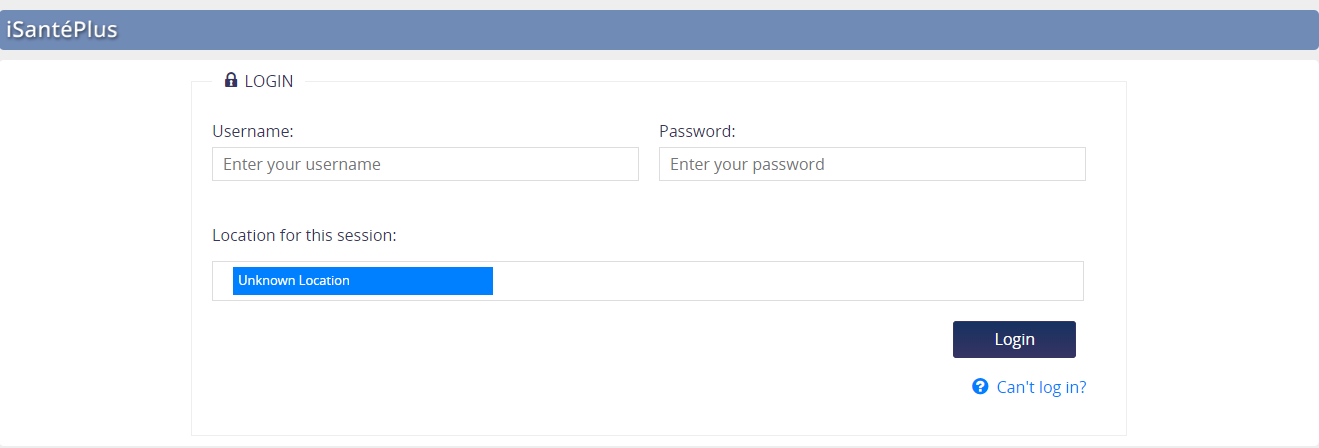
Navigate to https://isanteplusdemo.com/openmrs/login.htm and you should see the following page:
iSantéPlus Login Page
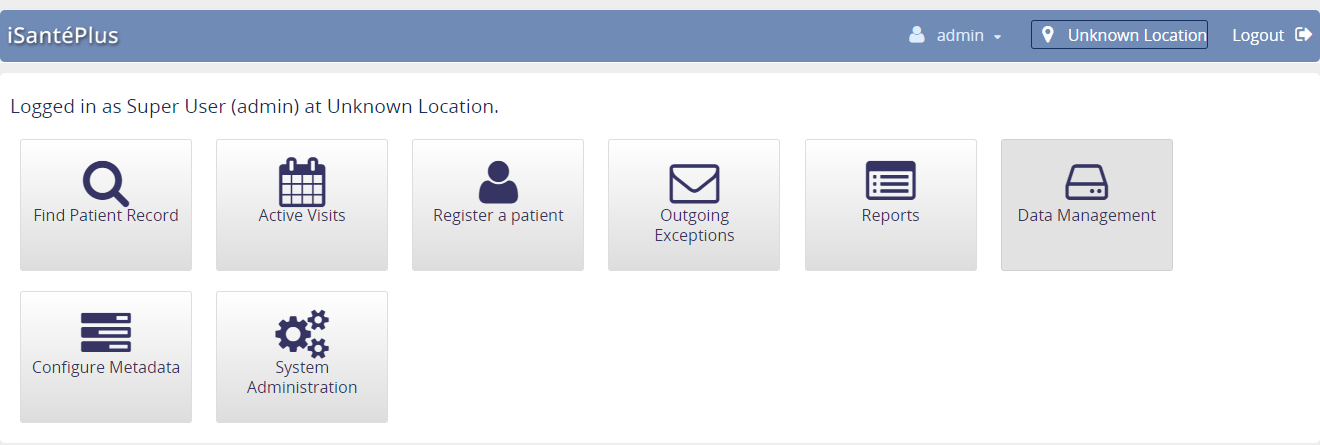
Login using the username `admin` and password `Admin123`, and you should see the following screen:
Select Existing Patient
2. Navigate to the patient chart
You can use an existing patient to test the communication, or register a new patient to use.
Existing Patient
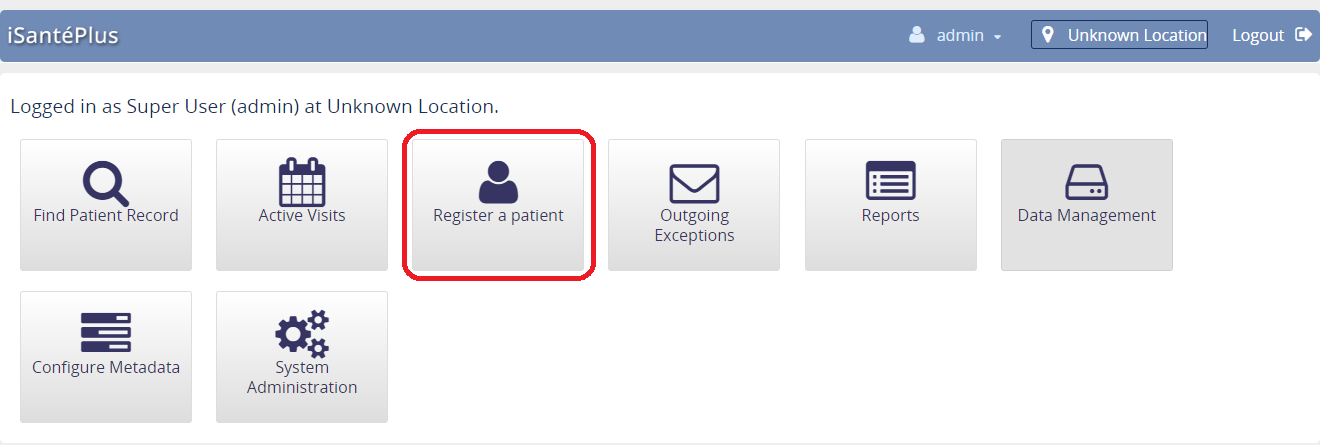
To select and existing patient, click on on the `Find Patient Record` button:
iSantéPlus Home Page
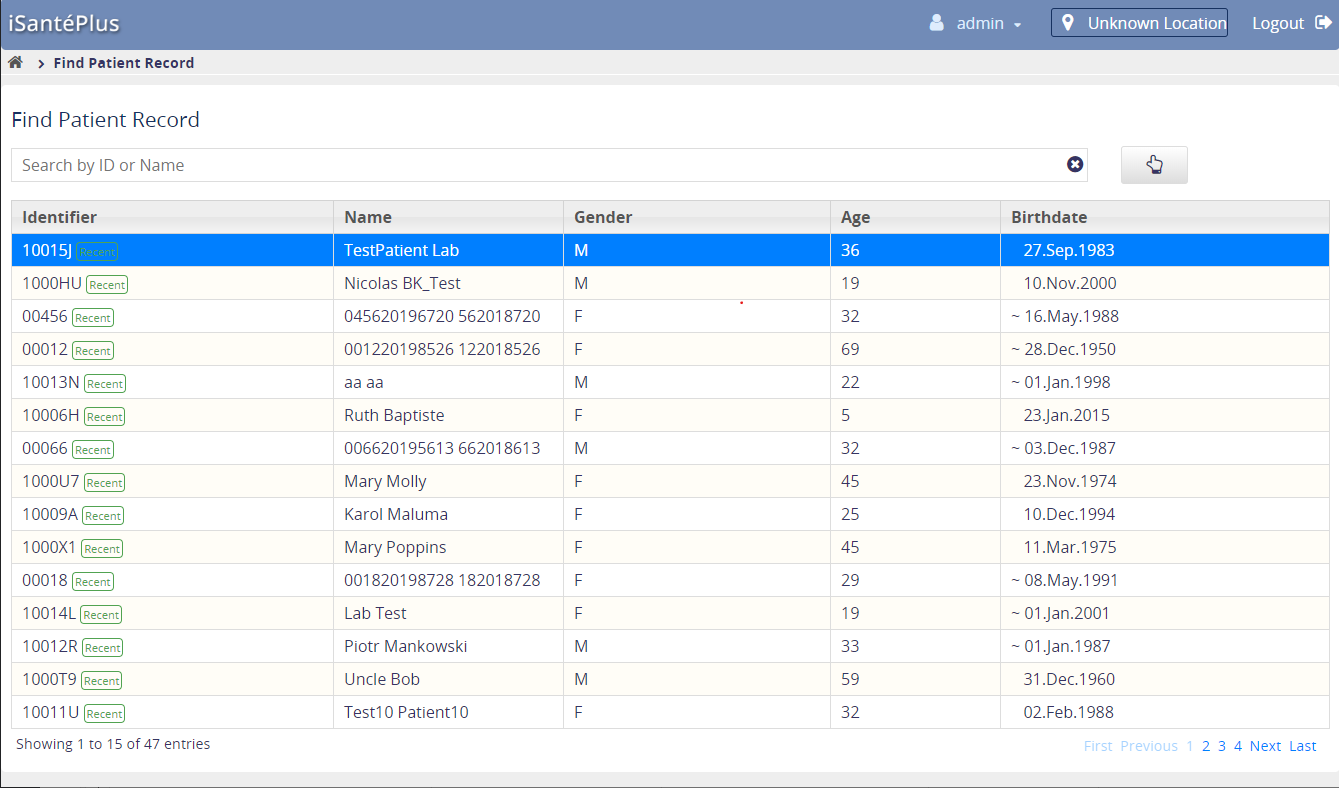
You can then search for and click on your desired patient:
Patient List
New Patient
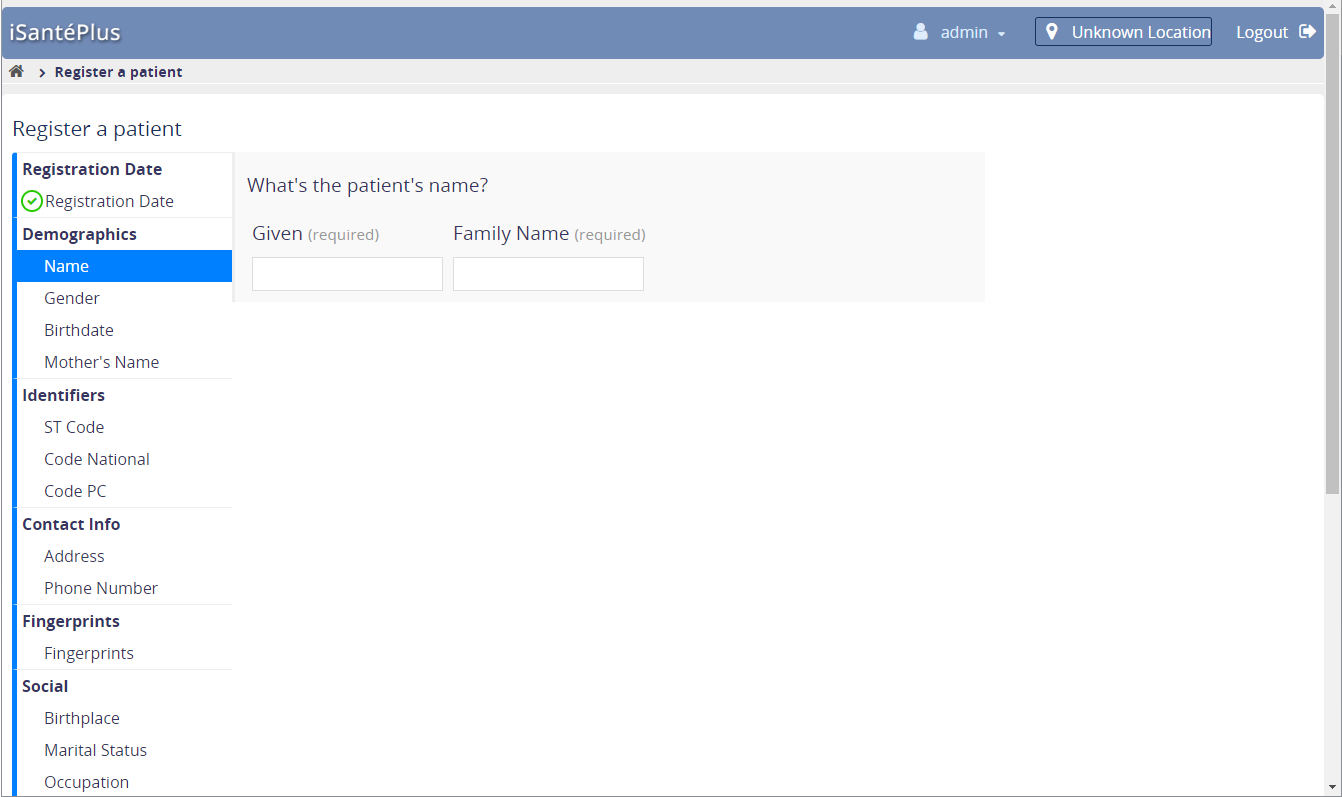
To create a new patient, click on the `Register a Patient button` and fill in the required information.
Register a new patient
↓
3. Start a patient visit
Click on the `Start Visit` button:
|
|
|---|
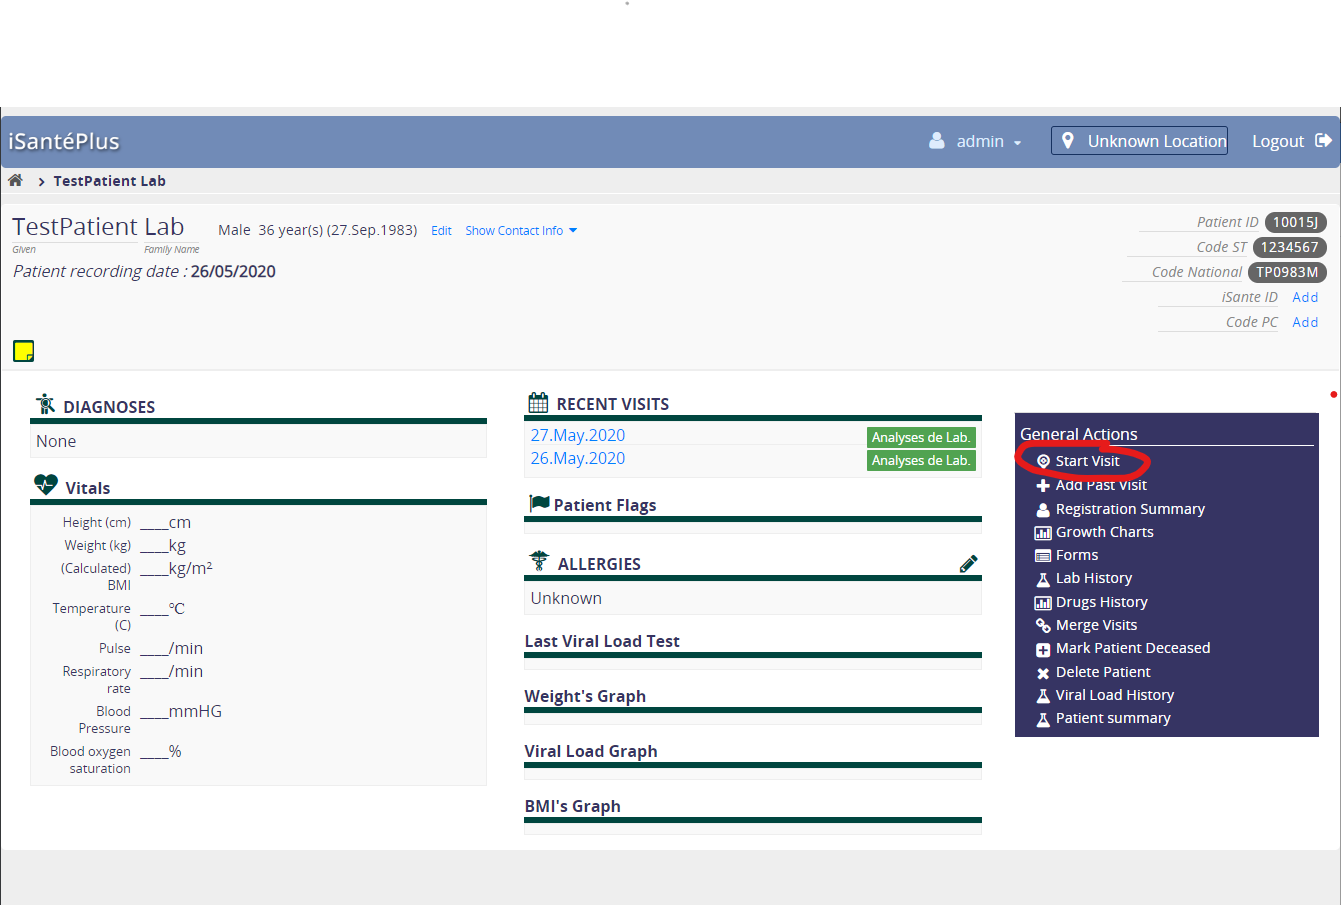
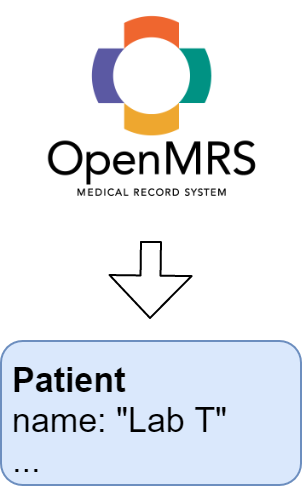
OpenMRS maps the concept of a patient to a Patient resource.
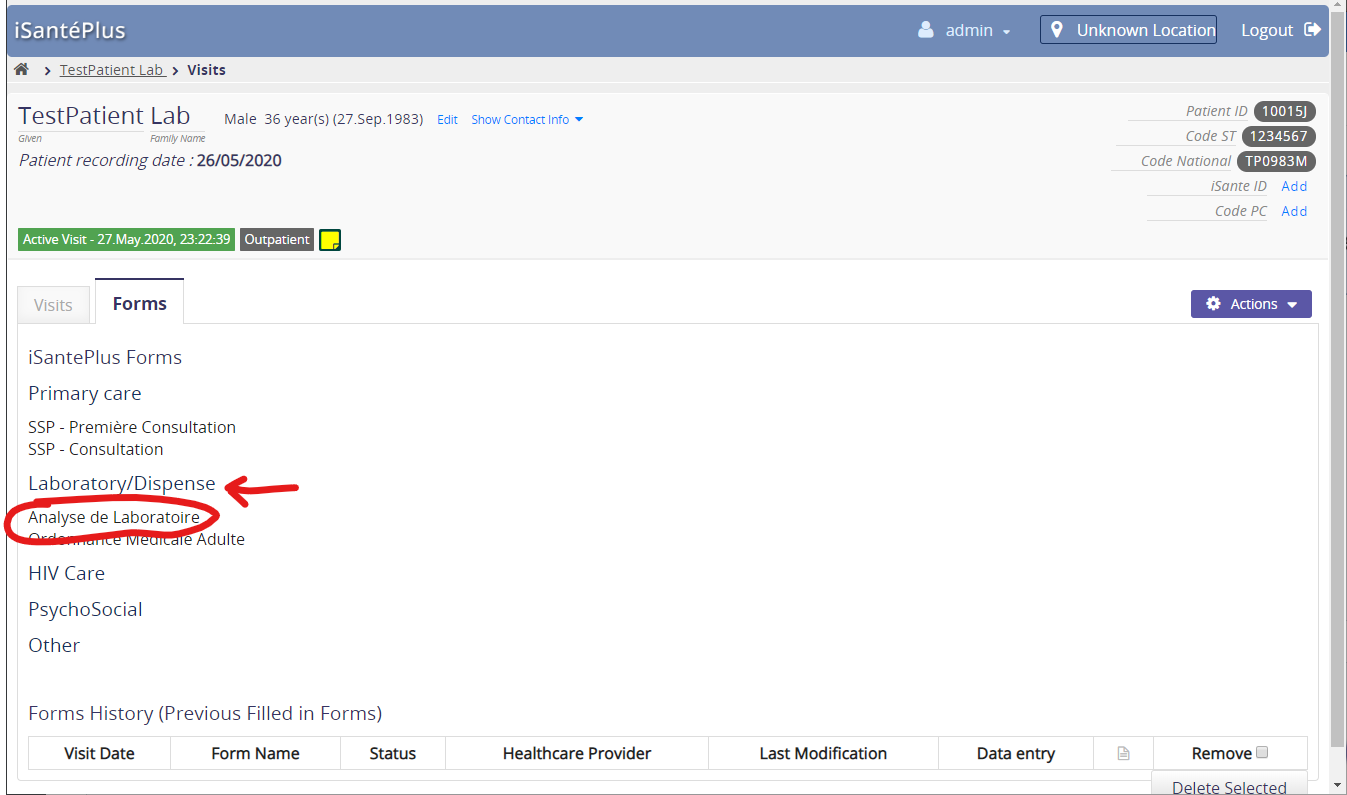
4. Order a lab test
Click on the `Laboratory/Dispense` heading and select the `Analyse de Laboratoire` link.
|
|
|---|
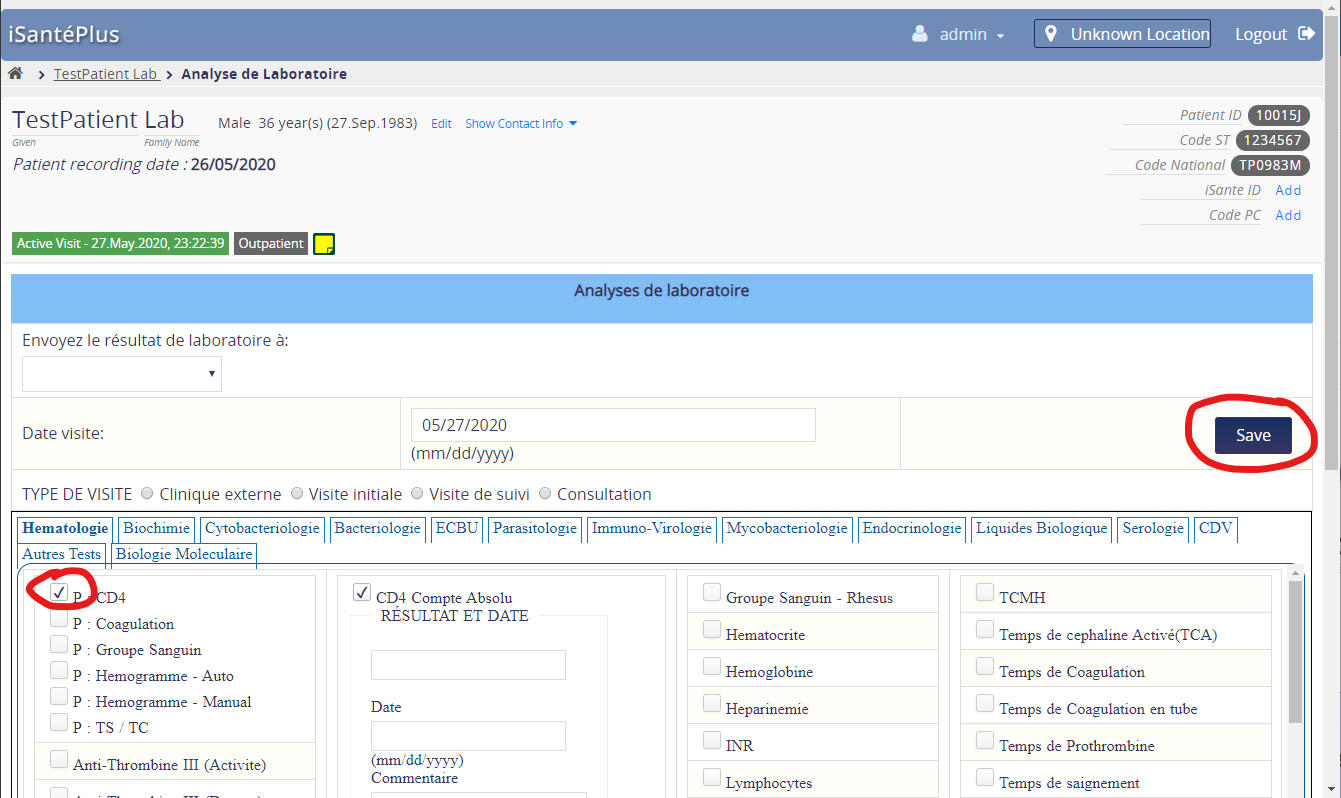
Select the `CD4 Panel` and click `Save`.
|
|
|---|
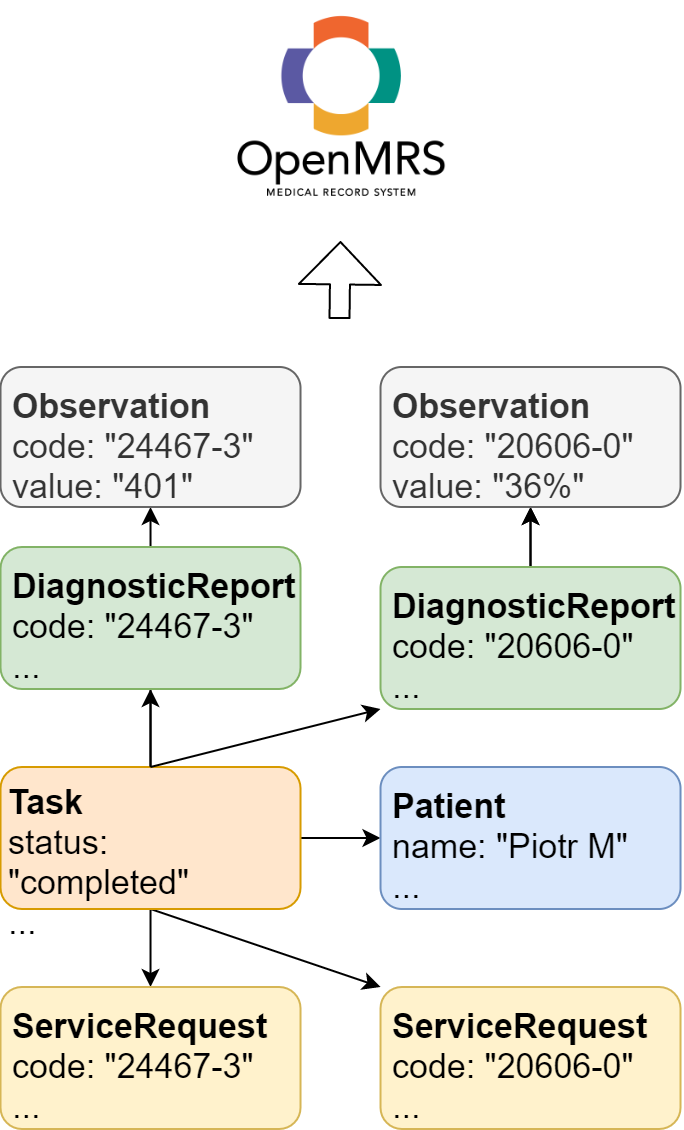
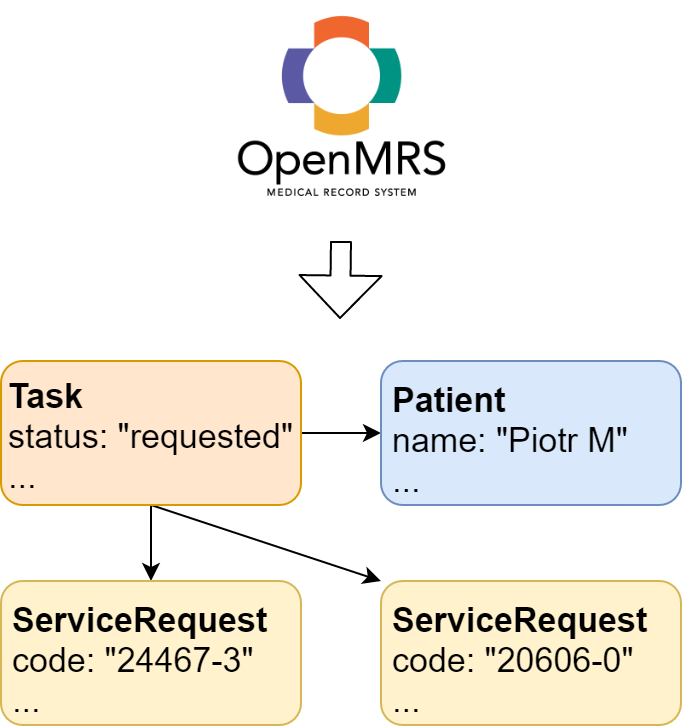
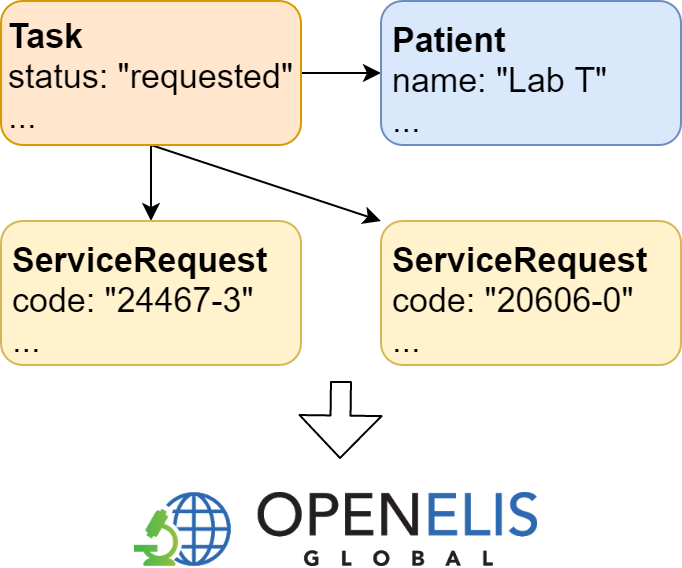
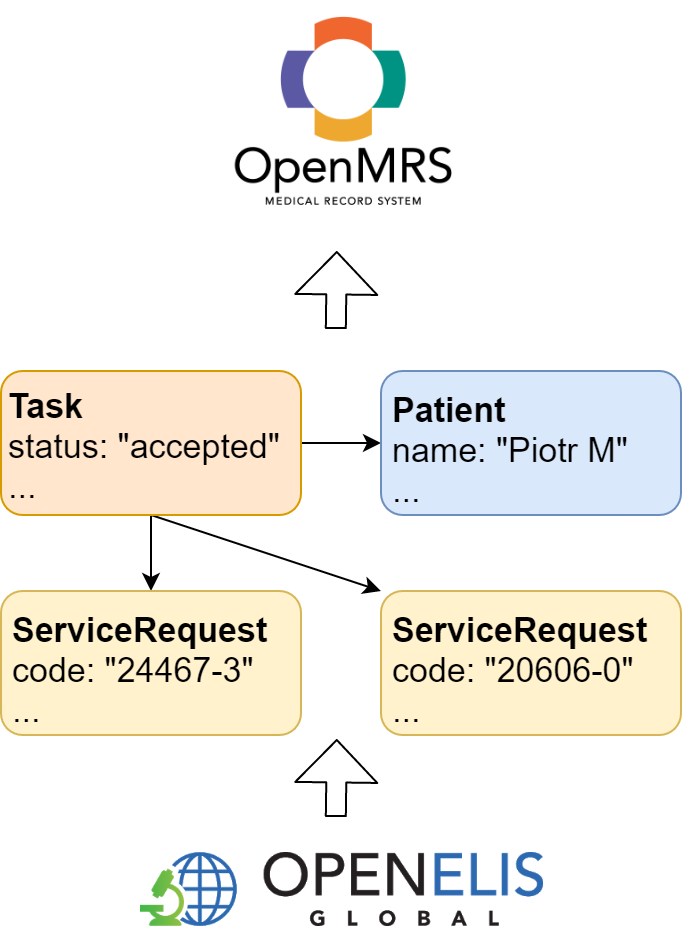
This form creates orders for two tests that are included in the CD4 panel: CD4 absolute count and CD4 percentage count. These orders are mapped to ServiceRequest resources. A Task resource is created as a container for the data that will be used in the communication, and the Patient and ServiceRequest resources are linked to the Task. The Task status is set to `requested` to indicate that the Task is ready to be handled by OpenELIS.
This bundle of resources is read in by OpenELIS, and used in the next couple of steps.
5. Log in to OpenELIS
Navigate to https://testapi.openelisci.org:8443/OpenELIS-Global and use the username admin and password adminADMIN!.
Note: When prompted by your browser to select a certificate for the webpage, just click Cancel
You should see the OpenELIS homepage:
6. View incoming electronic orders
In the top navigation menu, choose `Order` → `Electronic Orders`, and you should see a list of incoming Electronic Orders sorted by most-recent first.
|
|
|---|
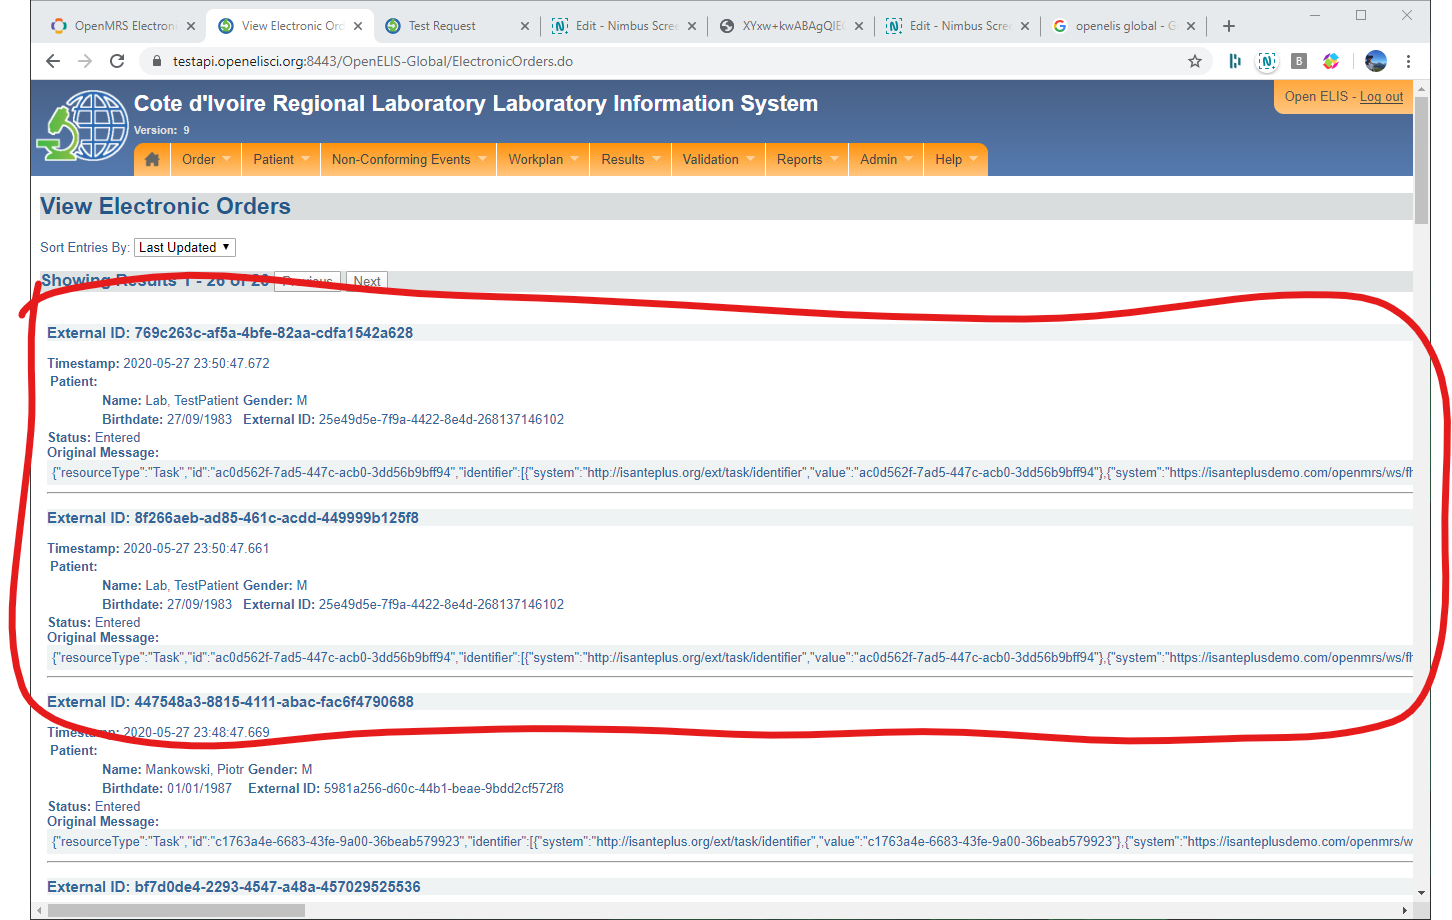
The CD4 test panel that we ordered in iSantePlus includes two tests: CD4 Percentage Count and CD4 absolute count. These tests are represented by the top two Electronic Orders in the above screenshot.
For each of the two `External IDs`:
- Copy the full string
- Navigate to `Order`→ `Add Order`
- Paste the order ID in the `Reference order number` field indicated in the screenshot below.
7. Use referral number to populate order form
(Repeat for each electronic order from previous step)
|
|
|---|
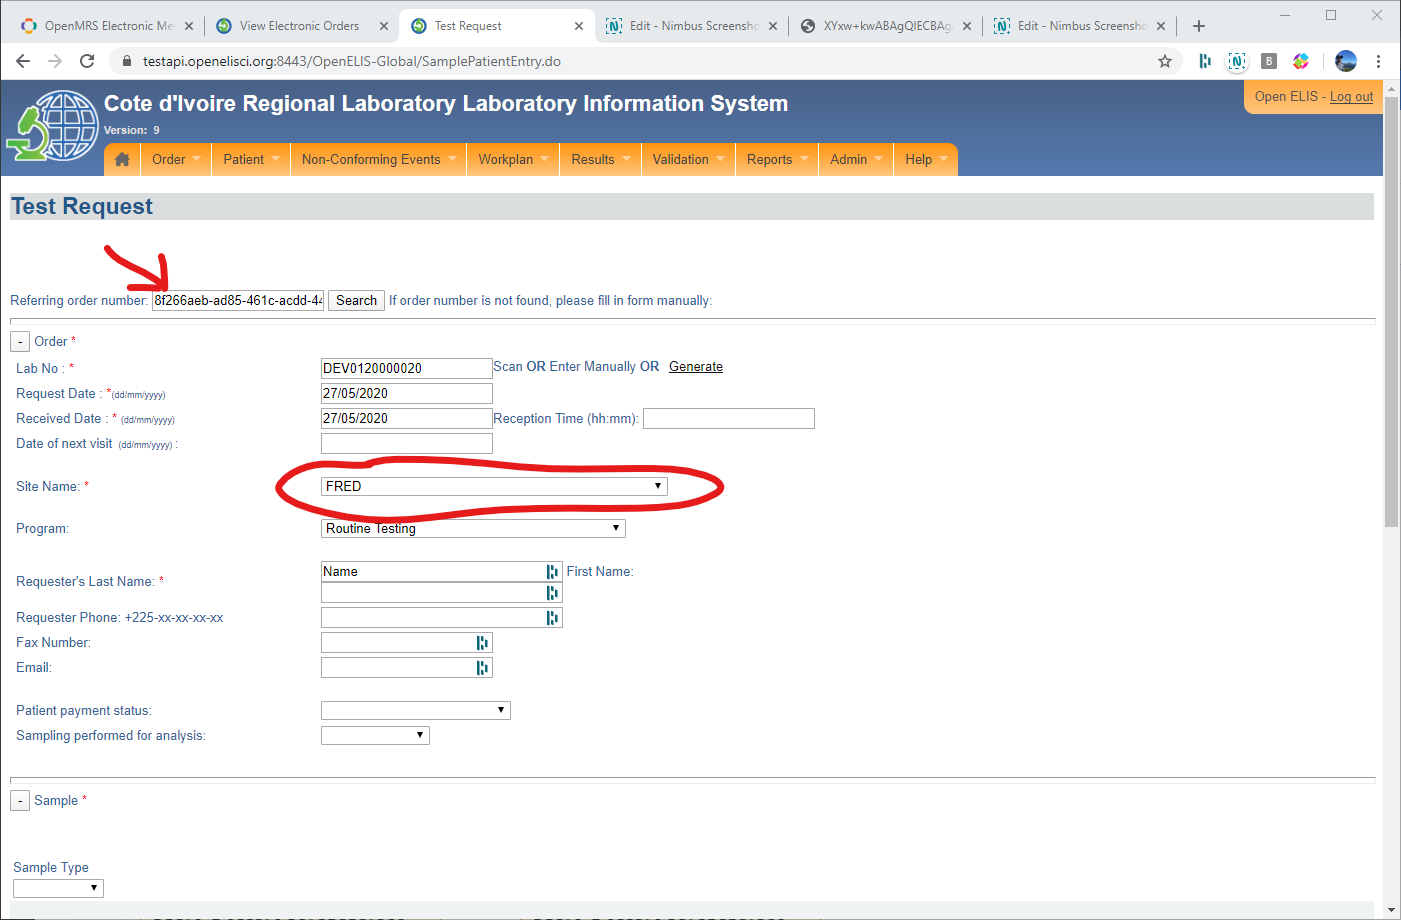
Once you have the electronic order number copied into the text field:
- Click on the `Generate` link next to the `Lab No` field
- Select any `Site Name` from the drop down
- Scroll down and click the `Save` button.
The information on the patient and the test that was ordered is pre-populated based on the incoming bundle of resources from OpenMRS. The Task status is set to `accepted` once the order is imported.
8. Enter results
Once each electronic order is added using the form in step 7, the results can be entered into the system.
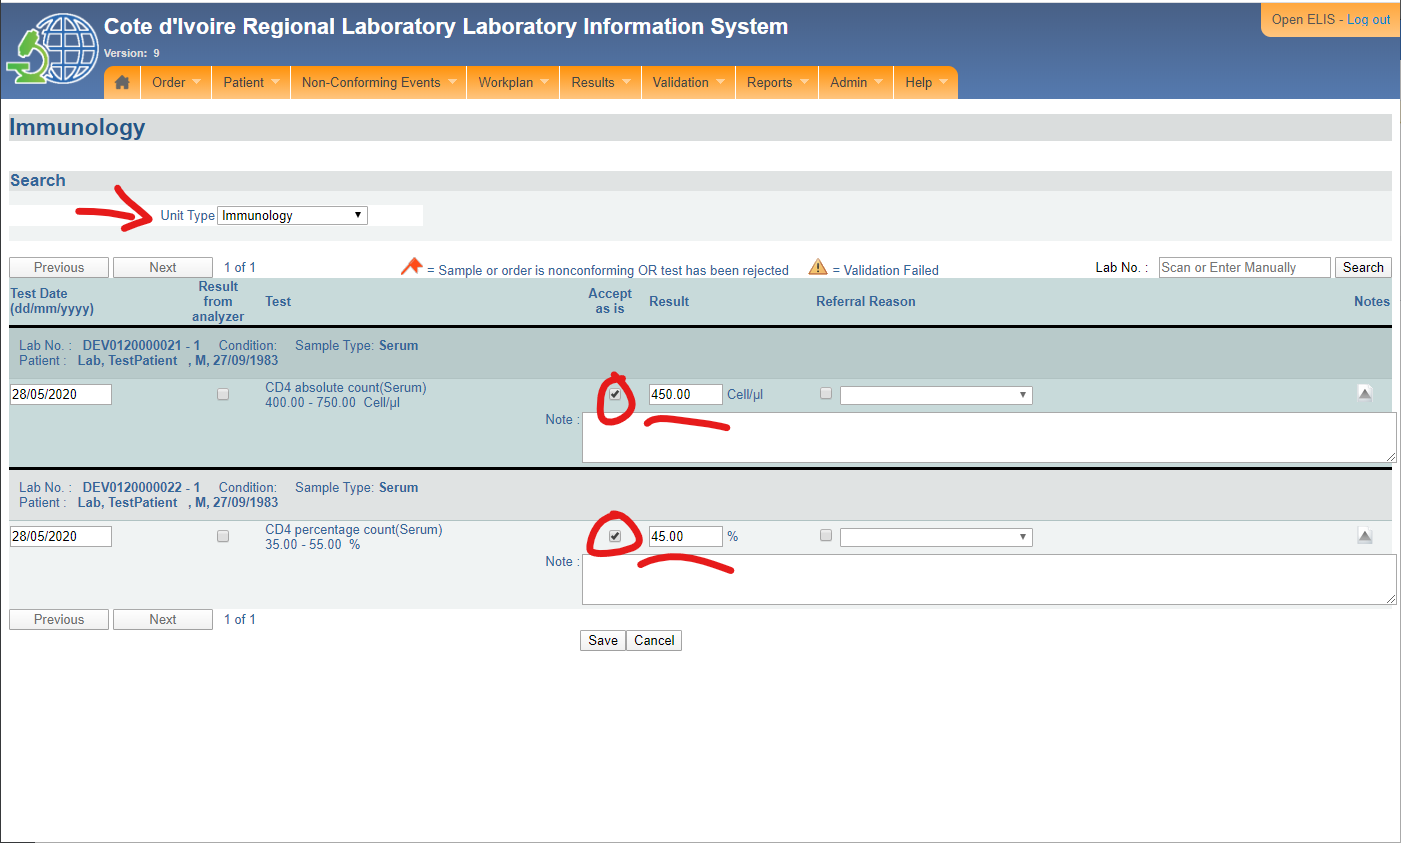
- Navigate to `Results` → `Enter by unit`
- Choose `Immunology` from the unit type dropdown
Enter results in the normal range for the two orders that show up on the screen
- Check the `Accept as is` checkbox for each result
|
|
|---|
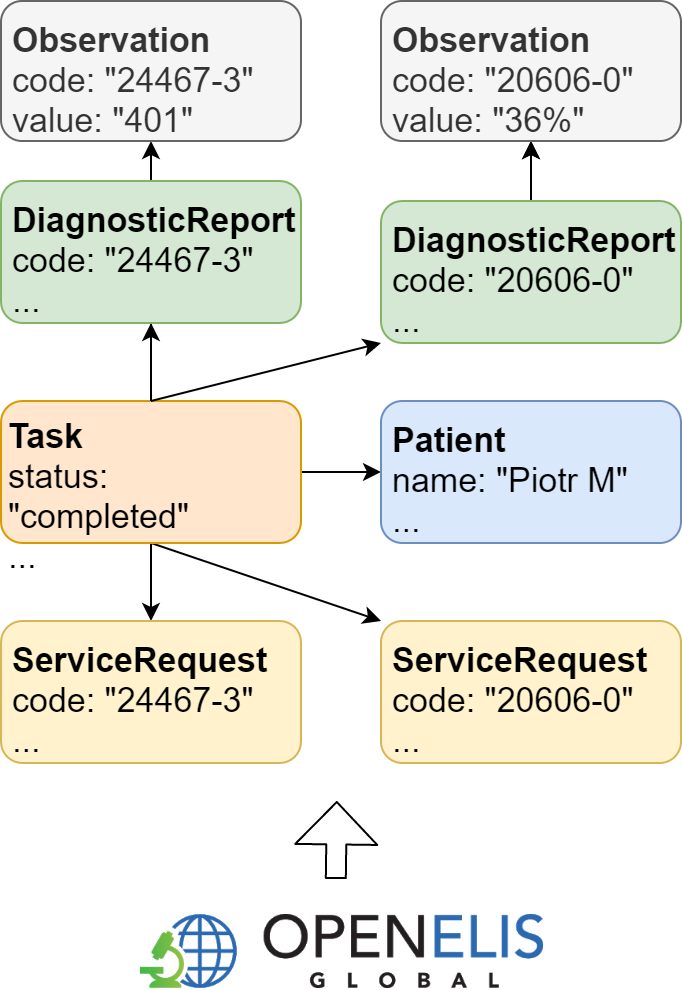
The added results trigger the creation of a DiagnosticReport resource that corresponds to each original ServiceRequest. These DiagnosticReports are attached to the Task using the output element. The result values are stored in Observation resources, attached to each DiagnosticReport. The Task status is also set to completed.
This bundle of resources is read in by OpenMRS in the next step.
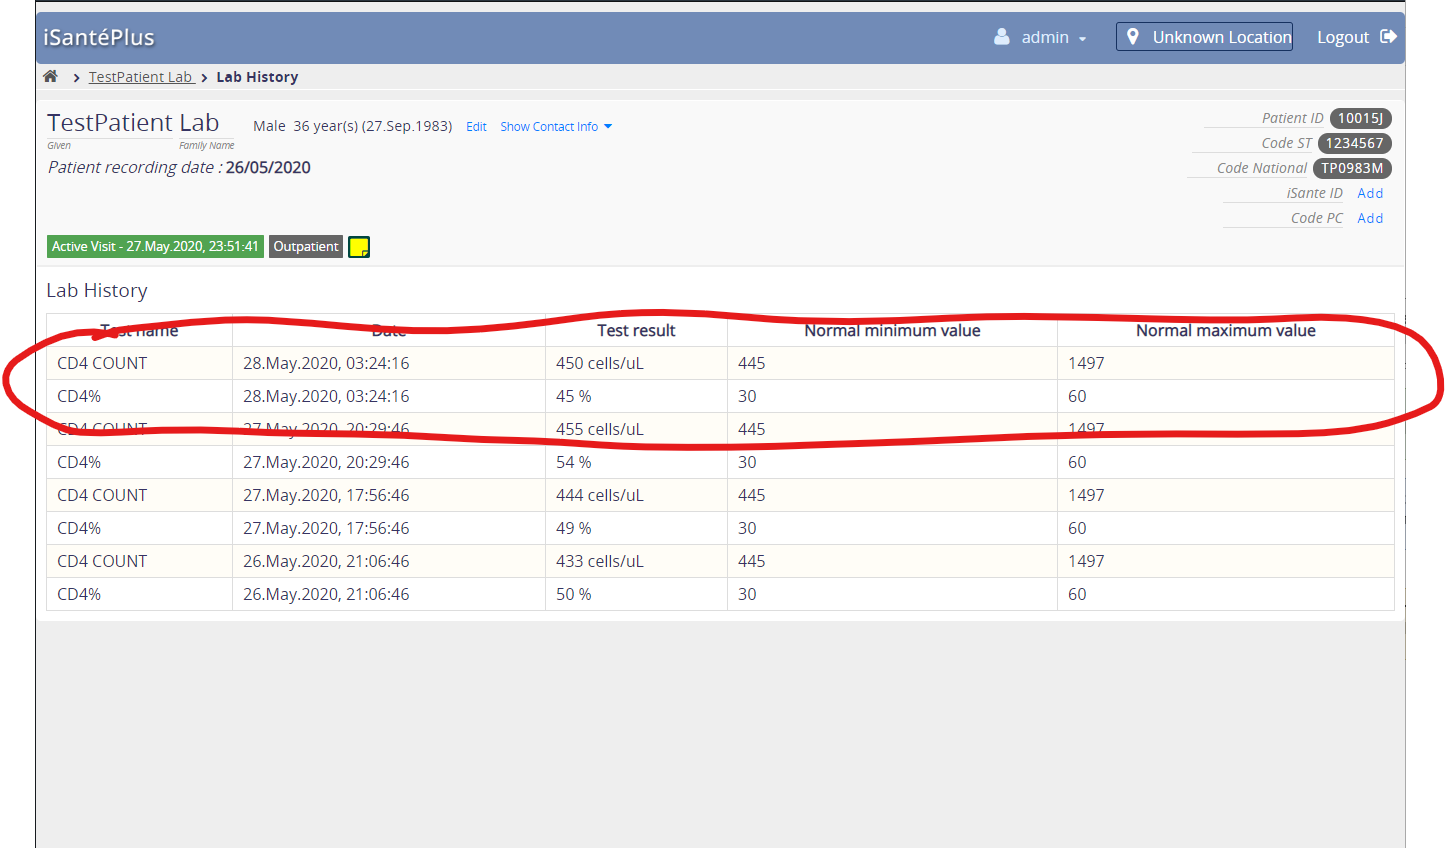
9. View results in the iSantéPlus patient chart
|
|
|---|