Using Team Management Module
1 Navigating to main page
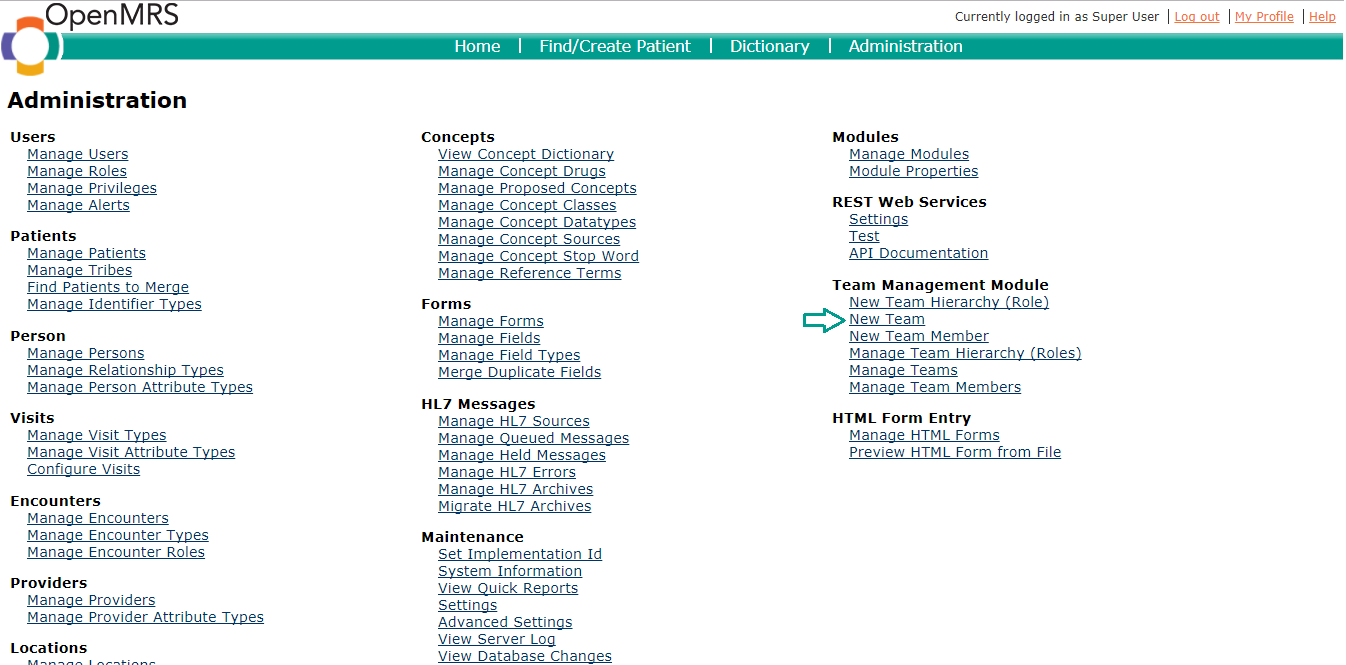
After logging in to OpenMRS, go to Administration, click on “New Team Hierarchy (Role)” to create a new team hierarchy, under the heading “Team Management Module”.
2 Team Hierarchy
The module allow users to maintain a hierarchical structure of a team where each team hierarchy (role) can own its own team as well.
- The reporting chain can have a single reporting line up and down the hierarchy, that is, a hierarchy (role) can report to same hierarchy (role) depending on its implementation settings.
- Similarly, one supervisor can have multiple reporting lines down the hierarchy. Also, the module allow the hierarchies (roles)/levels where sub teams are not applicable.
- The hierarchy modifications are logged in order to keep a track of the changes in reporting lines at any point of time.
2.1 Add Team Hierarchy
After clicking on “New Team Hierarchy (Role)”, you’ll be redirected to the page to add a new team hierarchy (role).
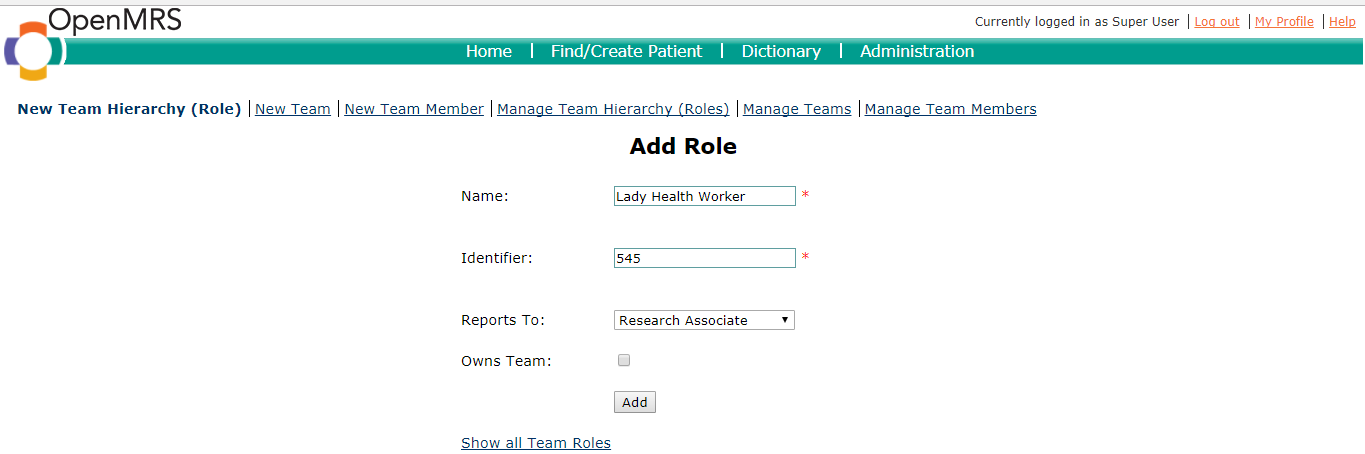
Fill in the data and click on “Add”, you would see the success message in green right below the “Add Role” heading. Also, the page is ready to add another team hierarchy (role) too. You can go to team hierarchy list to see the addition(s) by clicking on “Show all Team Roles”, or either using the “Manage Team Hierarchy (Role)” link in the menu. You would see the added team hierarchy in the list.
2.2 Editing and Voiding Team Hierarchy
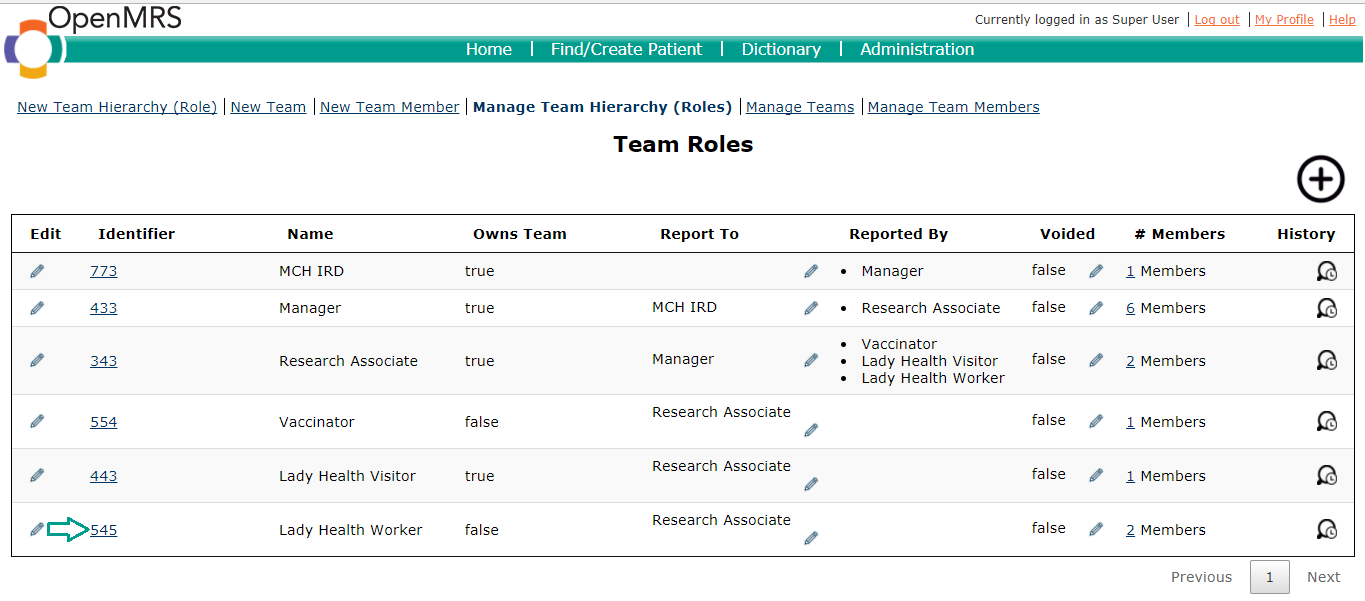
To edit a team hierarchy, click on the pencil button in “Edit” column (to edit a team hierarchy’s name, identifier, owns team), “Report To” column (to transfer a team hierarchy to another team hierarchy) and “Voided” column (to void the team hierarchy) in the team hierarchy list. The placement of button is shown below. You should click on the button corresponding to the team hierarchy you want to edit.
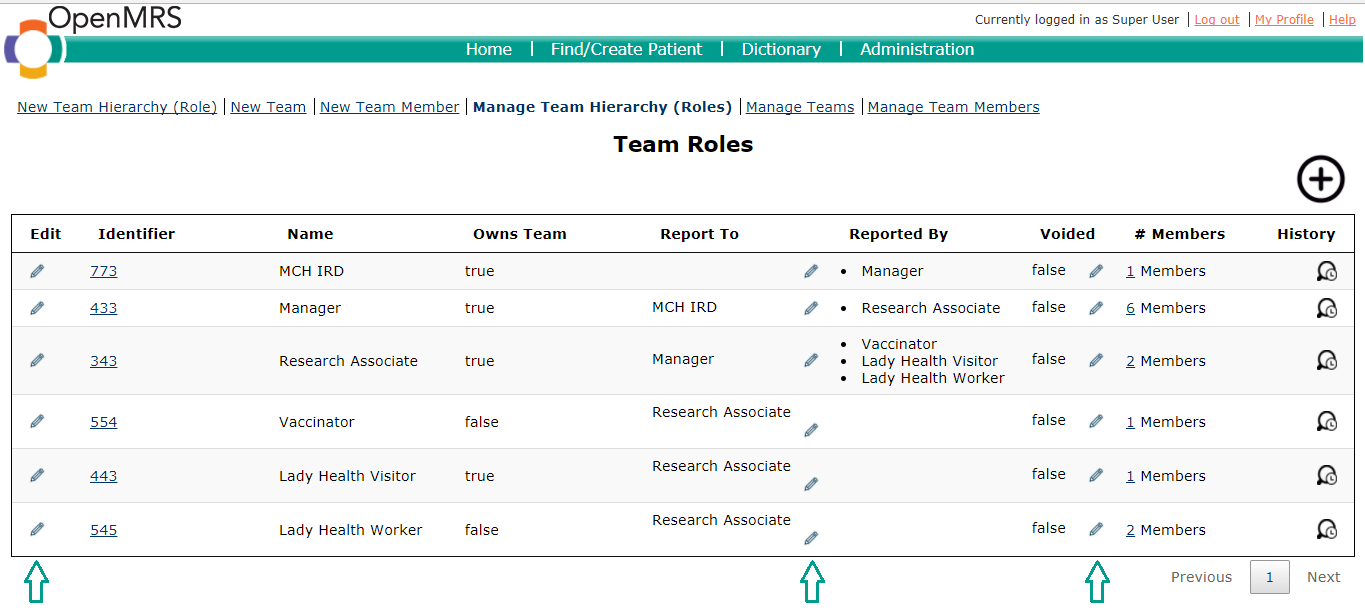
- By clicking on the pencil button in “Edit” column, a form would be displayed, letting the user change name, identifier and owns team of the selected team hierarchy (role).
- By clicking on the pencil button in “Report To” column, a form would be displayed, letting the user change the supervisor team hierarchy (role) selected hierarchy (role) can report to.
- By clicking on the pencil button in “Voided” column, a form would be displayed, letting the user void (delete) the selected team hierarchy (role).
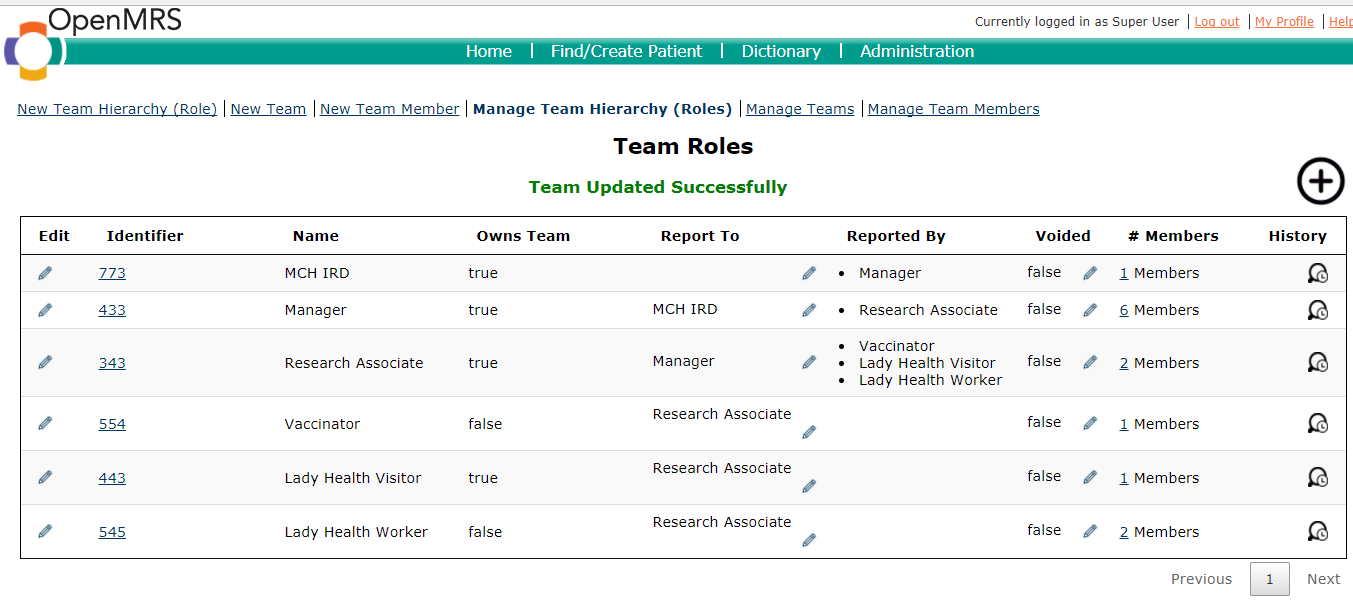
After editing the team hierarchy (role), you would see the success message in green right below the “Team Roles” heading.
2.3 View Team Hierarchy History
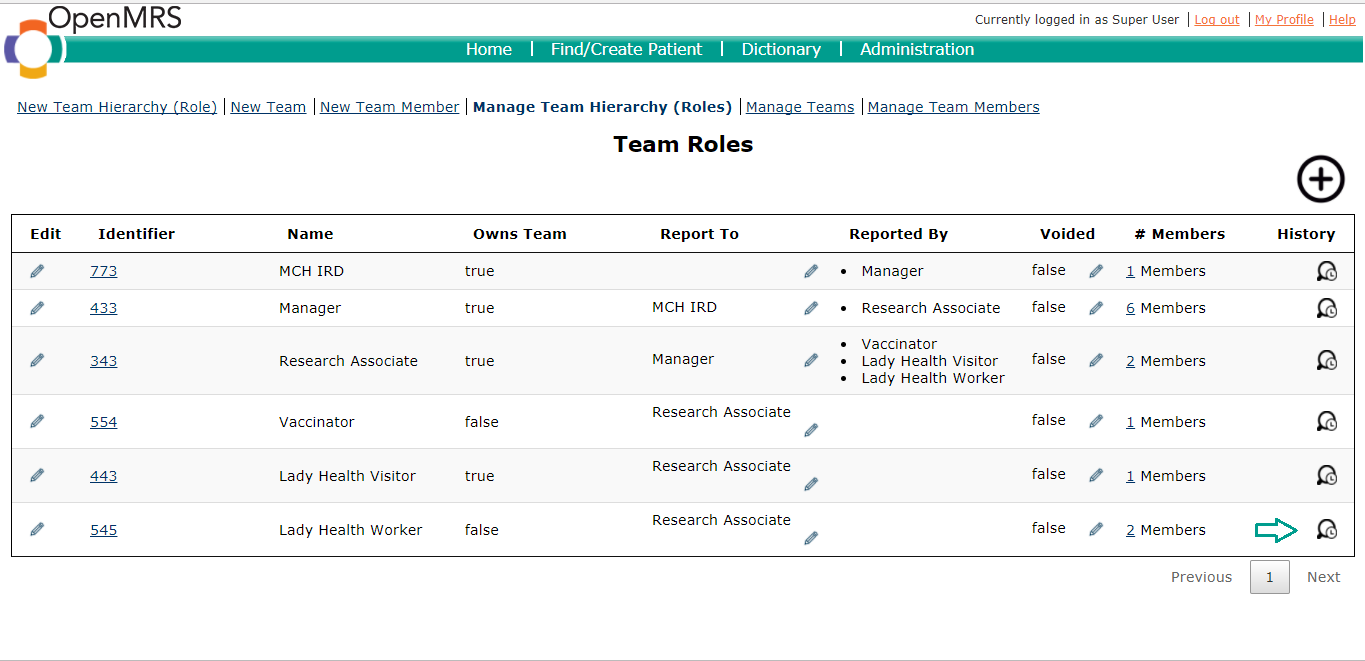
To view a team hierarchy history (logs), click on the button in “History” column in the team hierarchy list. The placement of button is shown below. You should click on the button corresponding to the team hierarchy’s history you want to view.
3 Team
The module allow users the management of a team based on its supervisor, location, or any other dimension. Following are features a team includes.
- Each team must have a location.
- Each team can have a supervisor.
- The team modifications are logged in order to keep a track of the changes in the teams at any point of time.
3.1 Add Team
Navigate back to main page and click on “New Team” or either by using the “New Team” link in the menu. After clicking on “New Team”, you’ll be redirected to the page to add a new team.
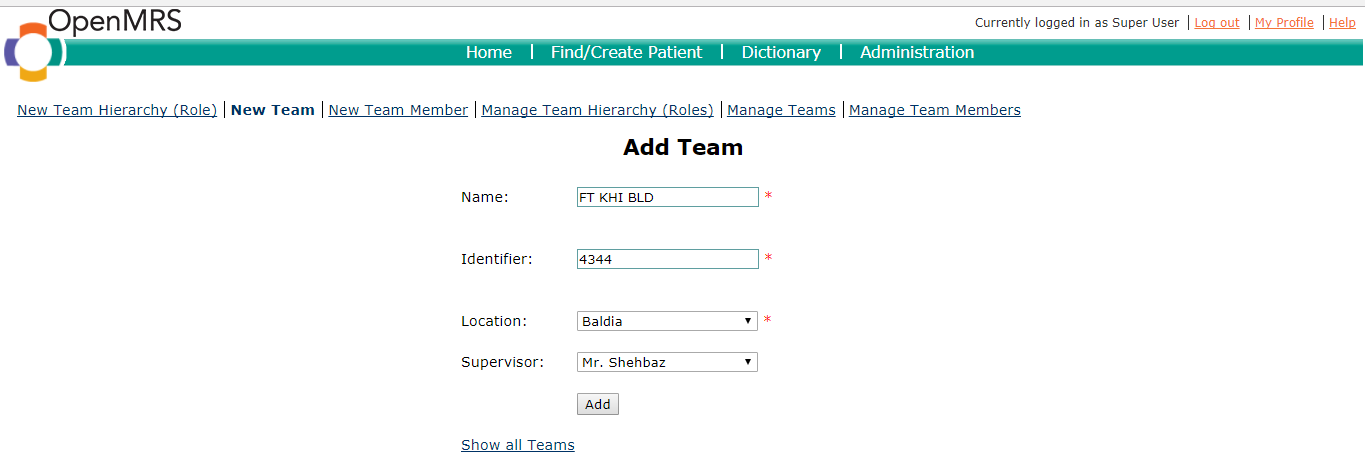
Fill in the data and click on “Add”, you would see the success message in green right below the “Add Team” heading. Also, the page is ready to add another team too. You can go to team list to see the addition(s) by clicking “Show all Teams”, or either using the “Manage Team” link in the menu. You would see the added team in the list.
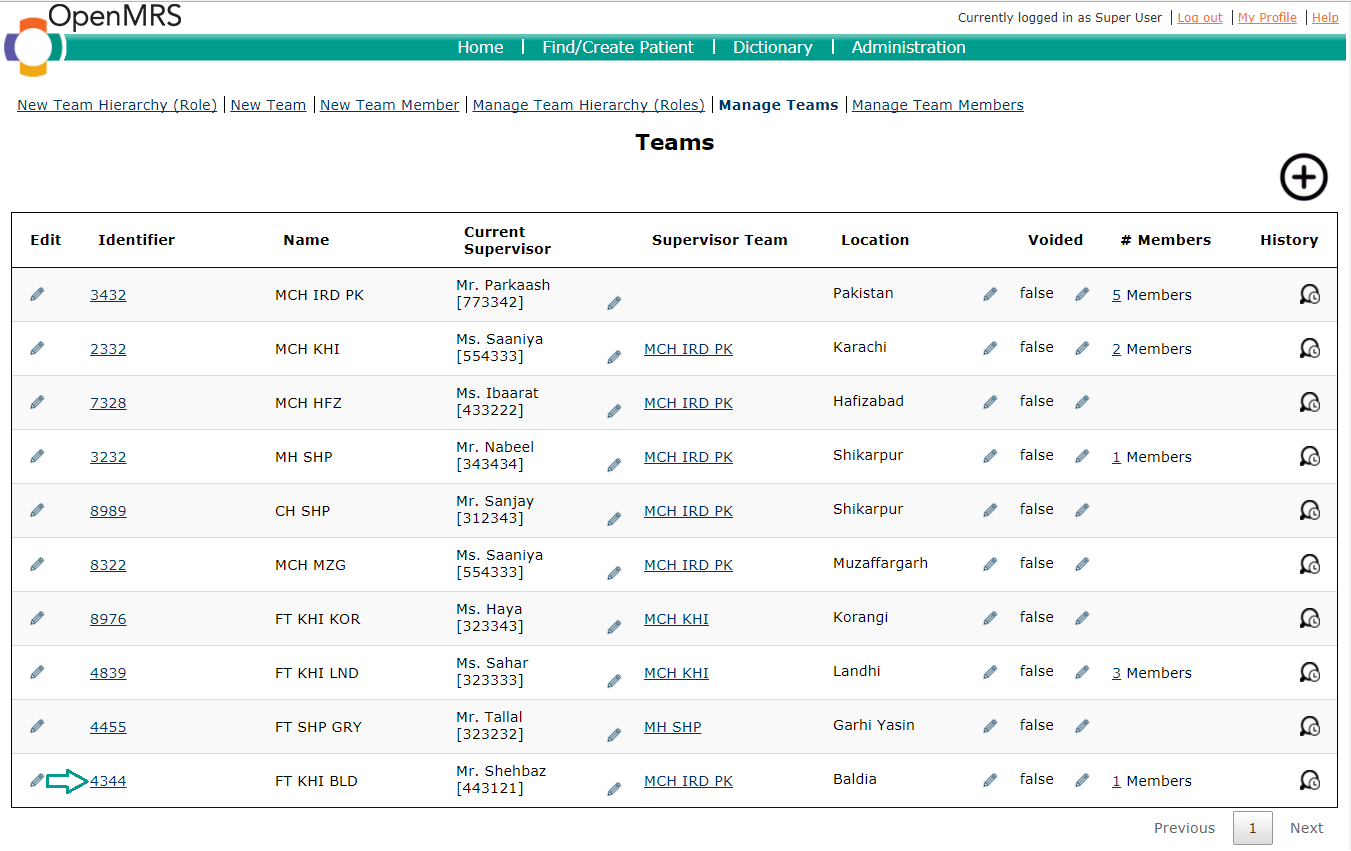
3.2 Editing and Voiding Team
To edit a team, click on the pencil button in “Edit” column (to edit a team’s name, identifier), “Current Supervisor” column (to transfer a team to another team supervisor), “Location” column (to change team’s location) and “Voided” column (to void the team) in the team list. The placement of button is shown below. You should click on the button corresponding to the team you want to edit.
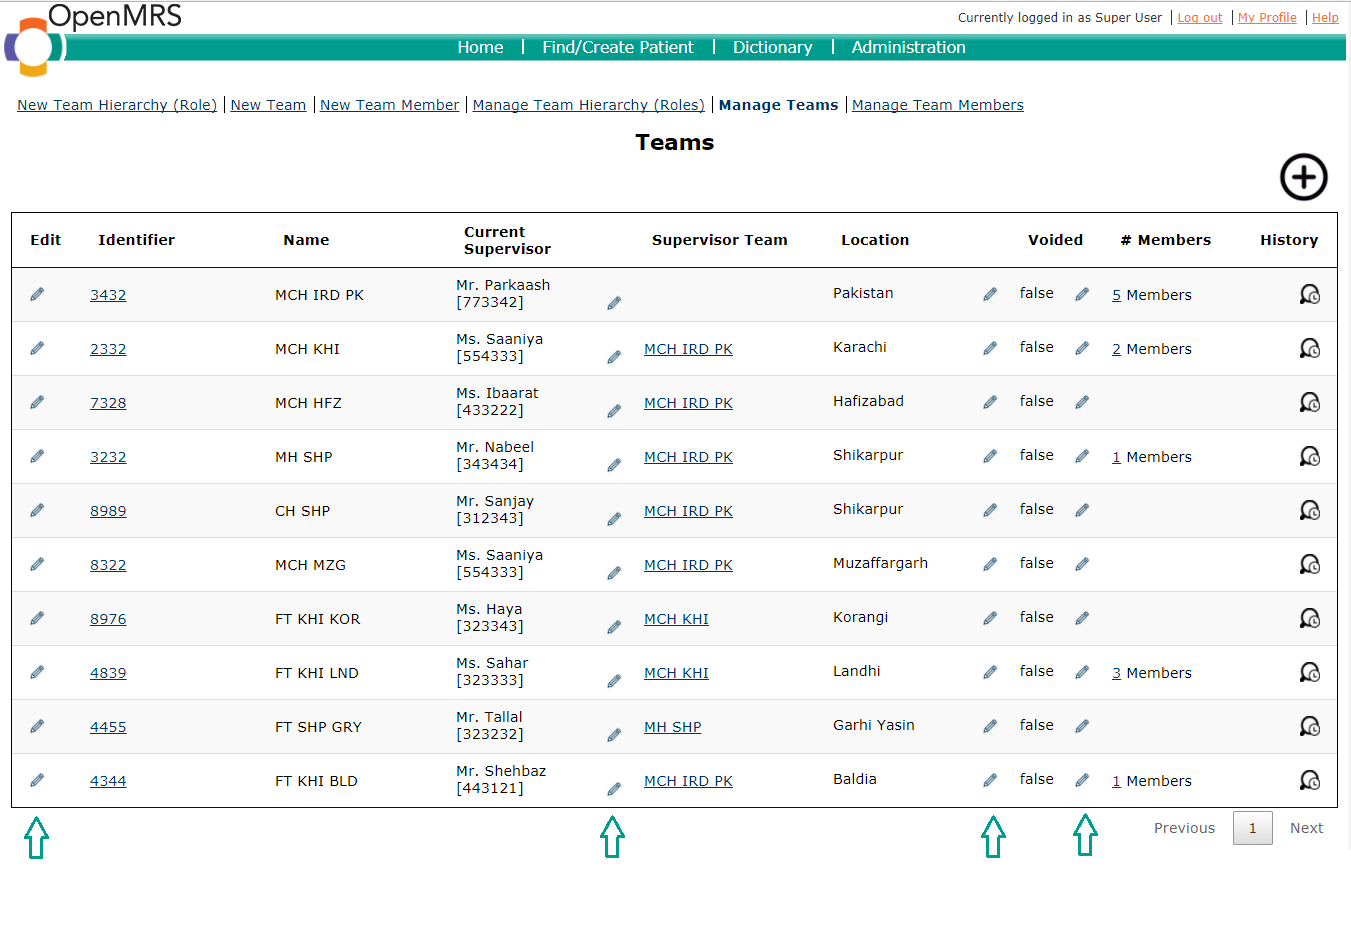
- By clicking on the pencil button in “Edit” column, a form would be displayed, letting the user change name and identifier of selected team.
- By clicking on the pencil button in “Current Supervisor” column, a form would be displayed, letting the user change the supervisor of selected team.
- By clicking on the pencil button in “Location” column, a form would be displayed, letting the user change the location of selected team.
- By clicking on the pencil button in “Voided” column, a form would be displayed, letting the user void (delete) the selected team.
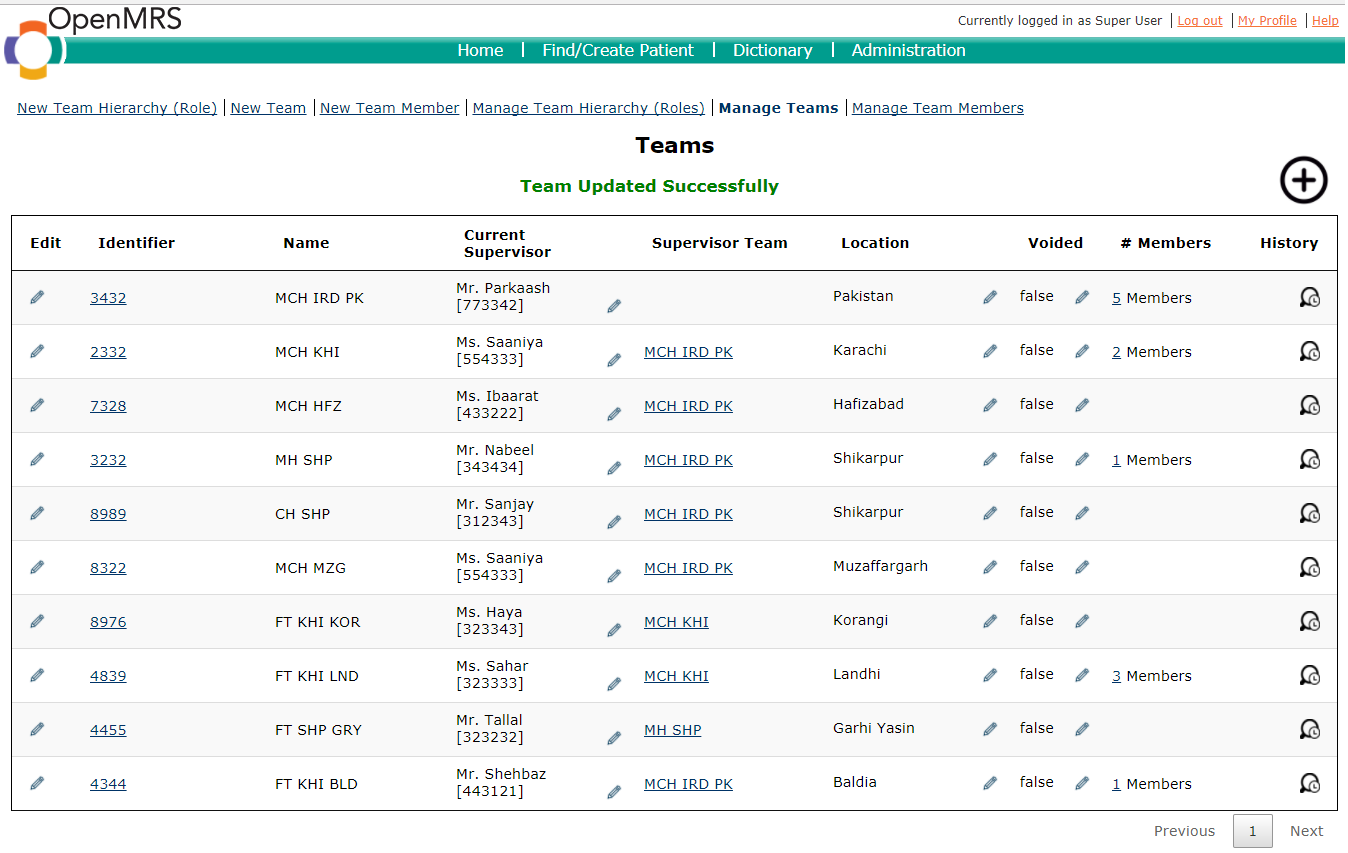
After editing the team, you would see the success message in green right below the “Teams” heading.
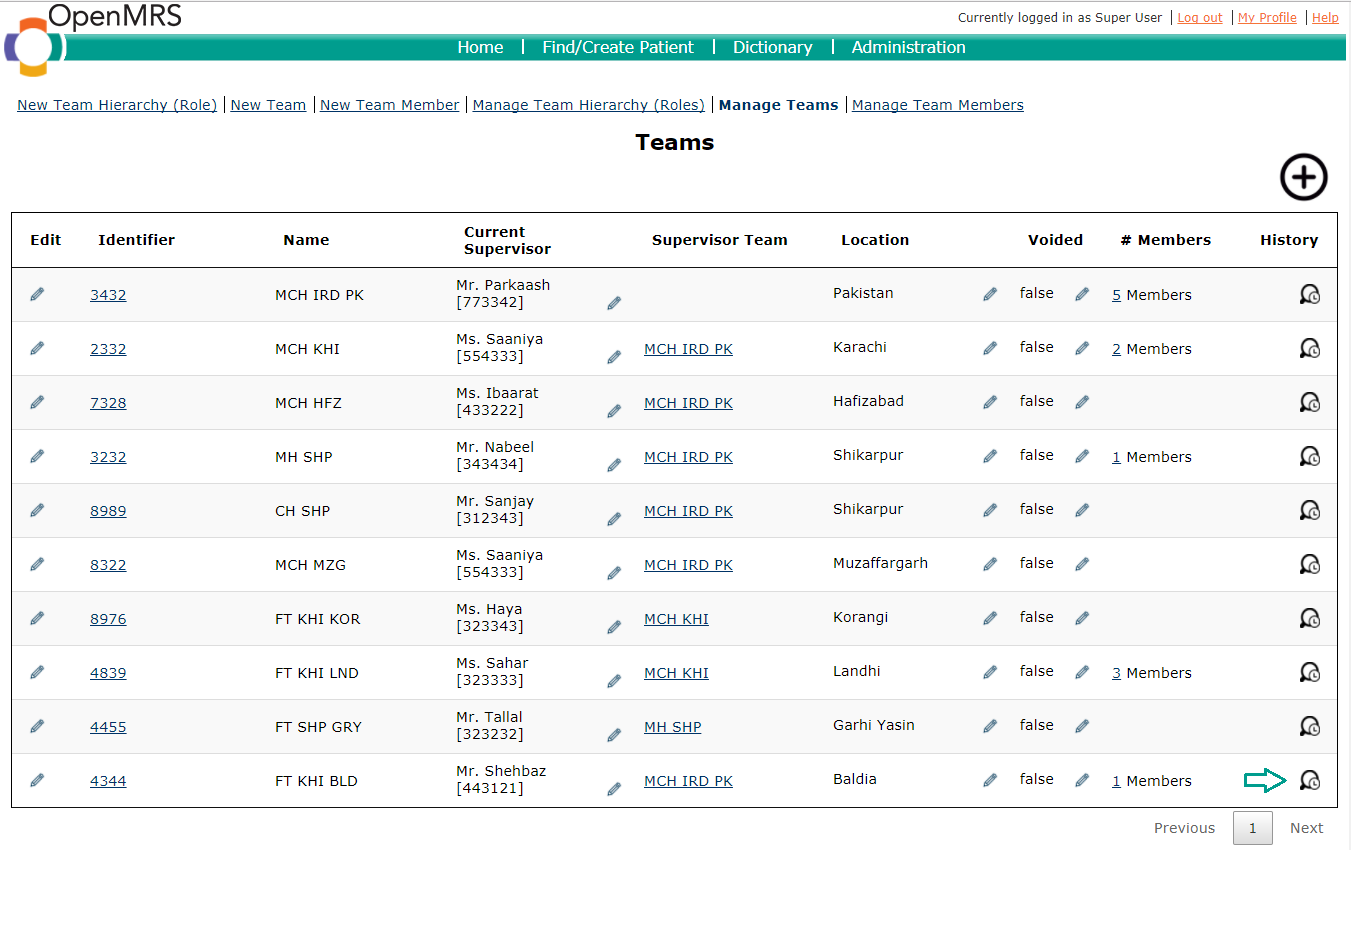
3.3 View Team History
To view a team history (logs), click on the button in “History” column in the team list. The placement of button is shown below. You should click on the button corresponding to the team's history you want to view.
4 Team Member
The module allow the team members to join any team in different capacity and also allow them to supervise a team provided that their hierarchy (role) allows owning a team. Following are features a team member includes.
- Each team member must have a team hierarchy (role) which might be reporting to another parent hierarchy (role).
- Each team member must be allowed to own or build up a team if their hierarchy (role) allows it. This means that different other team members would be joining his team and leaving as well
- Each team member must be allowed to join a team which means that he would be reporting to person owning the team
- A team member can handover his team to other team's team members which means that team members of his team would be reporting to new supervisor
- A team member can be mapped on different locations (under location of his supervisor`s)
- A team member must be allowed to own patients to provide provider-patient ownership, data entry and reporting
- The team member modifications are logged in order to keep a track of the changes in the team members at any point of time.
4.1 Add Team Member
Navigate back to main page and click on “New Team Member” or either by using the “New Team Member” link in the menu. After clicking on “New Team Member”, you’ll be redirected to the page to add a new team member.
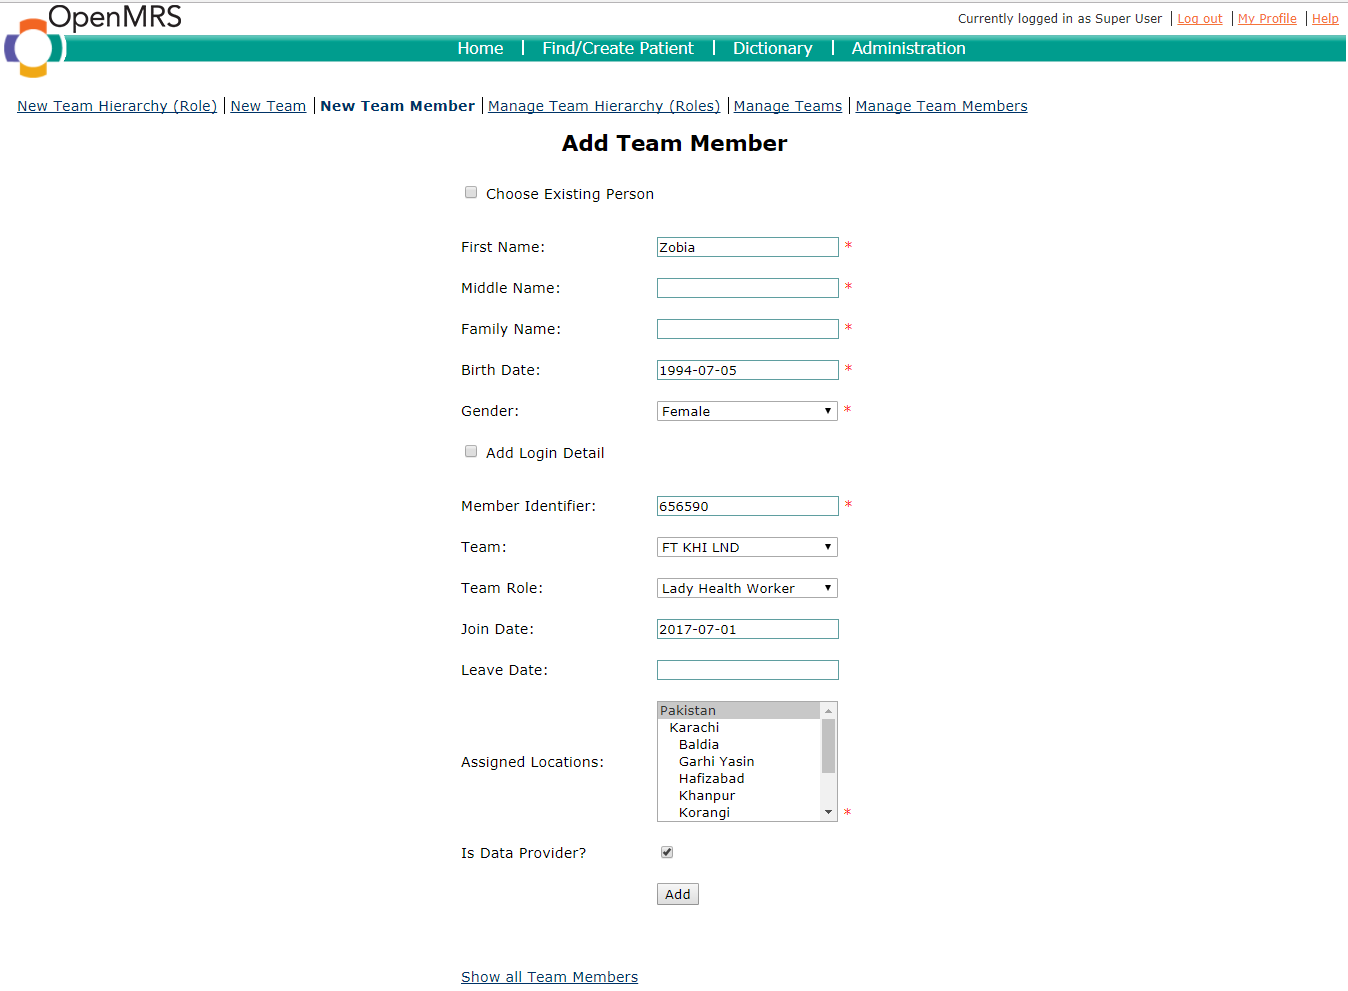
Fill in the data and click on “Add”, you would see the success message in green right below the “Add Team Member” heading. Also, the page is ready to add another team member too. You can go to team member list to see the addition(s) by clicking “Show all Team Members”, or either using the “Manage Team Member” link in the menu. You would see the added team member in the list.
4.2 Editing and Voiding Team Member
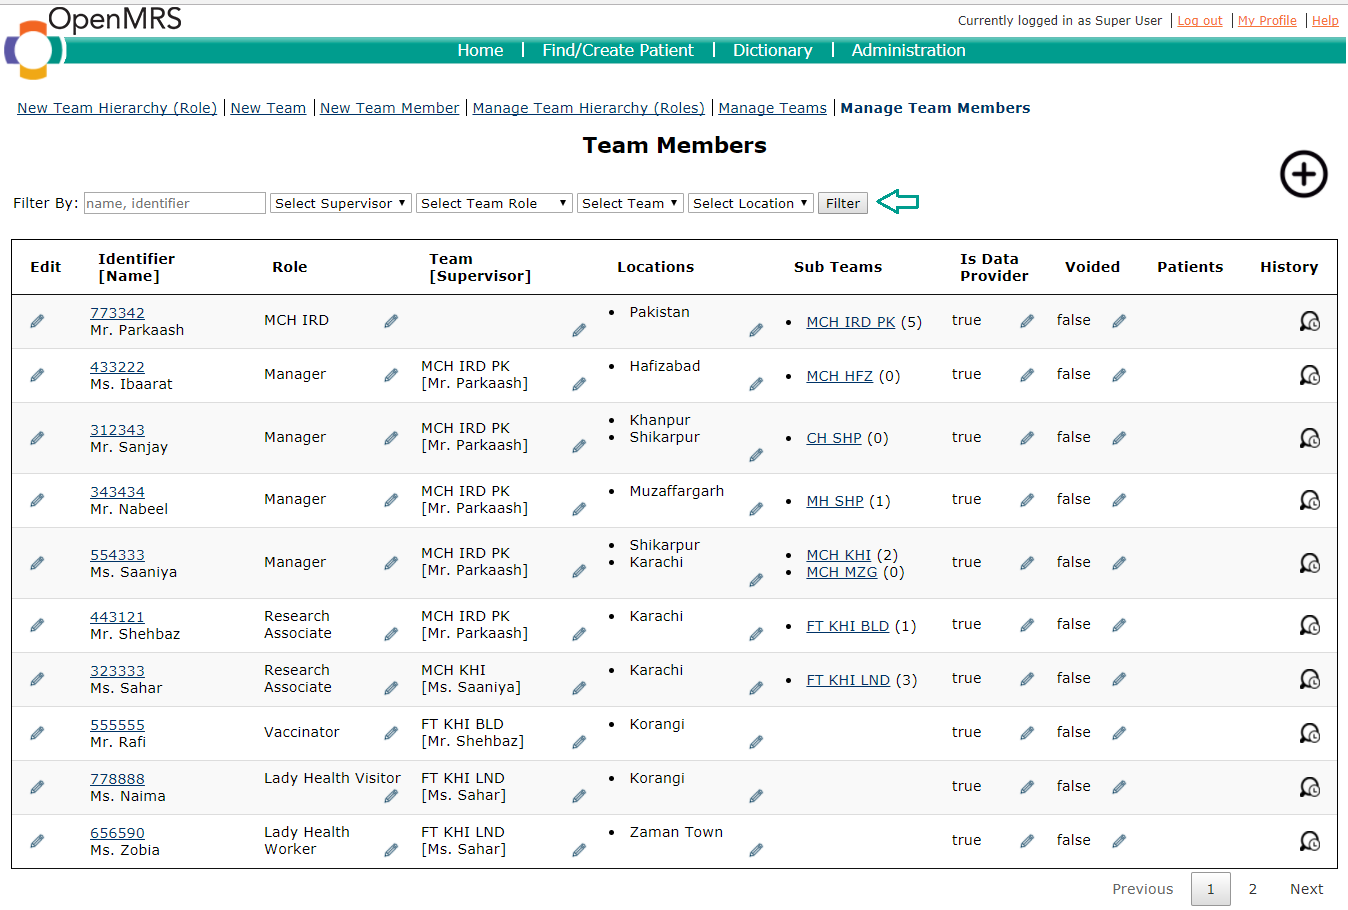
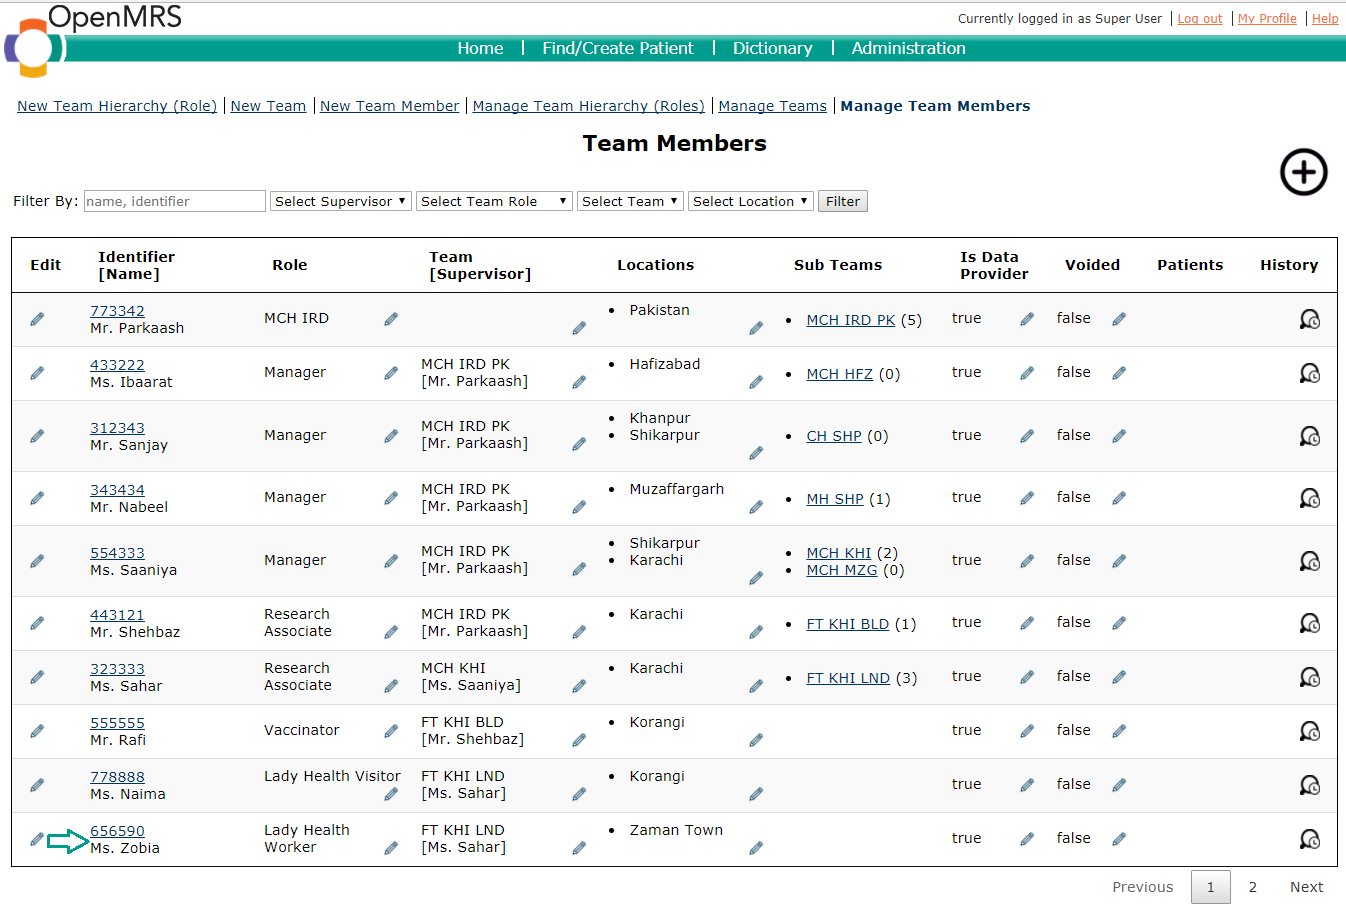
To edit a team member, click on the pencil button in “Edit” column (to edit a team member’s name, middle name, family name and identifier), “Role” column (to change a team member’s role assigned to it), “Team” column (to change a team member’s team assigned to it), “Location” column (to change team member’s locations), “Is Data Provider” column (to change whether team member is a data provider or not) and “Voided” column (to void the team member) in the team member list. The placement of button is shown below. You should click on the button corresponding to the team member you want to edit.

- By clicking on the pencil button in “Edit” column, a form would be displayed, letting the user change name, middle name, family name and identifier of selected team member.
- By clicking on the pencil button in “Role” column, a form would be displayed, letting the user change the team hierarchy (role) of selected team member.
- By clicking on the pencil button in “Team” column, a form would be displayed, letting the user change the team of selected team member.
- By clicking on the pencil button in “Location” column, a form would be displayed, letting the user change the locations of selected team member.
- By clicking on the pencil button in “Is Data Provider” column, a form would be displayed, letting the user change whether the selected team member is a data provider or not.
- By clicking on the pencil button in “Voided” column, a form would be displayed, letting the user void (delete) the selected team member.
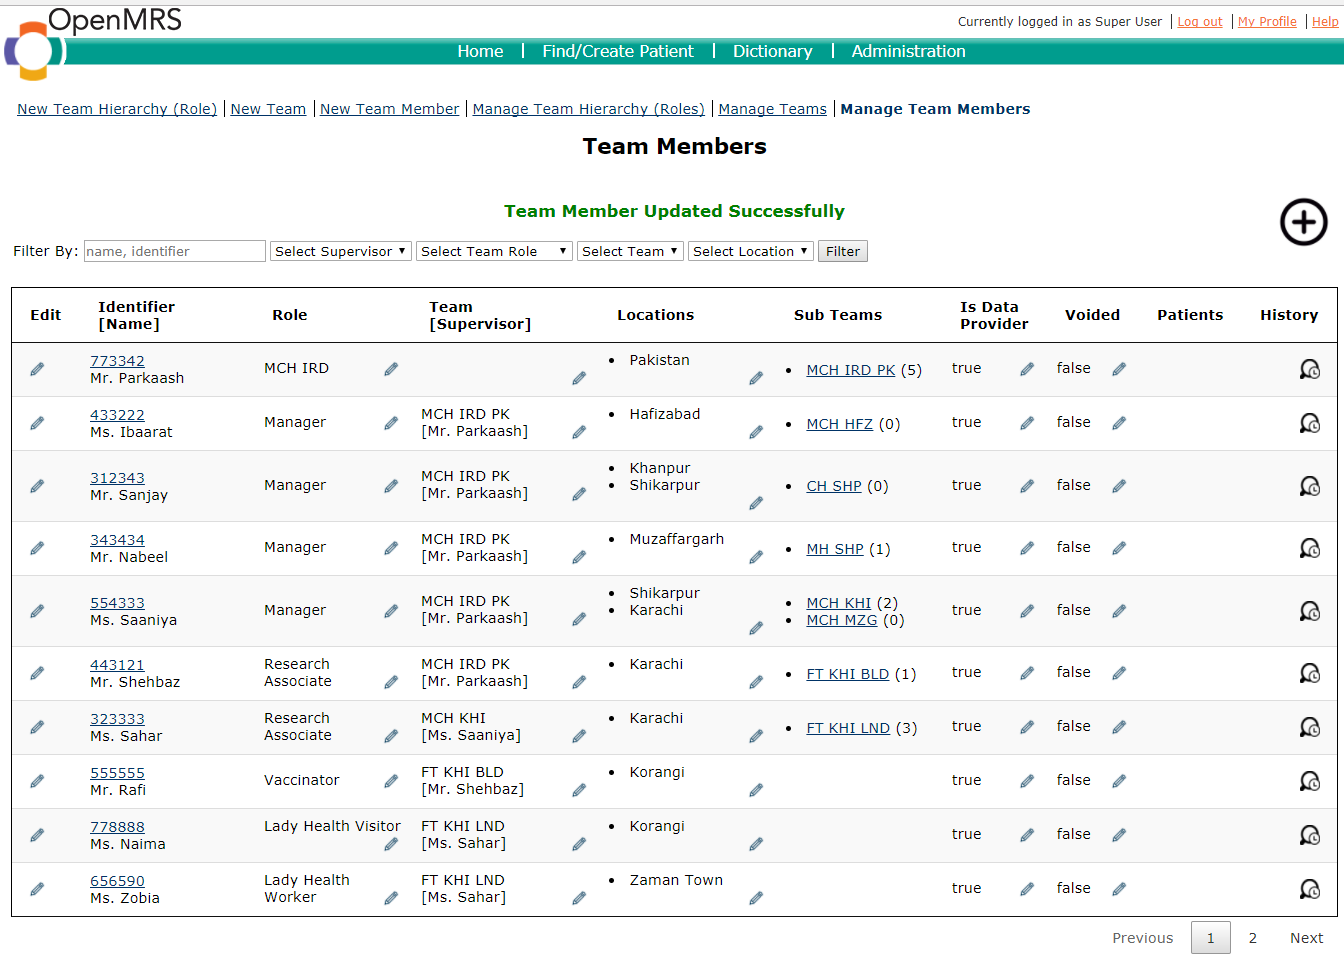
After editing the team member, you would see the success message in green right below the “Team Members” heading.
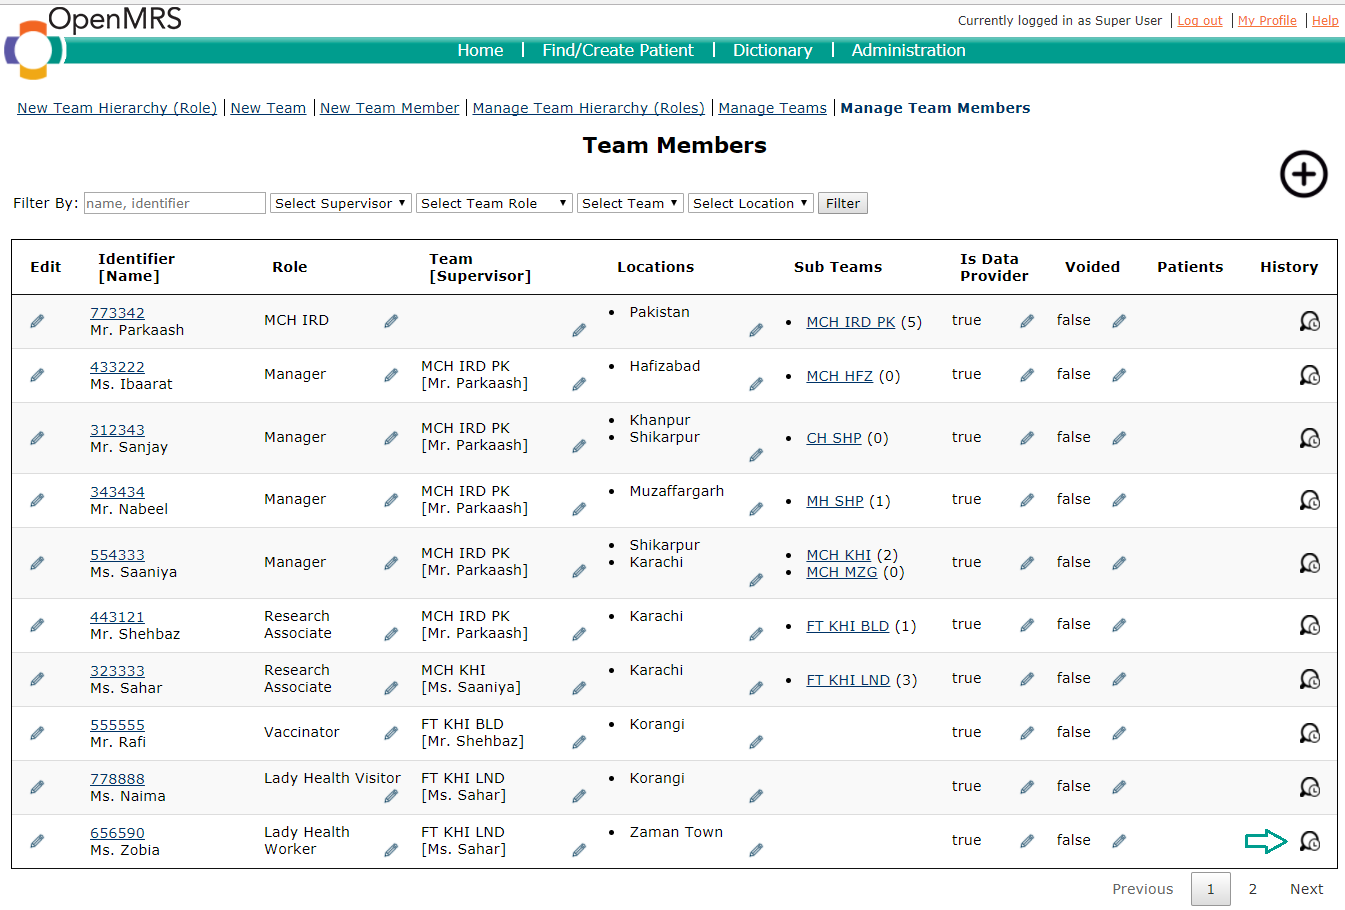
4.3 View Team Member History
To view a team member history (logs), click on the button in “History” column in the team member list. The placement of button is shown below. You should click on the button corresponding to the team member 's history you want to view.
5 Filter Option
The Team Management Module provides a search of team member by its name, identifier, team role, and team name, supervisor it is reporting to and by its location, for the easiness of the user to find the record in a huge list. When redirected to the team member list page, you would find a huge list of team members and it would be difficult to find a specific team member. So, for user’s feasibility, the users can use the filter option to search a member by name and id (identifier). Also, a team member can be searched by the team it is working in, what team role is assigned to it and whom it is reporting. See the image below for the placement of the filter option.