SMS Module Documentation
Alert
Does not work on Android 4.4 KitKat. Works on Gingerbread, Ice Cream Sandwich and Jelly Bean.
Overview
The sms module allows users to send sms messages/reminders to registered patients in openmrs. The messages are typically sent through the android phone where an apk needs to be installed.
Build Requirements
- JDK
- Maven
- GIT
Other Requirements
- Android Phone
- APK installation (This is provided with the module)
- Add ‘Mobile Number’ Person Attribute type. This is important otherwise exceptions will occur. This can be added in openmrs administration page and then going into ‘Manage Person Attribute Types’ under Person.
Quickstart
1) Download the latest OpenMRS stable version (Preferablly 1.9.3) and login with the credentials
2) Clone the sms module source code through git plugin in eclipse:
3) Build the module
4) Locate the module omod (in target folder) file to upload
5) Install the module omod file into OpenMRS by uploading it in the administration section
How does it work
APK Installation
The apk will have to be installed on the android device. Once installed, the user will see an icon on the main menu by the name of ‘smstarseel’. Running it would show the login form. The screenshot of this login form is shown below in the ‘Screenshots’ section.
The server url field requires the following path. The ‘ip:port’ part should be the one where openmrs is installed (machine’s ip and port mapped). Rest of it will remain the same.
http://10.0.2.2:8080/openmrs/moduleServlet/smsmodule/smsTarseel
This is pointing to the servlet in the module. The module resides in openmrs which will have to be installed on a machine. The user will have to supply the ip address of that machine, the port could be different and the rest will remain the same.
The user can use the same username and password that they use to log in openmrs local setup.
The next screen would ask the user to register the device. This step would have to be done once.
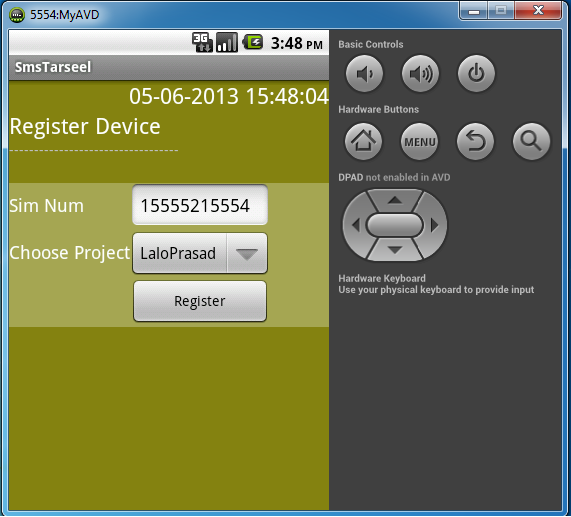
Figure 1: Register Device
Once logged in, the user will see the main menu. You can view the console to see the status. ‘Start SMSDispeser’ and ‘Start SMSCollector’ need to be started for sending and receiving to work. View the console again to see whether the services have started or not.
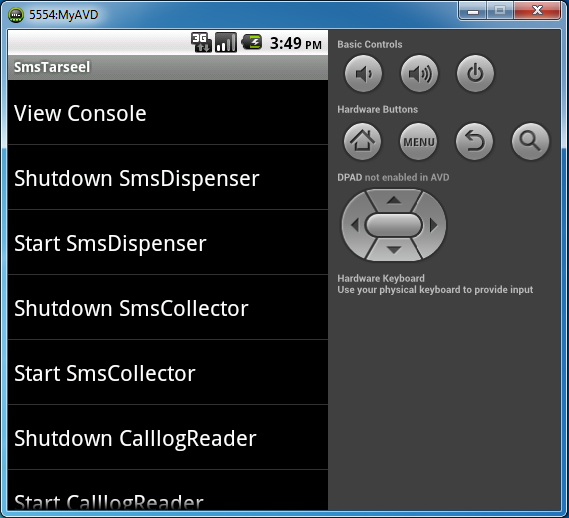
Figure 2: Main Menu
Liquibase Support
When the module builds, the liquibase file will run and generate 5 tables in the local openmrs database. The names of the tables are as follows:
- project
- inboundmessage
- outboundmessage
- device
- reminder
Liquibase will populate default values in the project and reminder tables. This has to be done for initialization otherwise the application will throw exceptions. In case the default values are not present, the user should explicitly populate the tables with the values given below.
Project table: Columns (projectId, description, name)
projectId | description | name |
1 |
| [Name of the Project] |
Reminder table: Columns (reminder_id, name, description, category, text)
In this table, a user can add any number of text messages based on their choice.
Reminder_id | name | description | category | text |
1 | SMS_TB | This sms is sent to TB Patients only |
| TB Patients SMS text |
2 | SMS_HIV
| This SMS is sent to HIV Patients Only
|
| HIV Patients SMS Text
|
3 | SMS_POLIO | This SMS is sent to Polio Patients Only |
| Polio Patients SMS Text |
Device table: Columns (Too many columns)
This table is for the Android mobile to read the imei and set the status of the mobile device to ‘ACTIVE’
Inbound table
This table is used by the Android application which reads the incoming sms messages from patients and populates it in this table for reporting purposes.
Outbound table
This table is used by the Android application to send sms messages to patients. The messages are populated through the interface provided by this module.
Downloads
https://addons.openmrs.org/#/show/org.openmrs.module.smsmodule
The apk is attached herein.
Screenshots
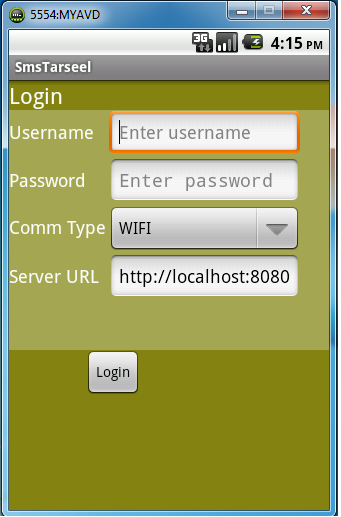
Figure A: Android App Login Form
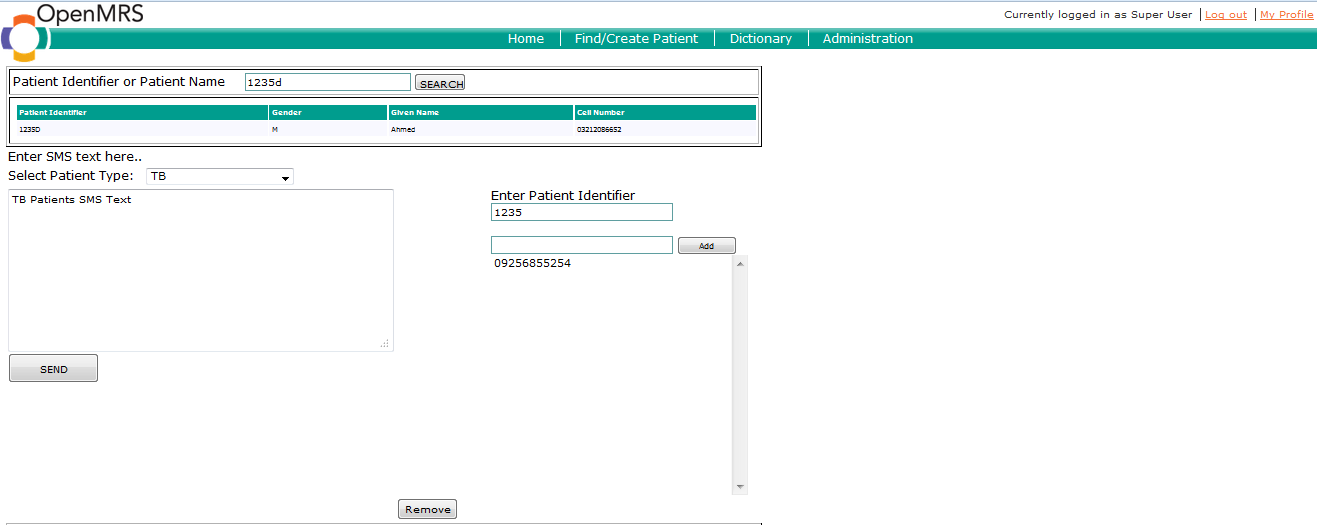
Figure B: Module Form
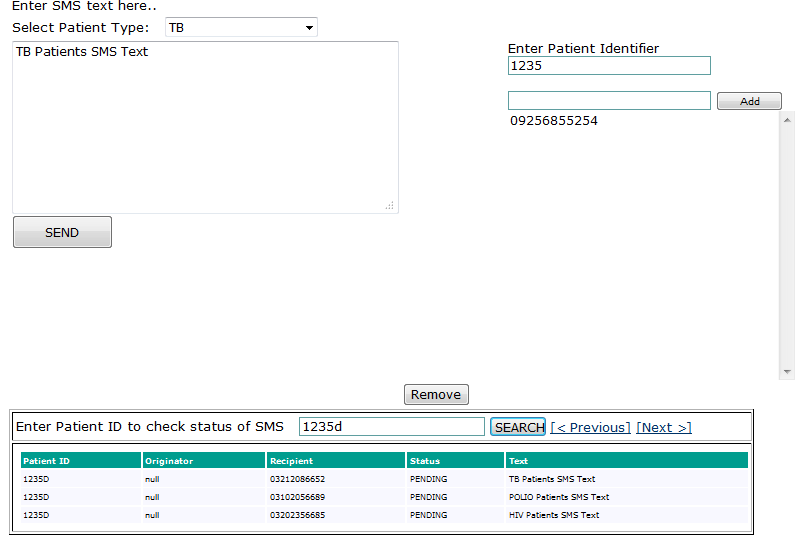
Figure C: Message Status Report