Quick Guide to Creating a Test Case on CucumberStudio
Quick Access
External Resources: https://support.smartbear.com/cucumberstudio/docs/general-info/about.html
Prerequisites:
- Link to the application: https://studio.cucumber.io/users/sign_in
- Login Credentials: Email and Password.
- If you would like access to CucumberStudio, share your email address via christine@openmrs.org and the login link will be sent to your email address.
- Key terms to note:
- Project: Collection of test scripts related to an application/system.
- Feature: Functionality in a project / application/system.
- Scenario: A Sequence of steps that represents the behavior of the application as expected by the user.
- Action word: a sequence of steps that can be reused across multiple scenarios. E.g Select book
- Test run: Collection of test cases you would like to run.
- Feature file: This is a file where you will describe your tests in Descriptive language (Like English).
- Gherkin syntax keywords:
- Given: Describes the pre-requisite for the test to be executed.
- When: Defines the trigger point for any test scenario execution.
- Then: Holds the expected result for the test to be executed.
- And: Defines additional conditions of the test.
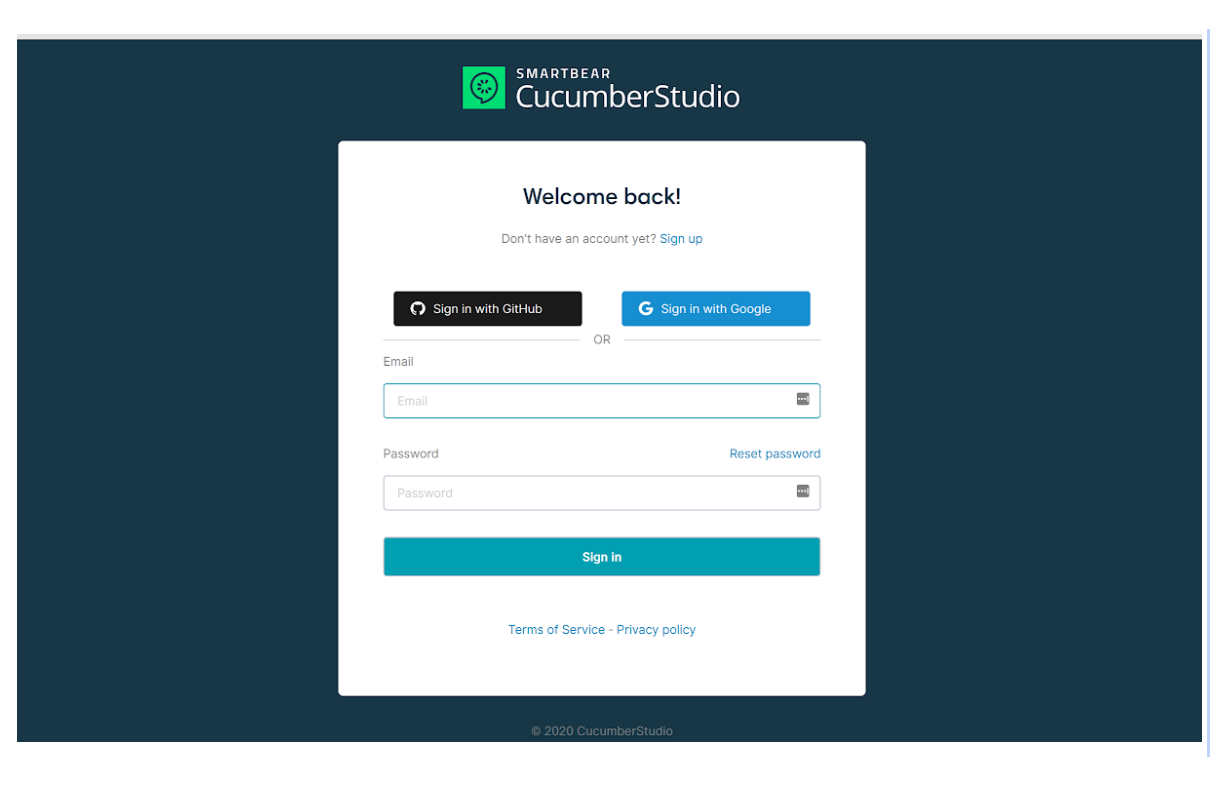
CucumberStudio Login page
- The CucumberStudio Login page is as shown below:
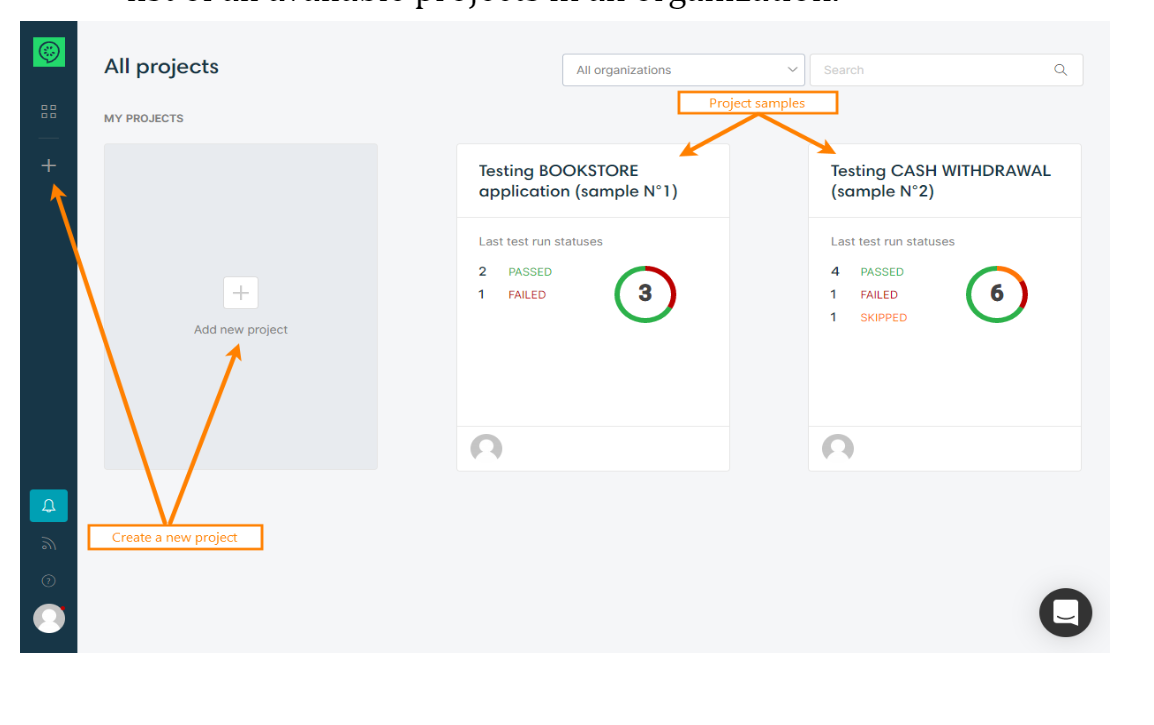
Cucumberstudio homepage
- Upon successful login, the CumberStudio homepage is displayed as shown below. It shows a list of all available projects in an organization.
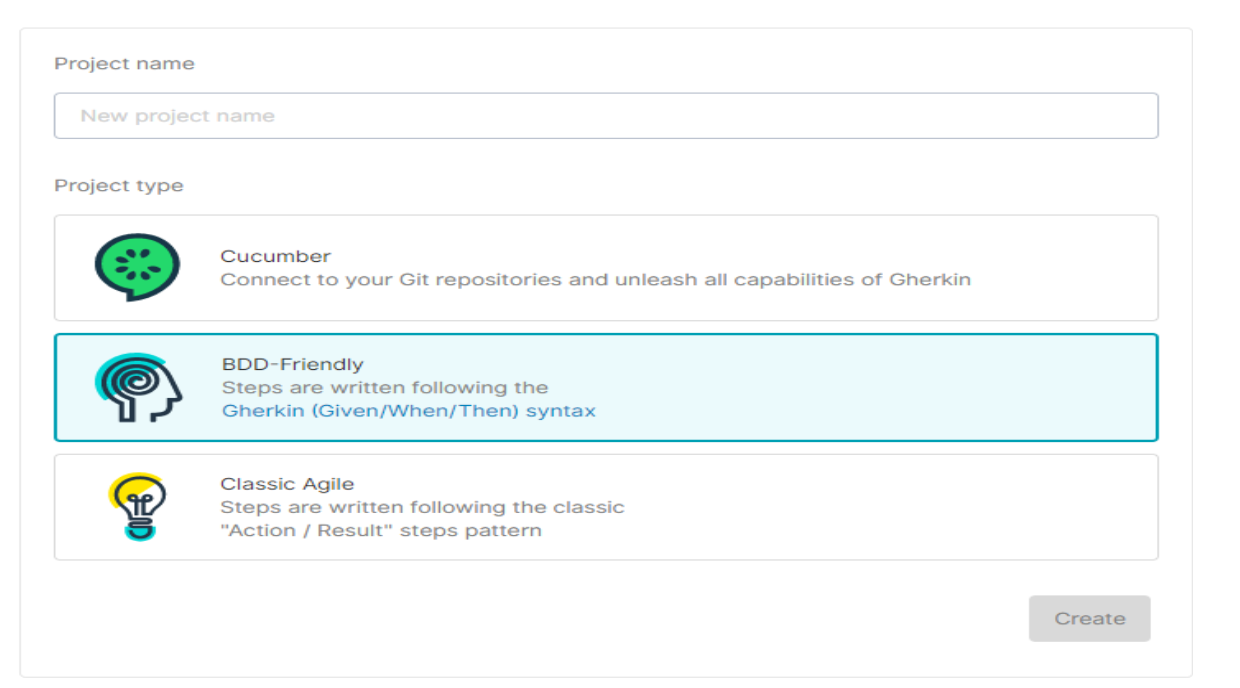
Creating a project
- Click on Create project link as shown above.
- On the dialog box displayed, type in the preferred project name and select for it to be BDD friendly to add in the Gherkin syntax: Given, When , then syntax.
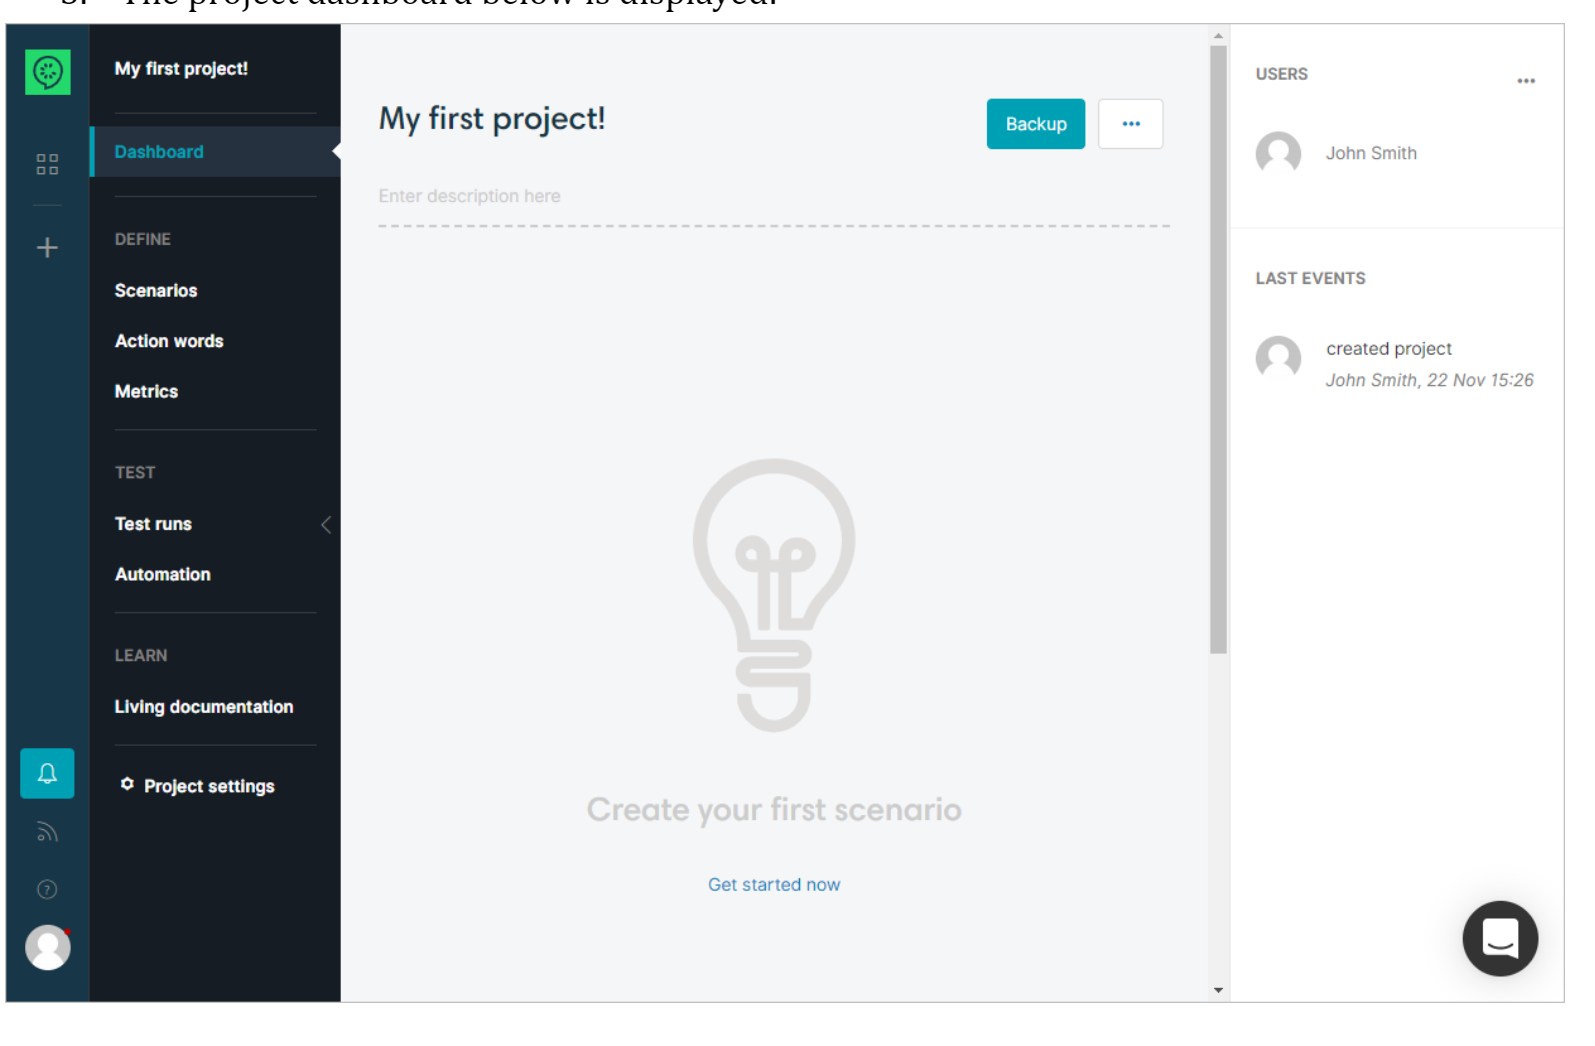
- The project dashboard below is displayed:
Creating test cases
- Click on the Scenarios link and the page below is displayed:
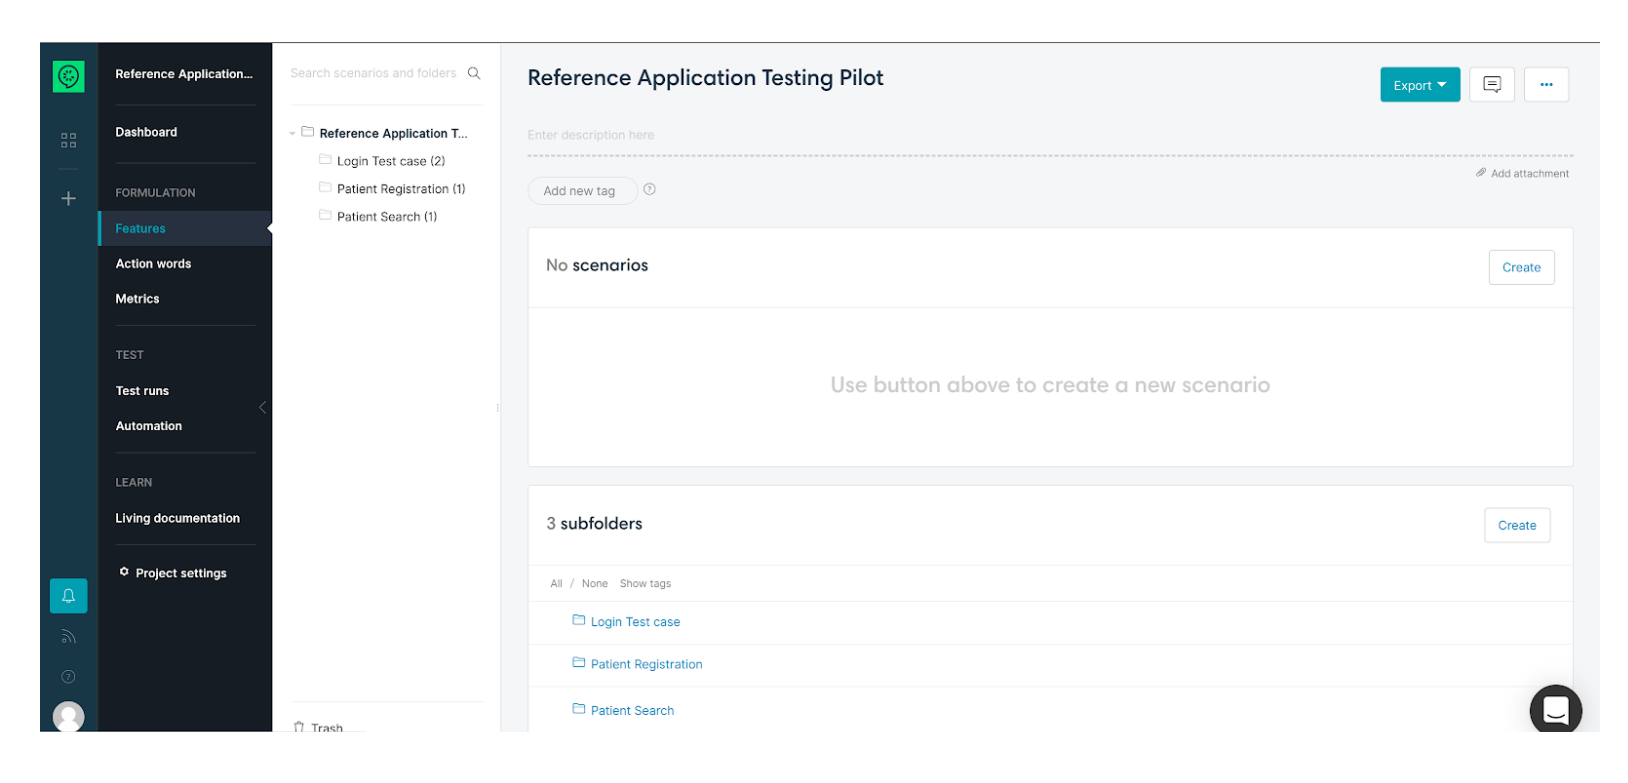
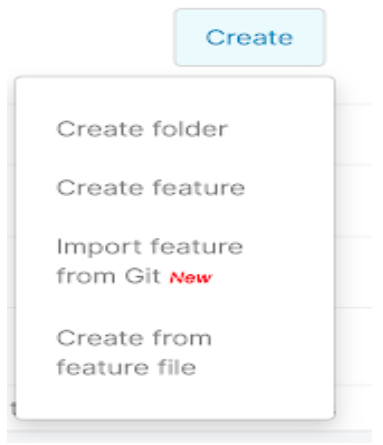
- Under the subfolders section, click on the create button.
- From the list of options displayed as shown below, select create feature:
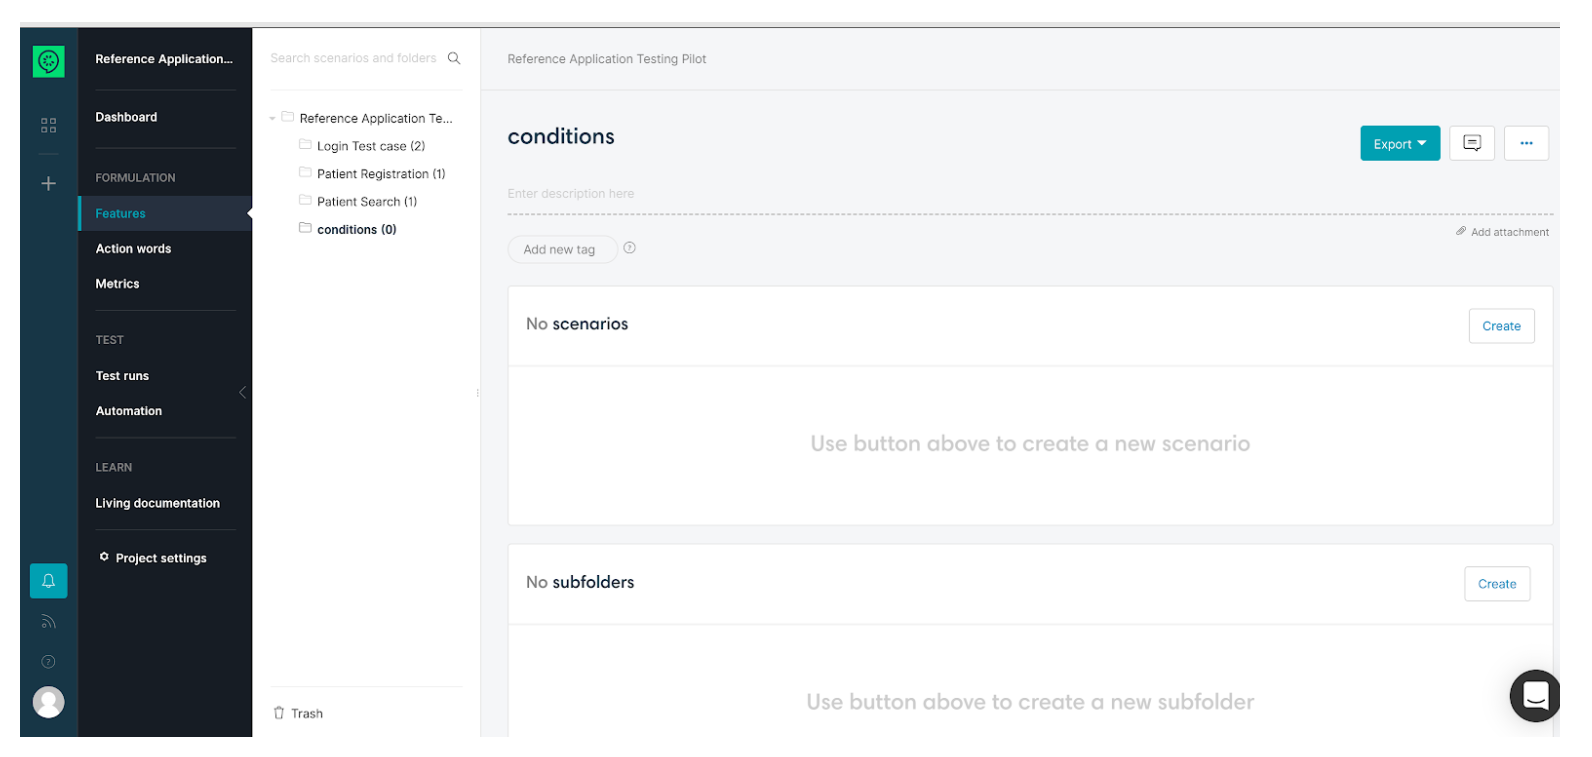
- A dialog box is displayed. Input the feature name e.g Login and click on create.
- The Feature name is displayed under the subfolder section as shown below:

- Click on the feature name to access the feature dashboard as shown below:
- Under the Scenarios section click on create.
- A dialog box is displayed. Input the Scenario name e.g Successful Login and click on create.
- The scenario name is displayed under the scenarios section as shown below:
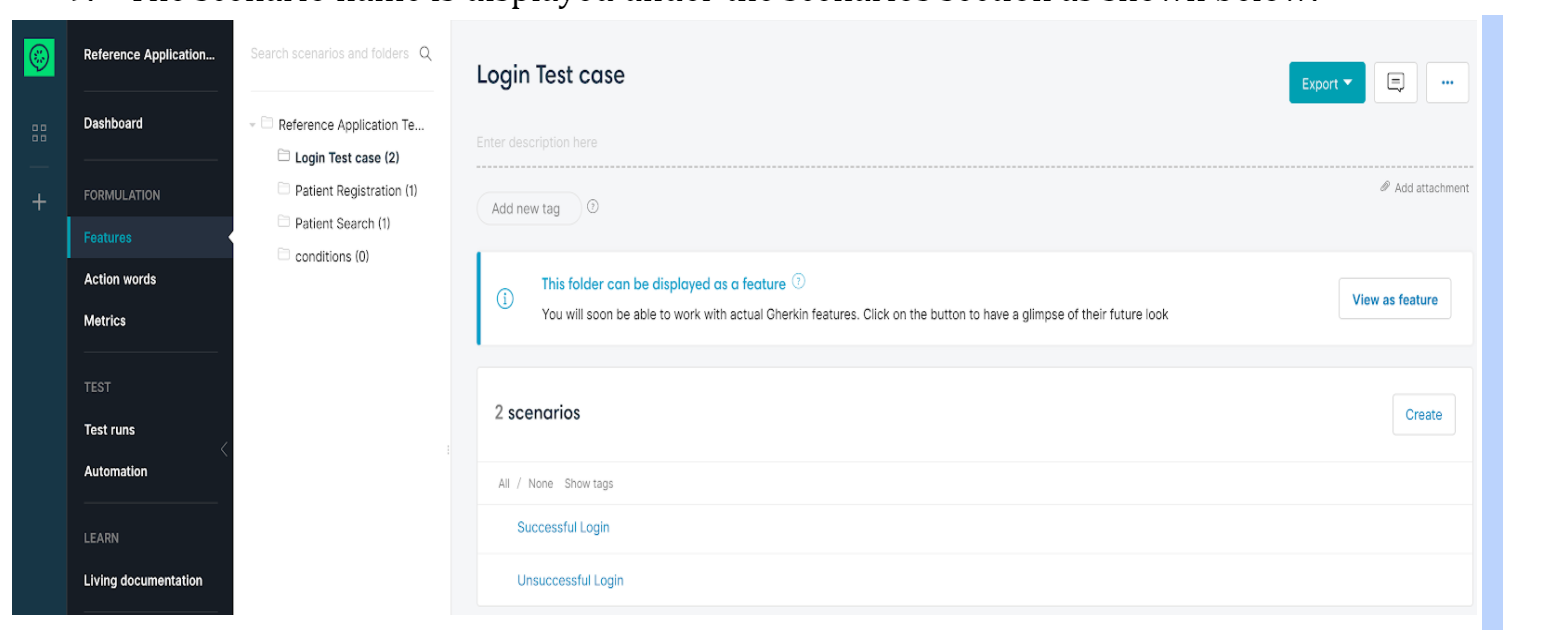
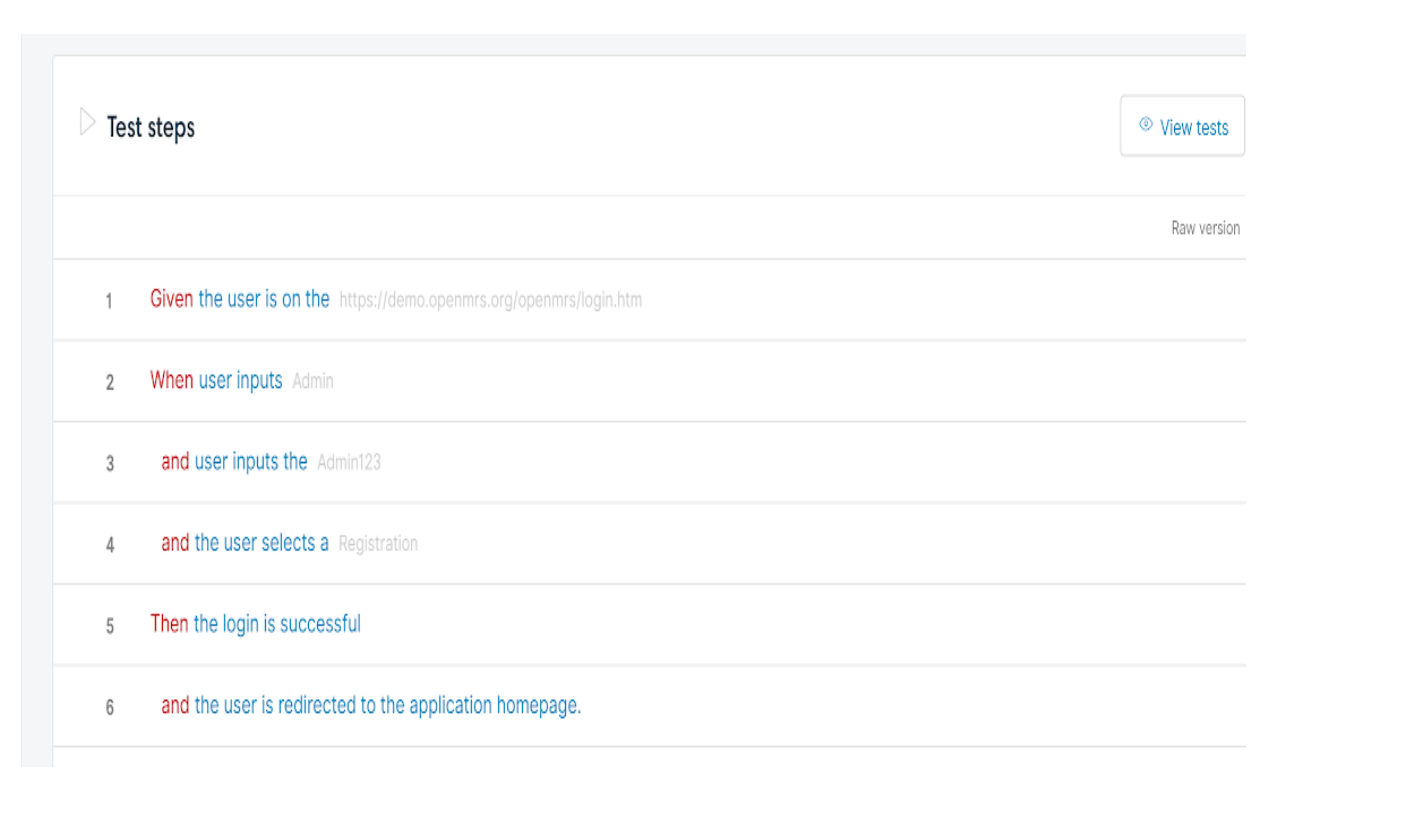
- Click on the scenario name to access the Scenario page and the page there is a section named Test steps.
- On the add steps field displayed, add the first action word to the scenario using the Gherkin syntax. Eg. Given the user is on the "login_page".
- Proceed to add the various steps until you have a complete scenario as shown below:
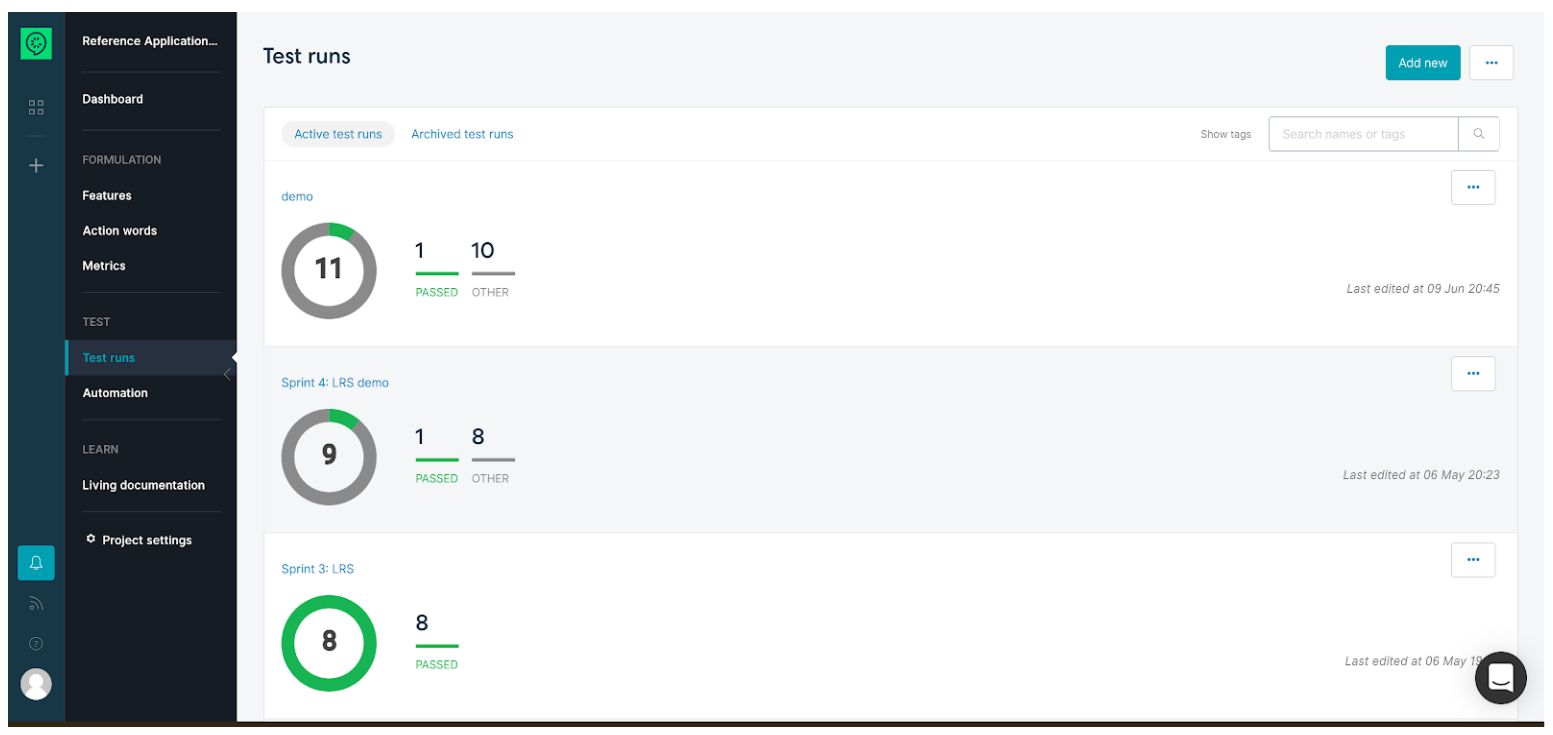
Creating a Test Run
- Click on the Test Run link to access the test run dashboard as shown below:
- Click on add new button to create a test run.
- On the dialog box displayed select your preferred creation mode. In this select Include all test cases and input a test run name. Eg Sprint 1. Click on create.
- The test run is created and displayed on the active test run dashboard.
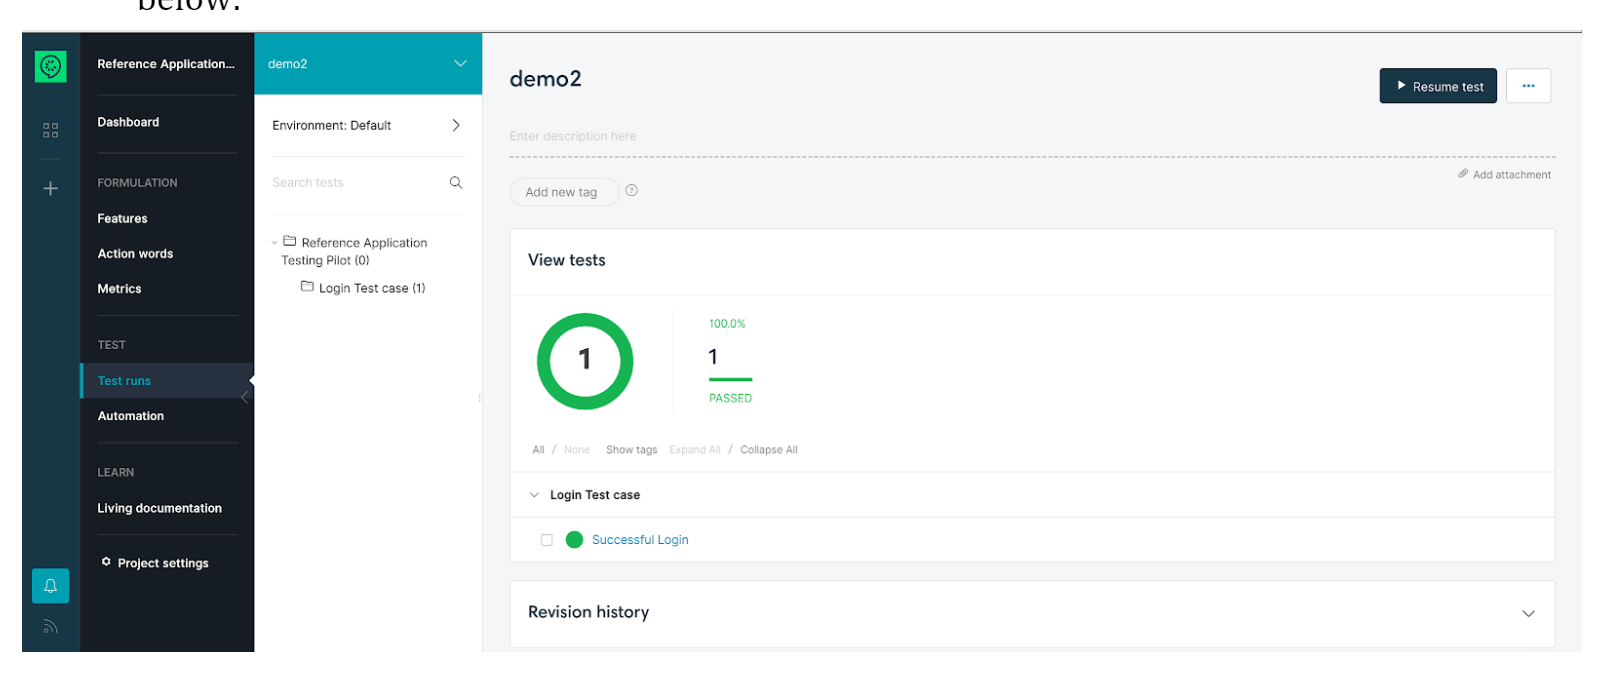
- Click on the test run name to access the test run environment.
- Click on resume testing to start the manual testing process.
- Update the results for each step and once done click on done as shown below:

- Once done the test run environment is updated with the results of the test run as shown below:
Generating a feature file
- Click on the automation link.
- Select your preferred coding language from the list displayed below, eg cucumber Java
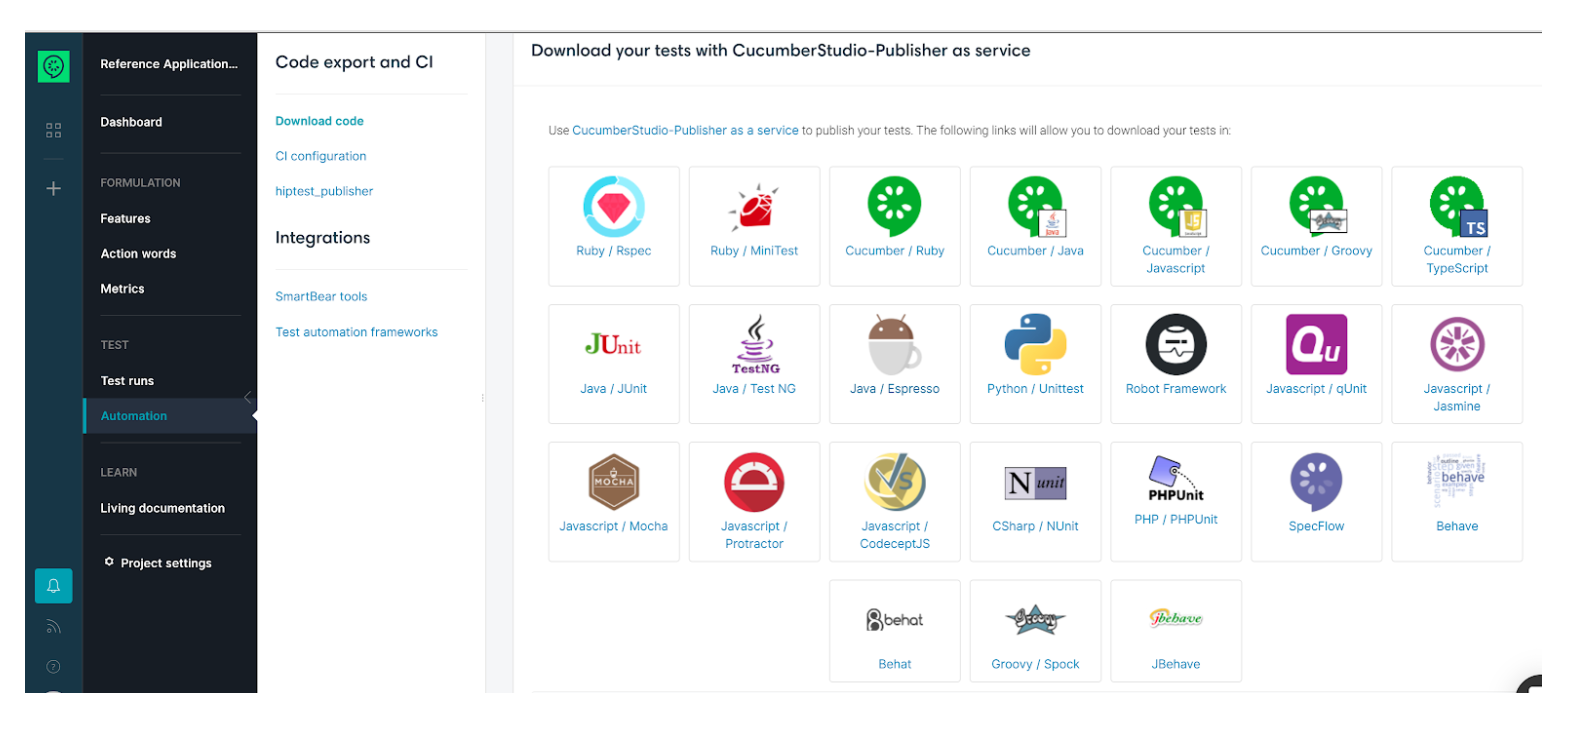
- A zip file export is provided with a list of all feature files.