Patient Flags Module OWA User Guide
Index
Overview
The Patient Flags Module OWA is an Open Web Application built using React & React-Redux in order to act as a front end for the Rest API supported by the Patient Flags Module. The web application consumes the Patient Flags Module Web API and has 4 Modules/Pages.
Features
- Manage Priorities -
- View table of existing priorities - their name, indicator and rank.
- Add New priorities - Select a name, numeric rank value and associated color indicator from a color swatch.
- Modify existing priorities.
- Delete priorities.
- Manage Tags-
- View table of existing tags.
- Add New tags- Select a tag name, which user group(s) the tag is visible to and Display points (patient dashboard or patient header) .
- Modify existing tags.
- Delete tags.
- Manage Flags-
- View table of existing flags.
- Add New flags- Select a flag name, an associated group of tags and a priority for the flag. Select whether flag is enabled or disabled.
- Modify existing flags.
- Delete flags.
- Filter flags by tags.
- Search-
- Find patients associated with a particular flag.
- Display Patient particulars, associated tags and flag enabled status.
Installation
The OWA is packaged along with the Patient Flags Module.
- Installation instructions for Module can be found here - Patient Flags Module Documentation.
- Independent OWA installation instruction can be found here - Patient Flags Module OWA Developer Guide.
Pages
Flags
1. Table Properties
The Flag display table has 5 columns - Name, Tags, Priority, Status & Actions.
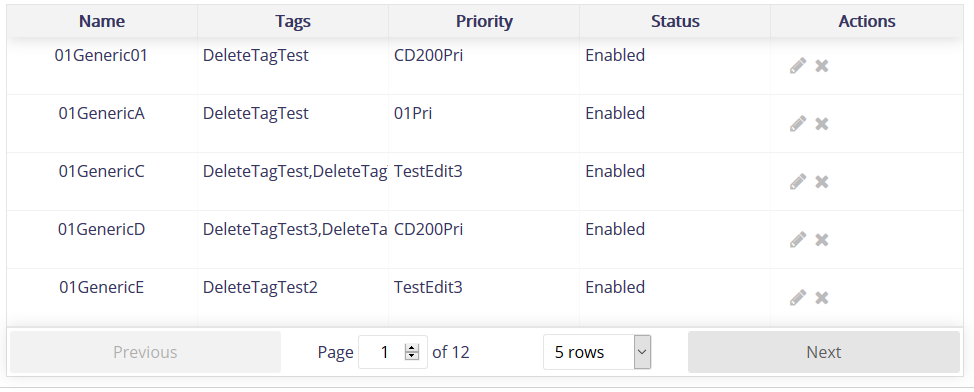
| Column Name | Description |
|---|---|
| Name | Displays flag name |
| Tags | Shows the tags associated with a particular flag |
| Priority | Shows the priority associated with a particular flag |
| Status | Shows the enabled status of the flag - Flag is either Enabled or Disabled. |
| Actions | List of Actions - Edit & Delete |
2. Adding A Flag
To add a new Flag click on the 'Add a Flag' button present in the page header.

A popup window containing a form would appear.
Fill In:
- The Flag Name
- The Flag Type (Groovy, SQL or Custom)
- Criteria on which patients will be queried
- A relevant message
- Associated Tags (Multi select option)
- Associated Priority (Single Select Option)
- Status - Either Enabled or Not
Click on the Save button to Save the details or Cancel button the close the popup window.
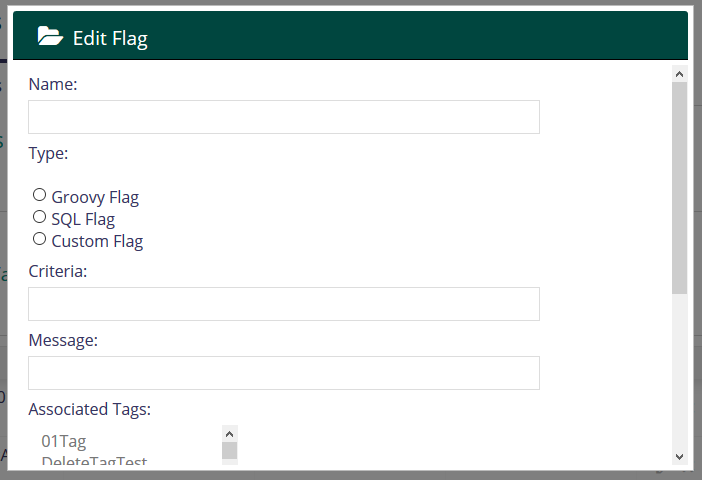
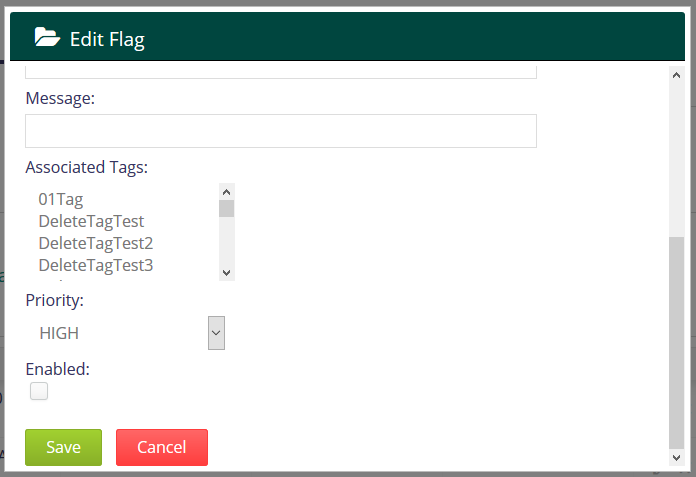
3. Editing a Flag
To edit a flag, click on the pencil icon, in the Actions header of the table.

| Edit Flag |
This would open a popup window with the flag details
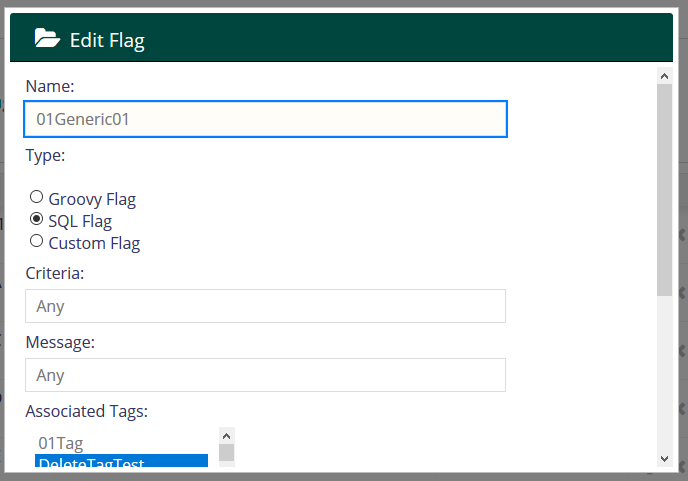
Once created, a Flag's name cannot be changed.
4. Deleting a Flag
Click the 'X' button against a particular Flag record in order to delete it.
| Delete Flag |
5. Sorting Tables
Click on any table's header, in order to sort the column alphabetically.
6. Filter Records by Tags

The Filter by Tags option at the top of a page can be used to filter the flags present in the table.
- Selected required associated tags from a multi-select options list.
- Subsequently Either -
- Show all the flags
- Show flags that contain any of the selected tags.
- Show flags that contain all of the selected tags.
Tags
1. Table Properties
The Tag display table has 2 columns - Flag Name, Actions
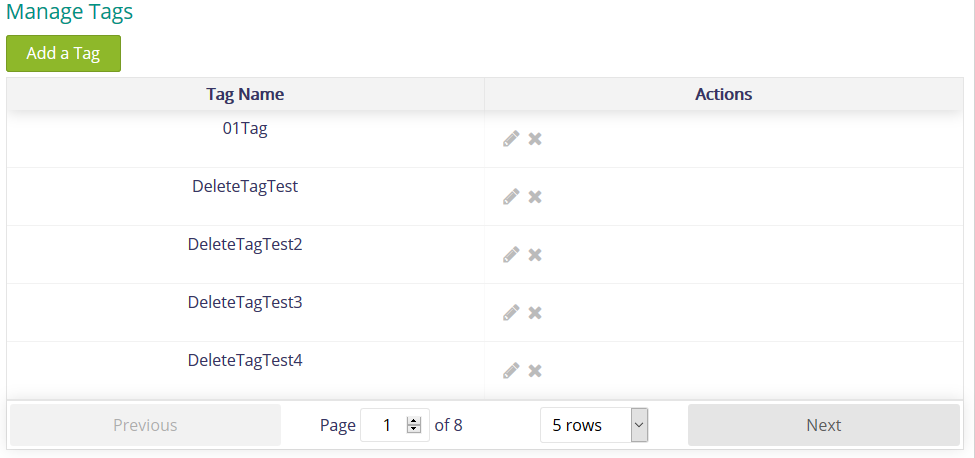
| Column Name | Description |
|---|---|
| Name | Displays tag name |
| Actions | List of Actions - Edit & Delete |
2. Adding A Tag
To add a new Flag click on the 'Add a Tag' button present in the page header.

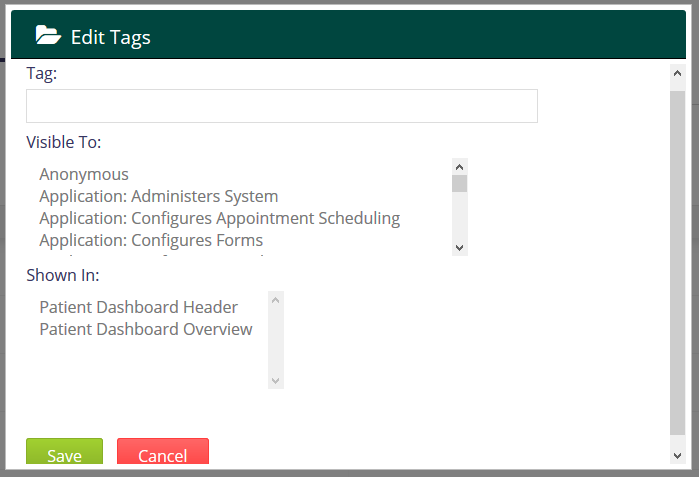
A popup window containing a form would appear.
Fill In:
- The Tag Name
- Visible To - User groups who can view the flag (Multi select option)
- Show In - Where is the flag displayed (Multi select Option)
Click on the Save button to Save the details or Cancel button the close the popup window.
3. Editing a Tag
To edit a tag, click on the pencil icon, in the Actions header of the table.
| Edit Tag |
This would open a popup window with the tag details
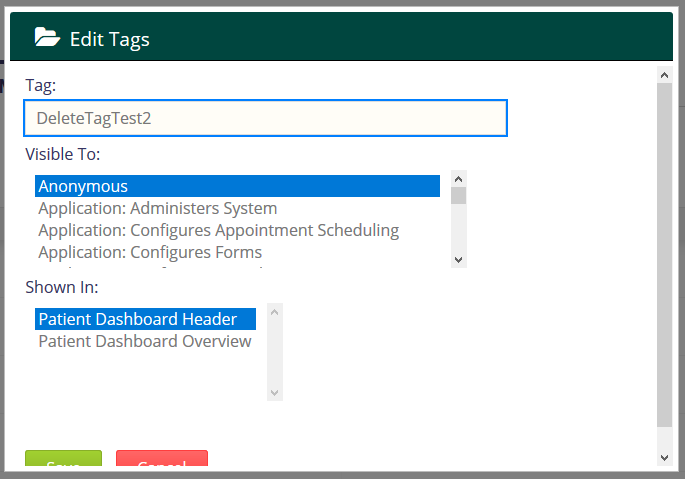
Once created, a Tag's name cannot be changed.
4. Deleting a Tag
Click the 'X' button against a particular Tag record in order to delete it.
| Delete Tag |
5. Sorting Tables
Click on any table's header, in order to sort the column alphabetically.
Priorities
1. Table Properties
The Priorities display table has 4 columns - Name, Indicator, Rank & Actions.
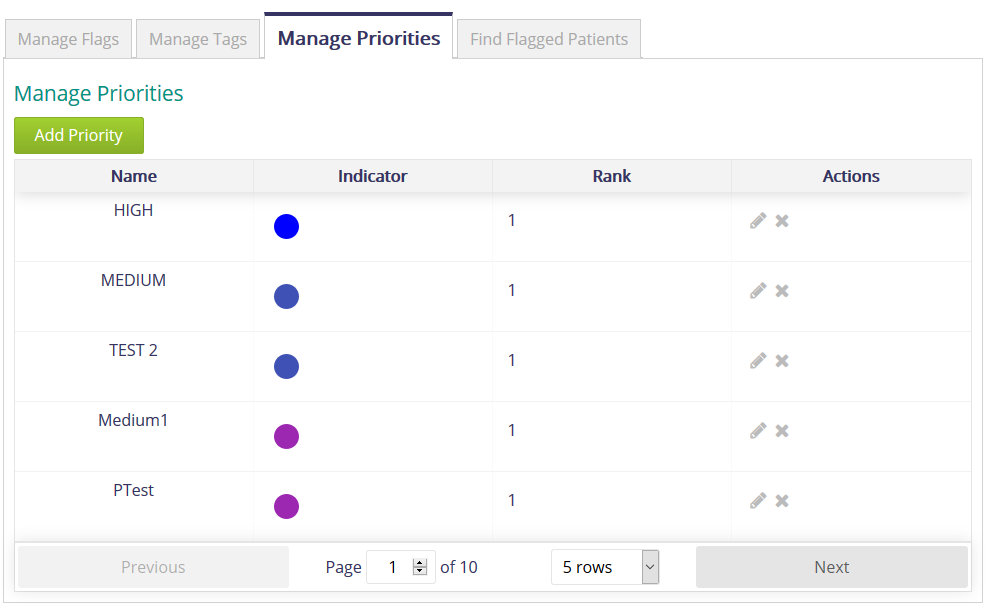
| Column Name | Description |
|---|---|
| Name | Displays Priority name |
| Indicator | Shows the indication color associated with the priority. |
| Rank | Shows the priority's numeric rank. |
| Actions | List of Actions - Edit & Delete |
2. Adding A Priority
To add a new Flag click on the 'Add Priority' button present in the page header.

A popup window containing a form would appear.
Fill In:
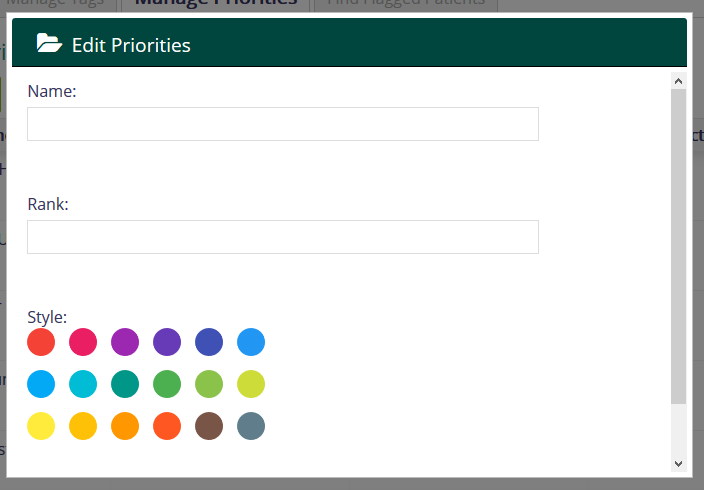
- The Priority Name
- Rank
- Select a Style
Click on the Save button to Save the details or Cancel button the close the popup window.
3. Editing a Priority
To edit a flag, click on the pencil icon, in the Actions header of the table.
| Edit Priority |
This would open a popup window with the flag details
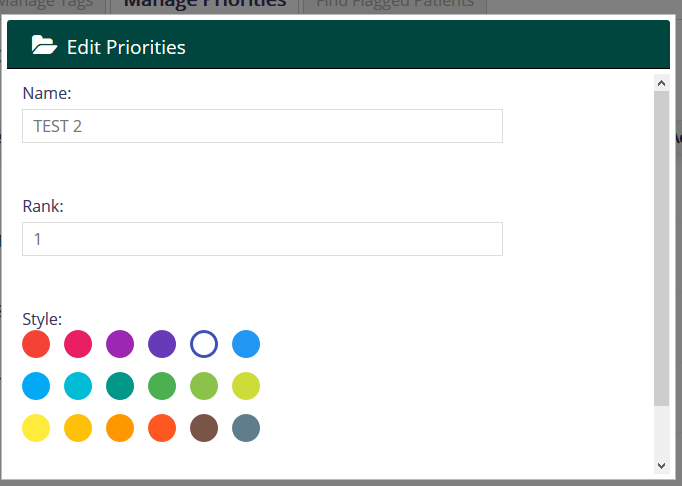
Once created, a Priority's name cannot be changed.
4. Deleting a Priority
Click the 'X' button against a particular Flag record in order to delete it.
| Delete Priority |
5. Sorting Tables
Click on any table's header, in order to sort the column alphabetically.
Find Flagged Patients
Find patients according to a particular flag associated with that patient.
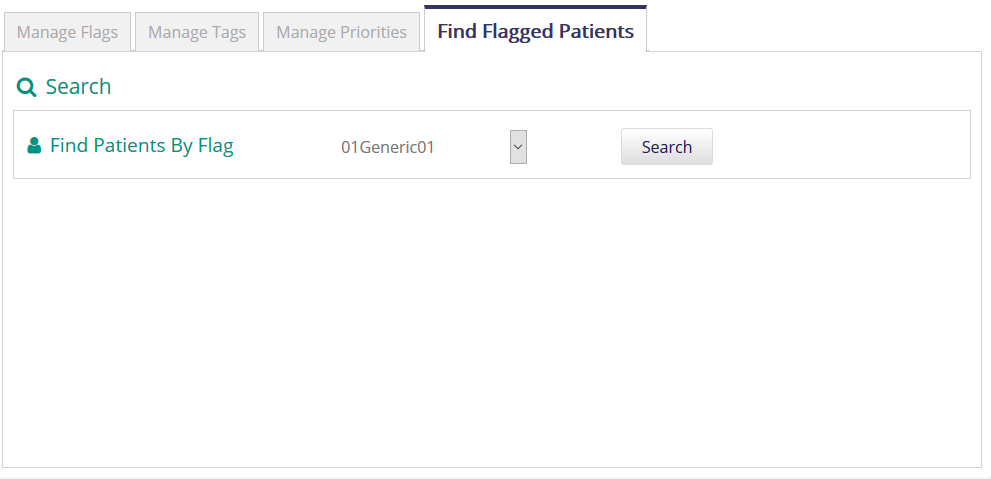
Select from the dropdown list the associated flag and click Search.
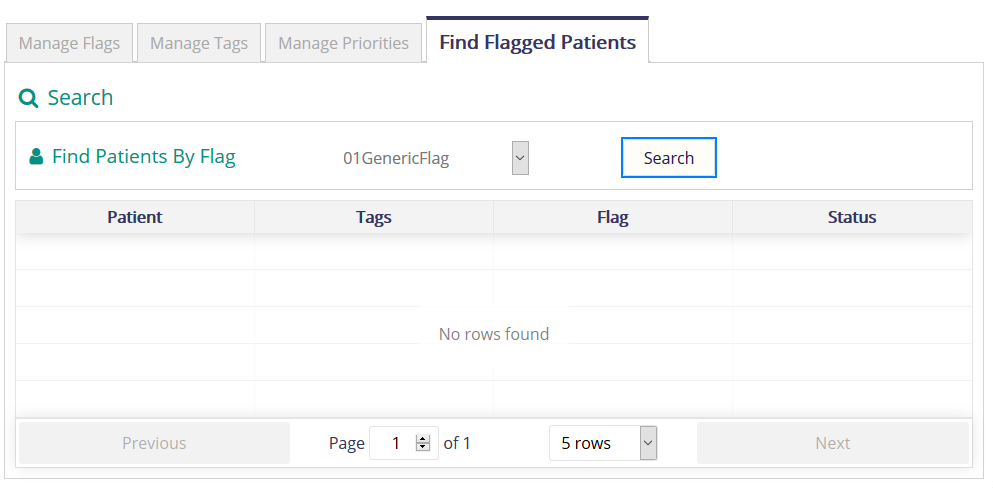
A table appears containing the list of patients associated with the flag.
Resources
TBD