OpenMRS Setup On PostgreSQL
Prerequisites
There are some prerequisites before we move on to setting up OpenMRS with PostgreSQL. These include:
Once done with the above steps, we can move on to setting up PostgreSQL. Follow the steps mentioned below :
Step 1 - Install PostgreSQL
It is recommended that your version of PostgreSQL is compatible with the version of the OpenMRS Platform you are installing. PostgreSQL support has been offered since platform version 2.4 . The recommended version of PostgreSQL is 12 for OpenMRS, though you might not face problems with versions as low as 8.2 .
Windows
- The PostgreSQL installer for Windows can be found here
- Run the installer program
- Accept the license agreement
- Select the installation directory when asked or leave it as default.
- Under Component Selection select PostgreSQL Server, PGAdmin4 and Command Line Tools.
- Select the database directory when asked or leave it as default.
- You will be asked to specify the password for superuser whose by default username is postgres. Don’t forget this password since it will be required when setting up OpenMRS.
- Specify port number as 5432 to be used by PostgreSQL database server.
- Leave all other settings to default
- Finish the installation and PostgreSQL is ready to use.
VERIFY INSTALLATION : When installing PostgreSQL, you installed some useful components namely psql and pgAdmin. We can use these tools to verify the installation.
Launch psql, which is a command line base utility to connect to PostgreSQL server, from the start menu. On its launch it will ask for PostgreSQL details like Server, Database, Port, Username, and Password. Provide these details and press enter.
You will now be connected to the database. Issue a query :
$ SELECT version();
This will return the current version of PostgreSQL.
Debian/Debian derived distributions
To install PostgreSQL on Debian based systems, follow the instructions laid out here .
Debian and many of its derived distributions include PostgreSQL by default. To install PostgreSQL on Debian, use the apt-get (or other apt-driving) command:
$ sudo apt-get install postgresql-12
Now we will set up the password for superuser(postgres). Run the command :
$ sudo -u postgres psql
You will now be connected to the postgres database via command line. Now issue the command “ \password “ :
postgres=# \password
Enter new password:
Enter it again:
postgres=#
- Your password is set for superuser(username - postgres) and you are now ready to go.
VERIFY INSTALLATION : Go to the terminal and run the command :
$ sudo -u postgres psql
You will now be connected to the database. Issue a query :
$ SELECT version();
This will return the current version of PostgreSQL.
Step 2 - Deploy OpenMRS
As an IMPLEMENTER : For deploying OpenMRS, as an implementer you might want to have a look here.
As a DEVELOPER : You can clone the OpenMRS-core repository from github : https://github.com/openmrs/openmrs-core and then build it and deploy it on jetty.
Go to the project directory and run :
$ mvn clean install
Once the build is finished, enter the webapp subdirectory and run:
$ mvn jetty:run
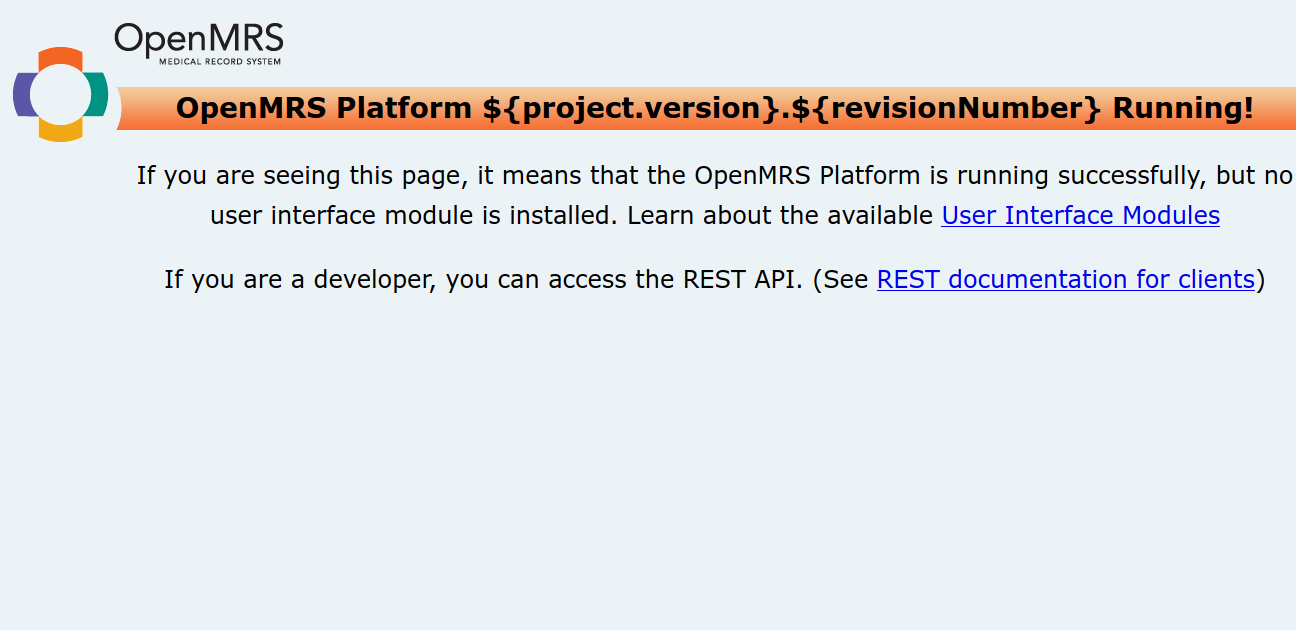
- Wait for the [ INFO ] Started Jetty Server message and open the web browser at http://localhost:8080/openmrs. Follow the instructions.
Step 3 - Configuring OpenMRS for PostgreSQL
Follow the steps given below to setup OpenMRS Platform on PostgreSQL:
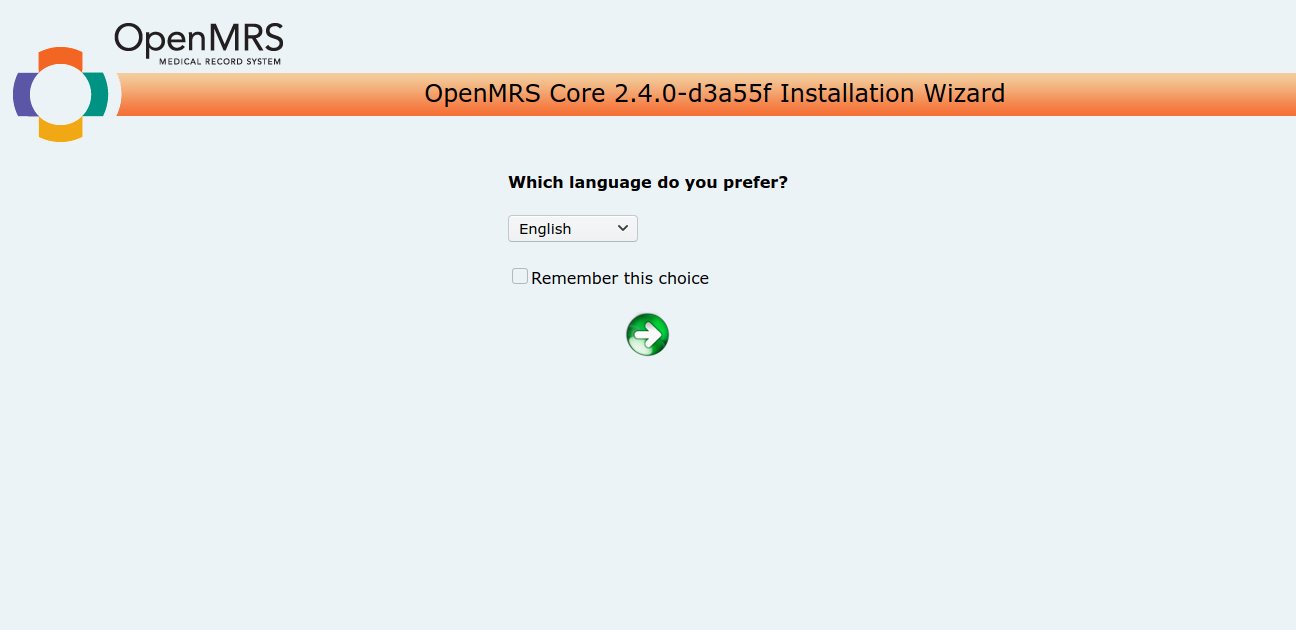
STEP 1
- Select the language of your choice from the drop-down.
- Go to the next step.
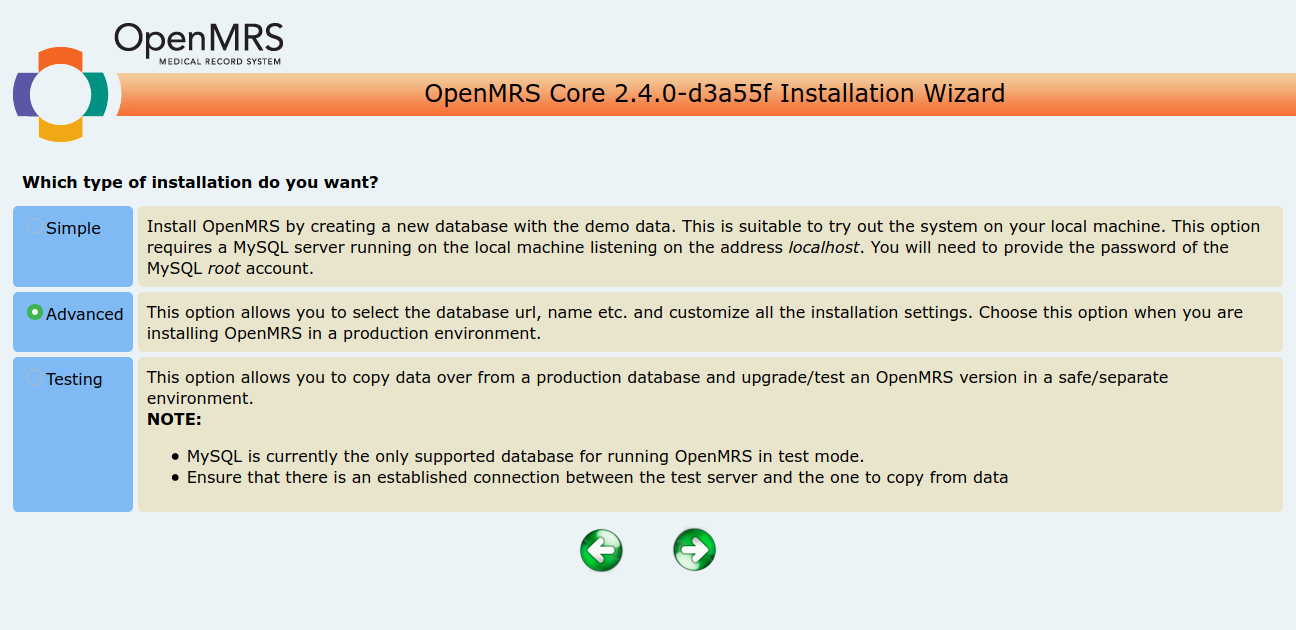
STEP 2
- Select the advanced option and go to the next step.
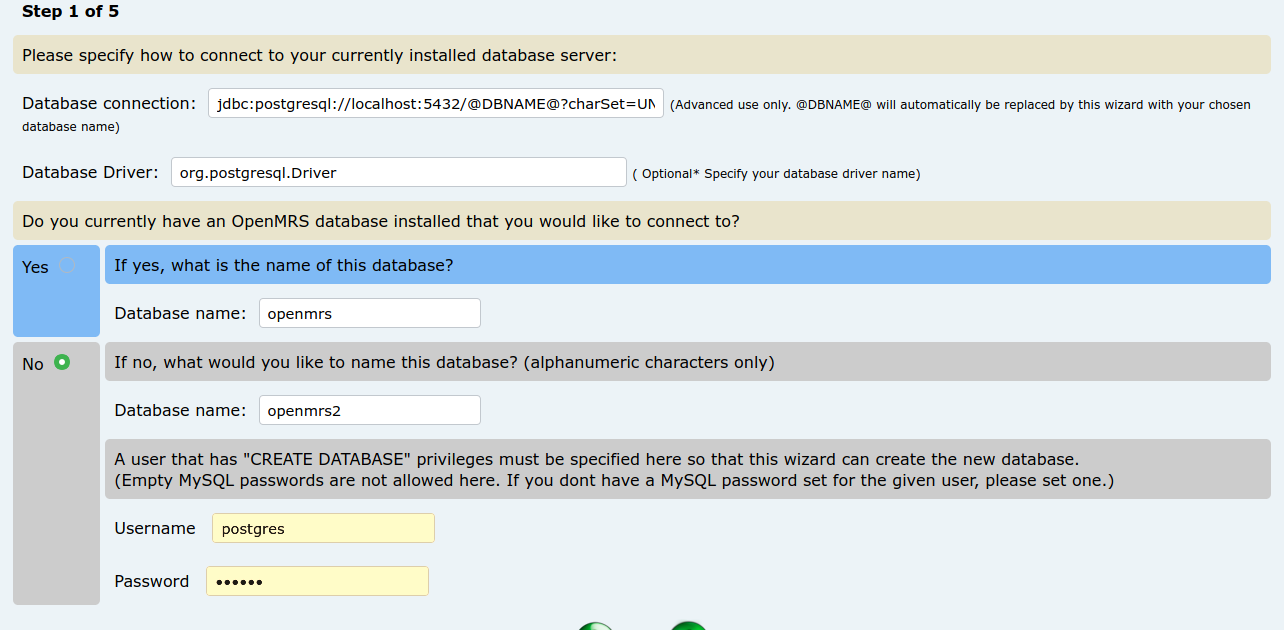
STEP 3
- Set the database connection string as:
jdbc:postgresql://localhost:5432/@DBNAME@?charSet=UNICODE
- Set the database driver as:
org.postgresql.Driver
- We will be doing a fresh installation of OpenMRS with a new database. So, select ‘ No ‘ and set the database name of your choice, in this case ' openmrs2 '.
- Then give the super/root user details as set during the installation of PostgreSQL. Go to the next step.
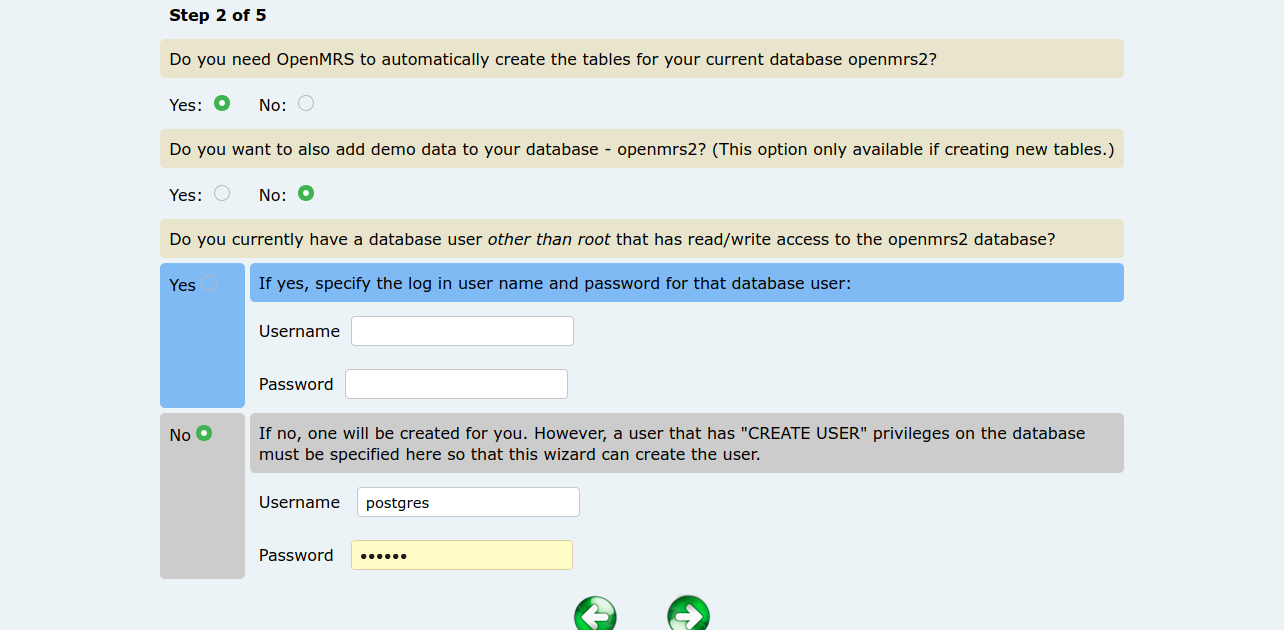
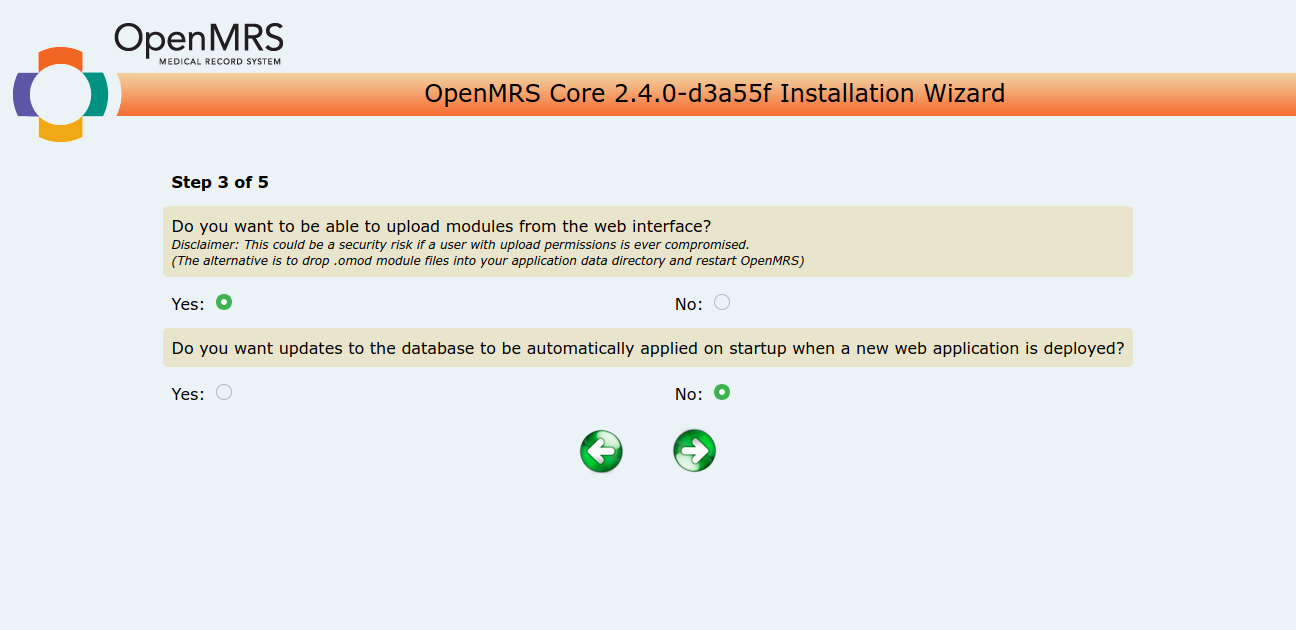
STEP 4
- Since we are creating a fresh database, select the ‘ No ’ option for the third question and provide the super/root user details of PostgreSQL database.
- Make the other selections as shown in image and go to the next step.
STEP 5
- Leave the default selection as shown in the image and go to the next step.
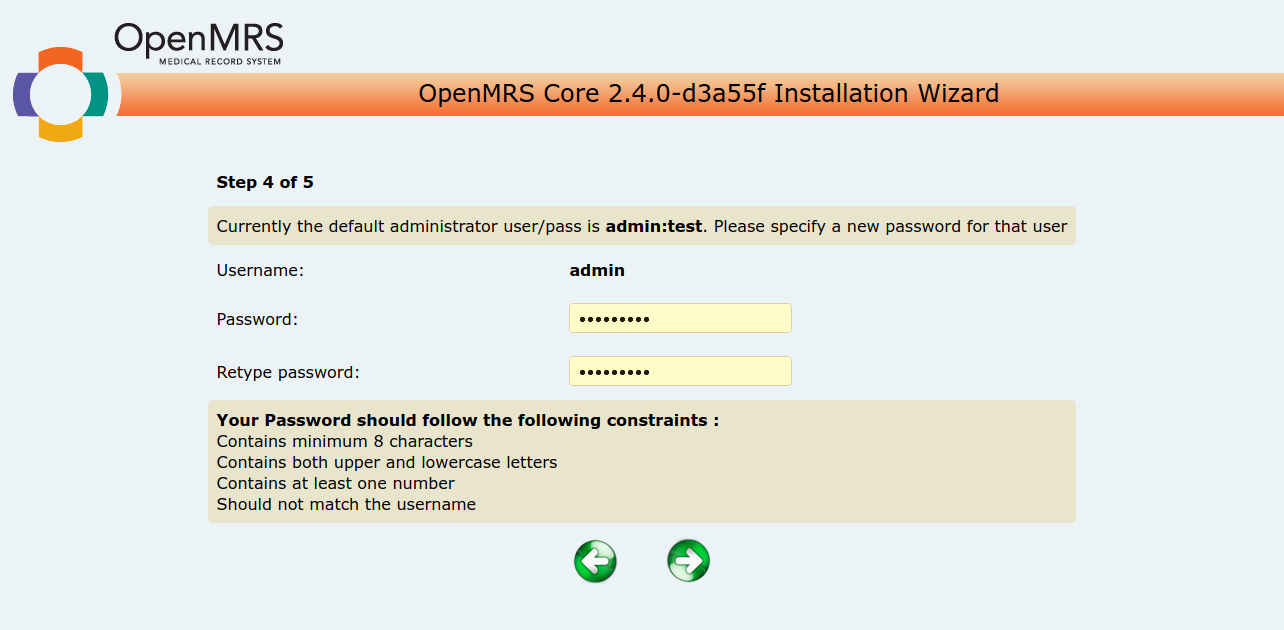
STEP 6
- Set the password for the admin user.
- These details will be used for the very first time when you log in to the application.
- Go to the next step.
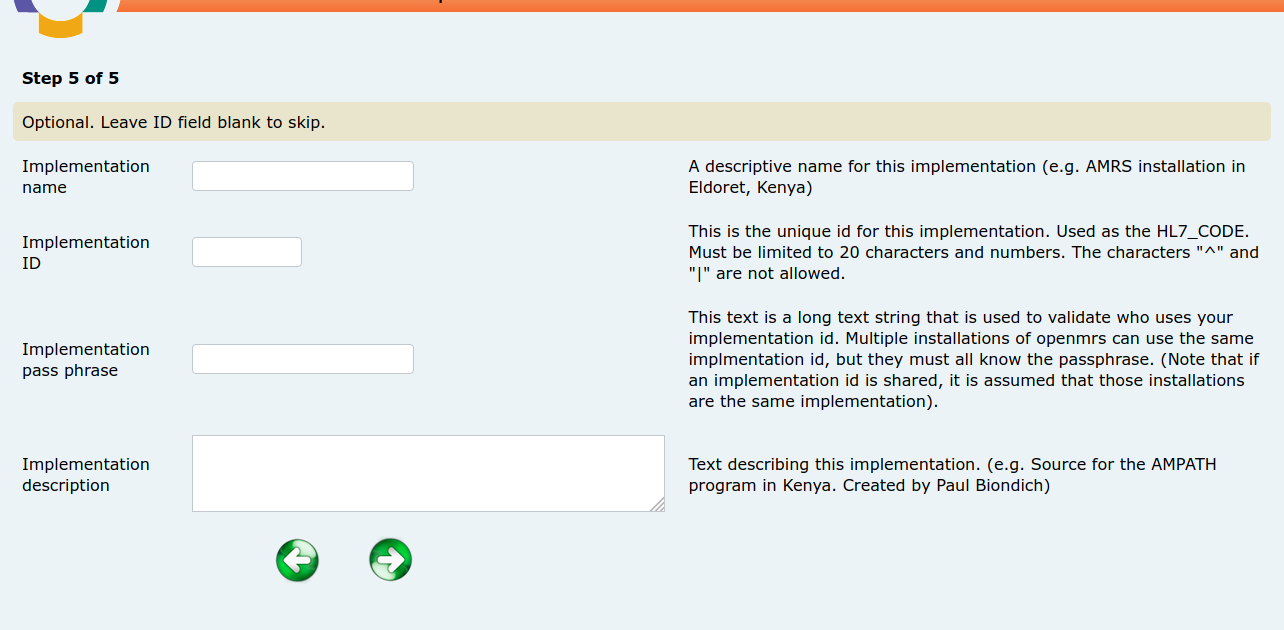
STEP 7
- Leave all the fields blank and click on next.
STEP 8
- You will now see a page with all the different configuration parameters that you have set in previous steps. Click on next.

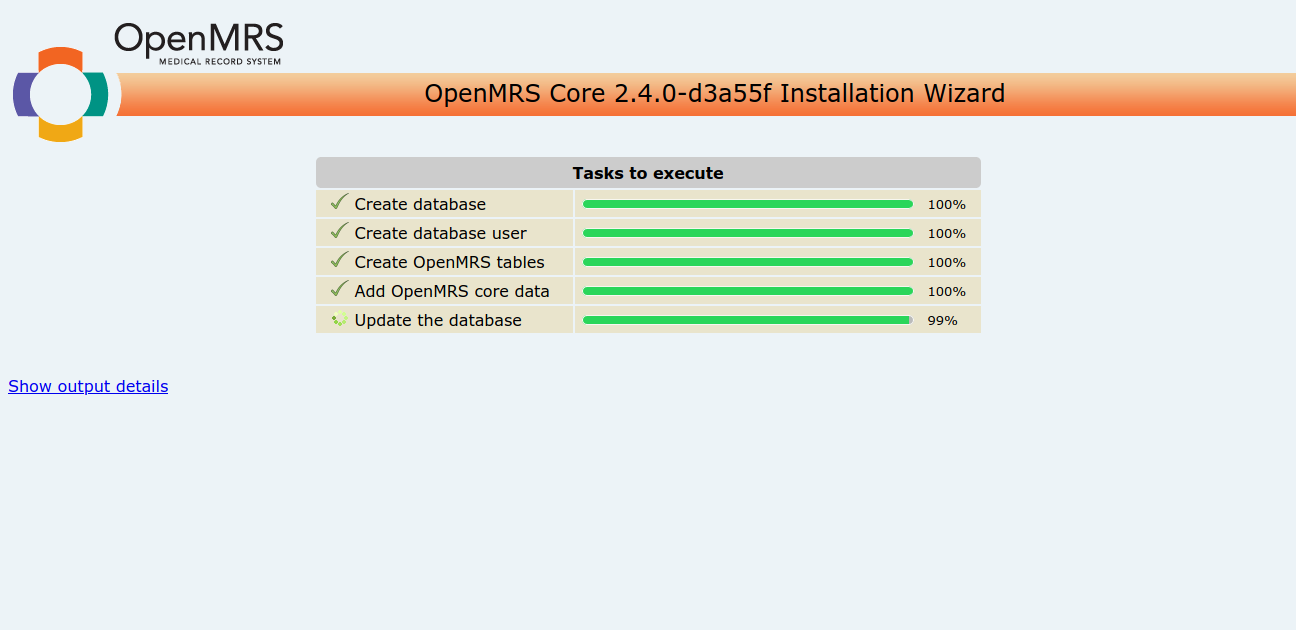
STEP 9
- Installation will start and all the necessary database and application specific configurations will take place.
STEP 10
- OpenMRS platform is installed and ready for work.
Adding User Interface To OpenMRS Platform:
To add the user interface to the OpenMRS Platform, have a look here .