OpenMRS SDK 2.x
Important!
This version is outdated. Please use latest SDK version: OpenMRS SDK
Overview
OpenMRS SDK (latest version - 2.1, released on 2015/11/18) allows for rapid development of modules and the OpenMRS Platform code. It is an ever expanding project with a rich feature-set, outlined below. Operating System compatibility was also taken into account, allowing users to install the SDK and be up and running within a few minutes on Windows, Linux and Mac OS X.
The SDK was proposed as a GSoC 2013 Project, which was then developed by Chris Niesel and raff (Mentor) throughout the length of GSoC 2013.
In GSoC 2015 the OpenMRS SDK was reworked by Dmytro Trifonov and raff (Mentor) to support OpenMRS 2.x and provide better integration with IDEs by the mean of a maven plugin.
Feedback
Please help us improve SDK. We kindly ask you to report any problems in JIRA or in notes. Please include the output of openmrs-sdk:help in your problem description. In order to test SDK on your computer please go through the Step By Step instructions that you find below.
Release Notes
- 2.1 (released on 2015/11/18)
- 2.0.3 (released on 21/09/2015)
- 2.0.2 (released on 27/08/2015)
- all release notes...
Installation
1. Development Environment Check
Before we get started with the installation of the OpenMRS SDK you have to make sure that if you are planning on working in conjunction with GitHub, that you have
Git installed. For a howto on how to do that see here.
Once Git is installed, you have to make sure that you have the Apache Maven installed. To see if you do, open up a console/terminal and enter
mvn -v
You should see output like this: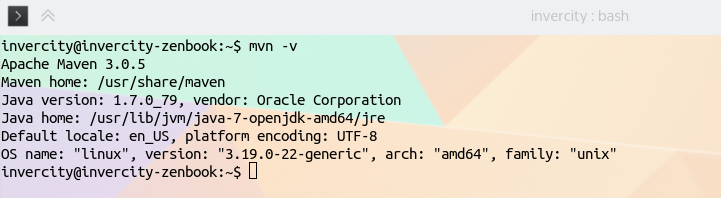
SDK requires Maven 3+ and JDK 1.7+ installed. You can download Maven from here and install.
If you do not have similar output, you are missing the Maven, please go ahead and install it.
Here are tutorials for Windows, Mac OSX, Ubuntu.
You will also want to make sure that your maven has enough memory available for building code, running tests and servers. Please set the MAVEN_OPTS system property to "-Xmx2048m -XX:MaxPermSize=1024m". It depends on your OS how you set it up. See http://stackoverflow.com/a/2820738 for Windows or http://unix.stackexchange.com/a/117470 for Unix/Linux.
If you are using an IDE for calling openmrs-sdk commands, please make sure to configure VM arguments in run configurations accordingly.
Once completed this, let's move onto setting up the sdk.
2. Setting up OpenMRS SDK
For setup the SDK you just need to open the terminal and execute:
mvn org.openmrs.maven.plugins:openmrs-sdk-maven-plugin:setup-sdk
Once it is finished, you can make sure the SDK works. To do so, open up a terminal/console and issue the following:
mvn openmrs-sdk:help
The output it gives, should be similar of that below:
If that is the case, you have successfully installed the SDK.
3. Upgrading OpenMRS SDK
If your SDK version isn't the latest version, you can update it using -U option with any SDK command.
For example, execute mvn openmrs-sdk:help -U, to be sure that you have the latest version installed.
Examples of usage
Useful tip
For all commands, you may not pass any attributes. In this case, all required parameters will be prompted in interactive mode.
Creating a module
OpenMRS Platform module
The SDK allow you, the user to create a basic module, with little effort! All that you have to do is, make sure you have a console/terminal window open and make sure you are
in a directory that you have write access to. If that is the case, you just issue the following:
mvn openmrs-sdk:create-platform-module
This will now prompt you for various inputs, the default value/name is already assigned, which you can change if you input your own.
Once the creation process is finished, you can now start working on your module. Be sure that you initialize a git project and push it to
your Github account for easy development access.
OpenMRS Reference Application 2.x module
Similarly as creating OpenMRS 1.x module, you can create module for OpenMRS 2.x. For that, you can execute command:
mvn openmrs-sdk:create-module
Creating a server
OpenMRS Platform server
For running and testing OpenMRS modules we need to create and configure an OpenMRS server instance. For creating a OpenMRS platform server you can use setup-platform command.
Example:
mvn openmrs-sdk:setup-platform -DserverId=test -Dversion=1.11.2
NOTE FOR WINDOWS USERS
In windows, the command above may give a maven error stating POM.xml not found..build failed. To resolve this issue, avoid inserting the parameters. Instead, simply type in :
mvn openmrs-sdk:setup-platform
And you will be prompted for the parameters which you can enter manually. Same instructions go for setting up the Reference Application server as well.
You can pass server attributes for the server. To get full list of them, see setup-platform section of this documentation.
If command will executed without errors, server will be created in $HOME/openmrs/<serverId> directory.
OpenMRS Reference Application 2.x server
You need to have your own MySQL instance running to create a Reference Application server with the SDK. Specify your existing root password for the -DdbPassword= argument below.
Similarly as create platform server, you can create OpenMRS Reference Application (RA) 2.x server, using setup command.
Example:
mvn openmrs-sdk:setup -DserverId=test2 -Dversion=2.1 -DdbDriver=mysql -DdbUser=root -DdbUri=jdbc:mysql://localhost:3306/@DBNAME -DdbPassword=12345
Note, that SNAPSHOT versions for RA based server also supported. For example, you can create OpenMRS 2.3-SNAPSHOT based server.
Example:
mvn openmrs-sdk:setup -DserverId=test3 -Dversion=2.3-SNAPSHOT
Creating server from properties file
During module development, sometimes we need to execute module on other machine (for example, on a remote server), but using the similar OpenMRS server instance (with a same configuration). Basically there are two ways to do that: move all server files to remote, or run setup command with required parameters, and install all required user modules. But you can move server much easier, using server properties file (see installation.properties).
For that, copy server properties file on remove server, and then execute:
mvn openmrs-sdk:setup -Dfile=serverdata/installation.properties
The same server, as original for this properties file, will be created. The same option also will work for setup-platform command.
If any other option except file will be added, it will override options of a file. For example:
mvn openmrs-sdk:setup -Dfile=serverdata/installation.properties -DserverId=test3
In this case, server will be created with a name "test3", even if other name selected in installation.properties file. In the same way you can override all available server attributes (see setup, setup-platform).
Installing module on server
To install module on selected server, just execute install task with required parameters (see install options). Note, that before installing a module on server you must install it lo local maven repo (launch mvn clean install for this)
Example:
mvn openmrs-sdk:install -DartifactId=mymodule -Dversion=1.1 -DserverId=test2
Also you may not pass any module parameters for this command, for this you must execute install task directly from module folder, and current module will be installed (parameters will be fetched from module pom file)
Example:
cd <modulename>
mvn openmrs-sdk:install -DserverId=test2
Uninstalling module from server
To uninstall module from server, just execute uninstall command (see uninstall options)
Example:
mvn openmrs-sdk:uninstall -DserverId=test2 -DartfactId=mymodule
Watching module for changes
Since SDK 2.1 it is possible to enable the uiframework development mode for modules. You can add any module to server's list of watched modules by going to modules source code main directory and typing:
mvn openmrs-sdk:watch -DserverId=test2
You can also list watched modules for the given server typing:
mvn openmrs-sdk:info -DserverId=test2
If you want to stop watching a module type:
mvn openmrs-sdk:unwatch -DserverId=test2 -DartifactId=mymodule
Running a server
OpenMRS 1.x instance with an embedded Database
Within the module that you just created, you can choose to run OpenMRS platform with an Embedded Database to test the module you are working on.
First, you need to create server:
mvn openmrs-sdk:setup-platform
Than you need to install you module to server. For that, execute next:
cd <module-name>
mvn clean install openmrs-sdk:install
Plugin will ask you for a serverId of server, you must put the id of just created server. After that, you can execute it:
mvn openmrs-sdk:run
If you run this command from the server folder, the server will start immediately. Otherwise plugin will ask you for a serverId.
If the server starts successfully, you can access a fully running OpenMRS instance by going to http://localhost:8080/openmrs
If a previous install of OpenMRS did not happen, an automatic installation will be done. When the wizard is finished, the page will refresh and
you can login using:
User: admin
Password: Admin123
The module you were working on, providing it was built without any error, should be visible on the administration page.
OpenMRS Reference Application 2.x instance with an external database
Steps for creating OpenMRS 2.x server, and starting, are mostly the same as for 1.x. First, setup 2.x server:
mvn openmrs-sdk:setup
Besides serverId, you must put database driver class, database URI, login and pass for database user.
And finally, install module to server, and run selected server (These steps are absolutely the same as for OpenMRS 1.x)
cd <module-name>
mvn clean install
mvn openmrs-sdk:install
mvn openmrs-sdk:run
Running a server from server folder
OpenMRS SDK 2 supports an option of running a server without passing any parameters (serverId). For this, you can execute run task directly from server folder.
Example:
cd $HOME/openmrs/<serverId>
mvn openmrs-sdk:run
After that, server <serverId> will be executed.
Running a server from module folder
During module development, we need to test how out module works. For that each time we need to install a module on server, and them run. SDK allows to do it much more simple. You can execute run task directly from module folder, and selected module will be installed on server before launching automatically.
Example:
cd <modulename>
mvn openmrs-sdk:run -DserverId=test
As usually, you may not pass serverId as a parameter of run task, in this case serverId will be prompted in interactive mode.
Running a server on different ports
Basically OpenMRS instance launching on 8080 port, but you can choose any other port for executing. For this, you can pass jetty.port option for run task.
Example:
mvn openmrs-sdk:run -DserverId=test -Djetty.port=8081
Server reset
Reset server, with saving user modules
To return server to its default state (as it was after creating) you may use reset command. All user data (database data, except user modules) will be removed. See more details about reset.
Example:
mvn openmrs-sdk:reset -DserverId=test
You may remove current server, without passing serverId option. For this, please run reset from server folder.
Example:
cd <server>
mvn openmrs-sdk:reset
Full reset, with removing user modules
To return server to default state, including user modules removing, you may pass a full option for reset task.
Example:
mvn openmrs-sdk:reset -DserverId=test -Dfull=true
Server upgrade
Upgrade platform based servers
For upgrading OpenMRS Platform server to later version, you may use upgrade-platform command. See more details about upgrade-platform.
Example:
mvn openmrs-sdk:upgrade-platform -DserverId=test -Dversion=1.11.2
Note, that you can't make upgrade to lower version of OpenMRS Platform, only to higher.
For upgrading current server, without passing serverId option, just execute command from server folder.
Example:
mvn openmrs-sdk:upgrade-platform -DserverId=test -Dversion=1.11.2
Upgrade Reference Application based server
For upgrading Reference Application server, you can use upgrade task.
Example:
mvn openmrs-sdk:upgrade -DserverId=test -Dversion=2.2
Also you can upgrade platform server to Reference application server. For this, also use upgrade task as described above, no any additional options required.
Fixing errors on server upgrade
If upgrading server finished with an error (for example, if you tried update server to missing server version) you can return server to previous state, which was before running upgrade.
Server files wouldn't be removed, but you just need to remove "old.properties" file to "installation.properties".
Server delete
For deleting server and all server files, use delete command. See details about delete. Please note that currently server data will not be removed from database after remove, so you need to remove this data manually. Database name for selected server you can find in installation.properties file.
Example:
mvn openmrs-sdk:delete -DserverId=test
List of commands
These commands are mainly used for working with an OpenMRS Module, however certain ones can come in handy if you are doing development on the OpenMRS core.
Each command can be executed by:
mvn openmrs-sdk:<command> [options]
Each option must be passed with next format:
<command> -D<option>=<value>
Here is an example of executing run task, with an option "serverId" which has a value "test":
mvn openmrs-sdk:run -DserverId=test
All supported commands listed below:
| Command | Description | Options | ||||||||||||||||
|---|---|---|---|---|---|---|---|---|---|---|---|---|---|---|---|---|---|---|
help | Displays all available commands and their information. | N/A | ||||||||||||||||
create-platform-module | Creates module for OpenMRS 1.x | N/A | ||||||||||||||||
create-module | Creates module for OpenMRS 2.x | N/A | ||||||||||||||||
run | Runs previously created OpenMRS server |
| ||||||||||||||||
setup-platform | Creates OpenMRS 1.x server |
| ||||||||||||||||
setup | Creates OpenMRS 2.x server |
| ||||||||||||||||
install | Installs module to selected server (you must install it to local repository before, using "mvn clean install") |
| ||||||||||||||||
uninstall | Removes module from selected server |
| ||||||||||||||||
watch | Adds module to the list of watched modules for the given server |
| ||||||||||||||||
unwatch | Removes module from the list of watched modules of the given server |
| ||||||||||||||||
info | Displays information about the server including a list of watched modules |
| ||||||||||||||||
upgrade-platform | Upgrades OpenMRS platform server to selected version. | |||||||||||||||||
upgrade | Upgrades OpenMRS 2.x server, or OpenMRS Platform server to 2.x. User modules will be saved |
| ||||||||||||||||
reset | Updates server to default state (database data, configuration, and optionally user modules) |
| ||||||||||||||||
delete | Remove selected server |
|
Note! All parameters, except "optional" are required, and will be prompted if user will no put them
Server properties file
Description
Server properties file - is a file, used for saving server properties, which required while running OpenMRS instance. File name of this file is usually "installation.properties", both for platform and Reference Application types of server.
Installation.properties file usually placed in $HOME/openmrs/<serverId>/installation.properties
Attributes list
| Attribute | Description |
|---|---|
| connection.username | Username for database connection |
| connection.url | URL for database connection |
| server.id | Unique name of a server |
| connection.driver_class | Database driver class |
| connection.password | Password for database connection |
| admin_user_password | Default admin password (used for first launch) |
| user_modules | Comma-separated list of user modules. |
| add_demo_data | Add demo data to server (platform server only) |
| database_name | Database name for server (usually generated automatically) |
| openmrs.version | Web App version (non-platform server only) |
| openmrs.platform.version | OpenMRS version |
Example
create_database_user=false
openmrs.platform.version=2.2
connection.username=root
connection.url=jdbc\:mysql\://localhost\:3306/openmrs-b1?autoReconnect\=true&sessionVariables\=storage_engine\=InnoDB&useUnicode\=true&characterEncoding\=UTF-8
server.id=b1
connection.driver_class=com.mysql.jdbc.Driver
connection.password=ermolenko
admin_user_password=Admin123
install_method=auto
user_modules=org.openmrs.module/ttt/1.0-SNAPSHOT,org.openmrs.module/mod2/1.1
add_demo_data=false
module_web_admin=true
has_current_openmrs_database=true
create_tables=true
database_name=openmrs-b1
openmrs.version=1.11.2
auto_update_database=false
Project Resources
| Element | Repository |
|---|---|
| OpenMRS 2.x SDK | https://github.com/openmrs/openmrs-contrib-sdk-maven-plugin |
| JIRA | https://tickets.openmrs.org/browse/SDK |
MAVEN_OPTS