OpenMRS SDK
Overview
OpenMRS SDK allows for rapid development of modules and the OpenMRS Platform code. It is an ever expanding project with a rich feature-set, outlined below. Operating System compatibility was also taken into account, allowing users to install the SDK and be up and running within a few minutes on Windows, Linux and Mac OS X.
Release Notes
- 3.7.0 (released on 2017/01/20)
- 3.6.0
- 3.5.0 (released on 2016/11/29)
- 3.4.0 (released on 2016/10/12)
- 3.3.0 (released on 2016/09/05)
- 3.2.0 (released on 2016/08/18)
- 3.1 (released on 2016/08/03)
- 3.0 (released on 2016/07/13)
- all release notes...
Installation
Requirements
JDK 1.8
To make sure that you have JDK 1.8 installed properly, open up a console/terminal and enter:
on Windows:
java -version
on Linux/Mac:
javac -version
It should say:
java version "1.8.0_172"
Java(TM) SE Runtime Environment (build 1.8.0_172-b11)
Java HotSpot(TM) 64-Bit Server VM (build 25.172-b11, mixed mode)
If you do not have similar output or the Java version does not start from 1.8, then you have to install JDK. Follow Oracle's guide.
Maven 3.x
To make sure that you have Apache Maven 3.x installed, open up a console/terminal and enter:
mvn -v
You should see:
Apache Maven 3.5.3 (3383c37e1f9e9b3bc3df5050c29c8aff9f295297; 2018-02-24T22:49:05+03:00)
Maven home: C:\Users\AppData\Local\Temp\apache-maven-3.5.3\bin\..
Java version: 1.8.0_172, vendor: Oracle Corporation
Java home: C:\Program Files\Java\jdk1.8.0_172\jre
Default locale: en_US, platform encoding: Cp1252
OS name: "windows 7", version: "6.1", arch: "amd64", family: "windows"
If you do not have similar output, you are missing the Maven, please go ahead and install it. Here are tutorials for Windows, Mac OSX, Ubuntu.
Miscellaneous
Although Git is not necessary for OpenMRS SDK to work, we recommended you to install it as well. See here.
You will also want to make sure that your maven has enough memory available for building code, running tests and servers. Please set the MAVEN_OPTS system property to "-Xmx768m -XX:MaxPermSize=512m". It depends on your OS on how you set it up. See http://stackoverflow.com/a/2820738 for Windows or http://unix.stackexchange.com/a/117470 for Unix/Linux.
If you are using an IDE for calling openmrs-sdk commands, please make sure to configure VM arguments in run configurations accordingly.
You will also need MySQL 5.7 for development of most OpenMRS modules. Please follow MySQL's guide.
Once completed, let's move on to setting up the SDK.
Setup
To setup the OpenMRS SDK you just need to open up a terminal/console and enter:
mvn org.openmrs.maven.plugins:openmrs-sdk-maven-plugin:setup-sdk
Once it is finished, you can make sure the OpenMRS SDK works by running the following command:
mvn openmrs-sdk:help
It should produce the following output:
[INFO] Scanning for projects...
[INFO]
[INFO] ------------------< org.apache.maven:standalone-pom >-------------------
[INFO] Building Maven Stub Project (No POM) 1
[INFO] --------------------------------[ pom ]---------------------------------
[INFO]
[INFO] --- openmrs-sdk-maven-plugin:3.13.4:help (default-cli) @ standalone-pom -
--
OpenMRS SDK 3.13.4

For more info, see SDK documentation: https://wiki.openmrs.org/display/docs/OpenMRS+SDK
If that is the case, you have successfully installed the SDK.
Upgrade
You can upgrade to the latest version of the OpenMRS SDK by running:
mvn openmrs-sdk:setup-sdk -U
Basic usage
Let's start from creating a server to run the OpenMRS platform or a distribution.
mvn openmrs-sdk:setup
When asked specify server id, which you will later use to run your server. You can have as many servers as you want. Each server can run a different set of modules and use a different database.
Next type '1' to setup a distribution or '2' to setup the OpenMRS platform without any modules.
Note that for running a distribution you will most likely need to have MySQL 5.7 installed.
Answer all remaining wizard questions, which may include selecting a version of platform or distribution, database connection details, JDK path.
Next let's create a module.
mvn openmrs-sdk:create-project
You will need to choose what type of module you want to create. It is either a platform module, which can be run on any server or OpenMRS Reference Application module, which needs to be run on a server with the OpenMRS Reference Application distribution installed.
A new directory named after the artifactId (basicexample by default) will be created for you with all the initial code constituting any OpenMRS module.
Let's build, deploy and run the module on the server.
cd basicexample
mvn clean install openmrs-sdk:run
You will be asked to choose the server id, which you want this new module to be deployed to. If you do not want to be asked for the server id each time you run the module, just use:
mvn clean install openmrs-sdk:run -DserverId=your_server_id
When running the server for the first time, you will see:
WARN - OpenmrsUtil.getRuntimeProperties(2039) |2020-04-26 13:58:31,866| Unable to find a runtime properties file. Initial setup is needed. View the webapp to run the setup wizard.
Apr 26, 2020 1:58:31 PM org.apache.coyote.AbstractProtocol start
INFO: Starting ProtocolHandler ["http-bio-8080"]
You need to go to http://localhost:8080/openmrs/ to complete the setup. You should see a page with the installation progress. Once done you will be redirected to the login page. Use admin as the username and Admin123 as the password.
Documentation
The OpenMRS SDK consists of a number of commands. In this section we will cover different use cases for them. By default all OpenMRS SDK commands work in a wizard mode that is, if there are any parameters required, but not provided, you will be asked for them.
Setting up servers
The openmrs-sdk:setup command allows you to easily create instances of servers running OpenMRS. You can have as many servers on your machine as you wish. They are stored in ~/openmrs (Linux/Mac) or %userprofile%\openmrs (Windows).
The OpenMRS SDK supports setting up a server with a plain platform or any distribution.
Databases
Servers can be configured to use H2 or MySQL 5.7 database. We also support databases running in a docker container. The H2 database is only supported by some modules. If you choose to install the Reference Application distribution, you must use the MySQL database.
The SDK comes with the H2 database so you do not have to install anything to use it. The MySQL 5.7 database needs to be installed prior to using it with the SDK. Please refer to installation instructions.
An H2 database is stored in a directory under ~/openmrs/server_id/database
A MySQL database with initial schema is created, if it does not exist when running setup. If you include @DBNAME@ in a dbUri, it will be replaced with "your_server_id".
The db docker container support comes in two flavours. One is letting SDK create and manage a MySQL 5.7 docker container for you. The other is creating a DB docker container manually and specifying container Id, label or name and connection details when setting up a server. The db docker container will always be started (if not already running) before starting the OpenMRS server.
Distributions
The SDK supports setting up a server with a distribution. The OpenMRS distribution consists of a platform and a set of modules.
If your distribution is published as a maven artifact, you can make it work with SDK by simply adding openmrs-distro.properties file under src/main/resources. That way others will be able to setup your distribution by simply typing -Ddistro=package:artifactId:version. To setup such a distribution it is not even required to clone its repository as Maven will fetch the given artifact from a remote repository.
See here how it is done for the Reference Application distribution.
If you do not use maven to publish your distribution, you can also create openmrs-distro.properties file. The openmrs-sdk:setup command will have to be run from a directory, which contains the file or with -Ddistro=path/to/openmrs-distro.properties.
See here how it is done for the Concept Dictionary OWA server.
Examples
Examples are provided as batch commands whenever possible, which means parameters are specified explicitly and you should not be asked questions. If you skip the parameters, you should be able to achieve the same following wizard questions.
Setup OpenMRS Reference Application 2.10.0 on MySQL database
mvn openmrs-sdk:setup -DserverId=distro-2-10-0 -Ddistro=referenceapplication:2.10.0 -DdbUri=jdbc:mysql://localhost:3306/distro-2-10-0 -DdbUser=root -DdbPassword=Root123 -DjavaHome="C:\Program Files\Java\jdk1.8.0_172"
Setup OpenMRS Platform 2.3.5 on H2 database
mvn openmrs-sdk:setup -DserverId=platform-2-3-0 -Dplatform=2.3.0 -DdbDriver=h2
Which JDK would you like to use to run this server?:
1) JAVA_HOME (currently: C:\Program Files\Java\jdk1.8.0_172)
2) Other...Which one do you choose? [1/2]:
Answer: 1
The server will use JAVA_HOME system variable whenever starting up. It means that if the value is changed in the system, the server will start using the new value after restart.
Setup OpenMRS Platform 2.3.0-SNAPSHOT on MySQL database
mvn openmrs-sdk:setup -DserverId=platform-2-3-0 -Dplatform=2.3.0-SNAPSHOT -DdbDriver=mysql -DdbUri=jdbc:mysql://localhost:3306/@DBNAME@ -DdbUser=root -DdbPassword=Roo123
Which JDK would you like to use to run this server?:
1) JAVA_HOME (currently: C:\Program Files\Java\jdk1.8.0_172\jre)
2) Other...Which one do you choose? [1/2]:
Answer: 1
Setup Concept Dictionary OWA distribution on H2 database
git clone https://github.com/rkorytkowski/openmrs-owa-conceptdictionary
cd openmrs-owa-conceptdictionary
mvn openmrs-sdk:setup -DserverId=conceptdictionary
Setting up a new server...
You can setup the following servers:
1) OpenMRS Concepts OWA server 1.0 from current directory
2) Distribution
3) Platform
Which one do you choose? [1/2/3]:
Answer: 1
Would you like to use the h2 database (-DdbDriver) (note that some modules do not support it)? [Y/n]:
Answer: Y
Which JDK would you like to use to run this server?:
1) JAVA_HOME (currently: C:\Program Files\Java\jdk1.8.0_172\jre)
2) Other...Which one do you choose? [1/2]:
Answer: 1
Adding '-Drun' flag will make SDK run newly created server right after successful setup.
Setup new Server from a distribution that uses the SDK Docker for MySQL (non-interactive mode)
mvn openmrs-sdk:setup -DserverId=test -Ddistro=org.openmrs.module:mirebalais:1.3.0-SNAPSHOT -DbatchAnswers="8080,1044,MySQL 5.6 in SDK docker container (requires pre-installed Docker)"
This will create a new server with id = "test", based on the distribution defined in the mirebalais module's openmrs-distro.properties file, providing answers to server port (8080), debug port (1044), and to use the SDK Docker container.
Deleting servers
You can delete a server by running:
mvn openmrs-sdk:delete -DserverId=myserver
The command will delete the server as well as the database it used. If the command fails for some reason, you can delete the server manually by dropping ~/openmrs/mysever (Linux/Mac) or %userprofile%\openmrs (Windows) directory.
Creating projects
Creating OpenMRS module
To create an openmrs module project in the current directory, use the openmrs-sdk:create-project command. The newly created project has basic structure and configuration files generated from an archetype. It is ready to be built and installed on an OpenMRS instance right after creation.
There are two types of projects: referenceapplication-module and platform-module. After you choose the module type, the SDK will run a wizard, where you will have to provide information about a module to create.
Creating OWA project
To create new OWA project run
mvn openmrs-sdk:create-project -Dtype=owa-project
Example
Creating Reference Application module
Creating a module has always the same workflow. The example shows how to create the Reference Application module.
In a directory where you want to have a directory with a project, run:
mvn openmrs-sdk:create-project
The wizard will appear:
What kind of project would you like to create?:
1) Platform module
2) Reference Application module
3) Open Web AppWhich one do you choose? [1/2/3]:
Answer: 2
Wizard asks for basic informations about your new module. Conventions and hints are displayed as well.
Module id uniquely identifies your module in the OpenMRS world.
It is advised to consult your module id on https://talk.openmrs.org to eliminate possible collisions.
Module id must consists of lowercase letters, must start from a letter, can contain alphanumerics and dots,
e.g. webservices.rest, metadatasharing, reporting, htmlformentry.Please specify 'module id': (default: 'basicexample'):
Module name is a user friendly name displayed to the user instead of the module id.
By convention it is a module id with spaces between words.Please specify 'module name': (default: 'Basic example'):
Describe Your module in a few sentences :
GroupId, artifactId and version combined together identify your module in the maven repository.
By convention OpenMRS modules use 'org.openmrs.module' as a groupId and the module id as an artifactId.
The version should follow maven versioning convention, which in short is: major.minor.maintenance(-SNAPSHOT).Please specify groupId (default: 'org.openmrs.module', must follow java conventions for naming packages): :
Please specify 'artifactId' (all lowercase, must start from a letter, allowed a-z, 0-9):
Please specify 'initial version': (default: '1.0.0-SNAPSHOT'):
Process is finished with creating project in your current directory. It should be ready to be packaged with
mvn clean install
Creating OWA project
Run the command from any directory
mvn openmrs-sdk:create-project -Dtype=owa-project
Please specify a directory for OWA project (a relative or absolute path):
Answer: owaName
? What is your app name?
Follow Yeoman configurator
If you don't have npm installed globally, run the below command from the OWA project directory
Windows users:
./npm.cmd install
Linux/Mac users:
./npm install
Deploying projects
The openmrs-sdk:deploy command allows you to deploy module, Open Web App, Distribution and Platform to your OpenMRS server.
Deploying module
OpenMRS SDK supports deploying modules in two ways. Either by running the command from the directory that contains module or by passing module artifactId, groupId and version.
Deploy OpenMRS Appui module from any directory
mvn openmrs-sdk:deploy -DserverId=serverId
What would you like to deploy?:
1) Module
2) Open Web App
3) Distribution
4) PlatformWhich one do you choose? [1/2/3/4]:
Answer: 1
Please specify 'groupId': (default: 'org.openmrs.module'):
Answer: org.openmrs.module
Please specify 'artifactId':
Answer: appui
You can deploy the following versions of the module:
1) 1.13.0-SNAPSHOT
2) 1.12.0
3) 1.11.0
4) 1.10.0
5) 1.9.0
6) Other...
Which one do you choose? [1/2/3/4/5/6]:
Answer: 1
If the module is installed you will be asked if you want to upgrade it
Module is installed already. Do you want to upgrade it to version '1.6-SNAPSHOT'? [Y/n]:
Answer: y
Deploy OpenMRS Appui module from it's directory
mvn openmrs-sdk:deploy -DserverId=serverId
Would you like to deploy appui 1.13.0-SNAPSHOT from the current directory? [Y/n]:
Answer: y
Deploy a module from it's directory (non-interactive mode)
mvn openmrs-sdk:deploy -DserverId=serverId -DbatchAnswers=y
This will perform the same operation as above, but will answer the question asked with "y" without being prompted.
Deploying OWA
This example will show how to install Concept Dictionary OWA.
mvn openmrs-sdk:deploy
You have the following servers::
1) refapp
2) platform-2-3-0
3) test
4) conceptdictionaryWhich one do you choose? [1/2/3/4]:
Select server you would like to use.
What would you like to deploy?:
1) Module
2) Open Web App
3) Distribution
4) PlatformWhich one do you choose? [1/2/3/4]:
Answer: 2
Which OWA would you like to deploy?:
1) ideliver.ui
2) openmrs-owa-conceptdictionary
3) openmrs-owa-cohortbuilder
4) openmrs-owa-sysadmin
5) openmrs-owa-addonmanager
6) openmrs-owa-obsadmin
7) openmrs-owa-orderentryui
8) openmrs-owa-builtinreports
9) openmrs-owa-labworkflow
10) openmrs-owa-orderentry
11) openmrs-owa-bahmni-appointments
12) Other...Which one do you choose? [1/2/3/4/5/6/7/8/9/10/11/12]:
Answer: 1
Which version would you like to deploy?:
1) 1.0.0
2) 1.0.0-beta.6
3) 1.0.0-beta.3
4) 1.0.0-beta.1
5) 1.0.0-beta
6) Other...
Answer: 1 to select latest version.
If you don't have Open Web App Module on selected server, before deploying OWA, SDK will install its latest version.
If there is no default directory 'owa' on selected server, you will have either to confirm to create it, or pass absolute path to directory where you want to install OWAs.
There is no default directory 'owa' on server refapp, would you like to create it? (if not, you will be asked for path to custom directory) [Y/n]: y
It is recommended to agree by answering with Y.
Deploying Distribution
You can upgrade your server's distribution version(to 2.1 and above) using the openmrs-sdk:deploy command. OpenMRS SDK supports openmrs-distro-properties files that contains all necessary information(modules, core version etc.).
The parameter responsible for distribution is -Ddistro. You can pass there:
1) Artifact information e.g referenceapplication:2.10.0
2) Path to openmrs-distro.properties file
You can also run openmrs-sdk:deploy command from directory that contains openmrs-distro.properties file.
Deploy Reference Application 2.10.0 from any directory
mvn openmrs-sdk:deploy -DserverId=serverId -Ddistro=referenceapplication:2.10.0
You will see all updates and additions required to upgrade the distribution version
Answer: y
Deploy Reference Application 2.10.0 from directory with openmrs-distro.properties file
mvn openmrs-sdk:deploy -DserverId=serverId
Would you like to deploy serverID OpenMRS Concepts OWA server from the current directory? [Y/n]:
Answer: y
You will see all updates and additions required to upgrade the distribution version
Answer: y
Deploy Reference Application 2.10.0 with path to openmrs-distro.properties file
mvn openmrs-sdk:deploy -DserverId=serverId -Ddistro=/path/to/file
You will see all updates and additions required to upgrade the distribution version
Answer: y
Deploying Platform
Deploying platform replaces OpenMRS core on selected server.
Deploy 2.3.0 platform to selected server
mvn openmrs-sdk:deploy -DserverId=serverId -Dplatform=2.3.0
If you will try to downgrade server's platform, you will be asked to confirm this action with prompt:
Note that downgrades are generally not supported by OpenMRS. Please consider setting up a new server with the given version instead. Are you sure you would like to downgrade? [Y/n]
You will see all updates and additions required to upgrade the platform version
The Reference Application 2.9.0 introduces the following changes:
^ Updates openmrs-webapp 2.1.4 to 2.3.0
^ Updates owa-omod 1.10.0 to 1.11.0
^ Updates webservices.rest-omod 2.24.0 to 2.26.0
^ Updates fhir-omod 1.18.0 to 1.19.0Would you like to apply those changes to 'openmrs'? [Y/n]
Answer: y
Building projects
With openmrs-sdk:build you can either build all server's watched projects or OWA project.
Building watched projects
mvn openmrs-sdk:build -DserverId=serverId
All watched projects will be build in the correct order by creating temporary maven reactor project.
Build OWA project in working directory
mvn openmrs-sdk:build
You will see prompt message if there is OWA project found in working directory:
Would you like to apply those changes to 'server4'? [Y/n]:
Answer: y
Cloning and Forking OpenMRS module repository
You can clone any OpenMRS module repository by executing openmrs-sdk:clone command.
Cloning OpenMRS module repository
mvn openmrs-sdk:clone
You will be asked for artifactId of module You want to clone:
Please specify 'artifactId':
Note: groupId is set to "org.openmrs.module", but it can be changed by adding -DgroupId=<Your custom groupId> to openmrs-sdk:clone command.
Then You will be asked for GitHub credentials:
Please specify 'GitHub username':
and:
Please specify 'GitHub personal access token':
OpenMRS SDK will automatically clone repository to current directory, fork it to Your GitHub account and add upstream remote to git repository.
Watching projects
Note (Windows) : See the solution section of this article, for step by step instructions to grant Create Symbolic Links privileges to a user or group. (In the current version of the SDK, watch does not copy files. It creates a symbolic link in the distribution folder to the source folder. Older versions of Windows do not support symbolic links. For those that do, the user account running this command must have the Create Symbolic Links privilege. Generally, it can be added through the Local Security Policy snap-in by a user with Administration privileges. Review details about the Create Symbolic Links permission for more information.)
You can add a module as watched by the selected server executing the openmrs-sdk:watch command in module's project directory.
mvn openmrs-sdk:watch -DserverId=myserver
UI changes (given UI Framework is used) in project's code will be automatically deployed to the running server.
You can also list watched modules for the given server typing:
mvn openmrs-sdk:info -DserverId=myserverId
If you want to stop watching a module:
mvn openmrs-sdk:unwatch -DserverId=myserverId -DartifactId=mymodule
Running and debugging servers
You can run any server with:
mvn openmrs-sdk:run -DserverId=myserver
If you do not specify the serverId parameter, then you will be presented with a list of previously setup servers:
You have the following servers::
1) conceptdictionary
2) platform-1-11-7
3) platform-1-11-5Which one do you choose? [1/2/3]:
By default a server is started on port 8080 so you should be able to access it opening up http://localhost:8080/openmrs in your browser. You can change the port by specifying -Dport=8081.
Before running the server make sure that the classpath to your JDBC driver is properly configured.
The SDK runs OpenMRS on embedded Tomcat 7.0.6, which you do not have to install, because it is bundled with the SDK. By default it uses -Xmx768m and -XX:MaxPermSize=512m for memory settings. You can increase those settings by defining MAVEN_OPTS="-Xmx768m -XX:MaxPermSize=512m" in your system properties or in a run configuration in your IDE. If you specify lower values, they will be increased to the default values as they are required to run OpenMRS.
If you execute the run command from a directory with a module or openmrs-core project, it will be automatically deployed before starting up the server. You can add the following run configuration to the IDE to build, deploy and run the project:
mvn clean install openmrs-sdk:run -DserverId=myserver
Debugging
You have 2 ways of debugging a server. First is by connecting to a running server by using a remote debugger configuration in your IDE. To run the server in remote debugging mode use:
mvn openmrs-sdk:run -DserverId=myserver -Ddebug
By default the server listens for remote debuggers on port 1044. You can configure it to use a different port by setting -Ddebug=1045.
Alternatively, you can debug a server by running it in a debug mode straight from your IDE. It depends on your IDE, how to do it, but usually you just create a debug configuration and as the run command specify:
mvn openmrs-sdk:run -DserverId=myserver -Dfork=false
It is important to use -Dfork=false to disable forking a new process for Tomcat as it is not possible to debug a forked process that way (the debugger stays connected to the Maven process and not the Tomcat process).
Setting JDK
When setting up a server you are asked to select JDK. OpenMRS Platform 2.x requires JDK 1.8 whereas lower versions require JDK 1.7. The SDK prevents you from running a server using a wrong JDK. You should see the following message trying to do so:
The JDK 1.7.0_51 is not compatible with OpenMRS Platform 2.0.0-beta. Please use JDK 1.8 to run this server.
If you are running in a forked mode, correct the java.home property in C:\Users\Rafal\openmrs\platform\openmrs-server.properties
Following the message please correct the java.home property in openmrs-server.properties by pointing to the correct JDK version.
Pulling changes from upstream
The openmrs-sdk:pull command can pull changes from upstream for all watched projects or for any project if executed in it's directory.
Pulling changes for all watched projects
mvn openmrs-sdk:pull -DserverId=serverId
This command will try to update your projects to the latest upstream master (upstream remote repository is the one in the project's pom.xml, if not preset then it will be created for you). If openmrs-core will be detected it will ask you for the upstream branch you want to pull changes from.
Pulling changes for any git project
mvn openmrs-sdk:pull
If you run this command from a directory that contains openmrs git project, it will be updated to upstream master or if openmrs-core will be detected it will ask you for the upstream branch you want to pull changes from.
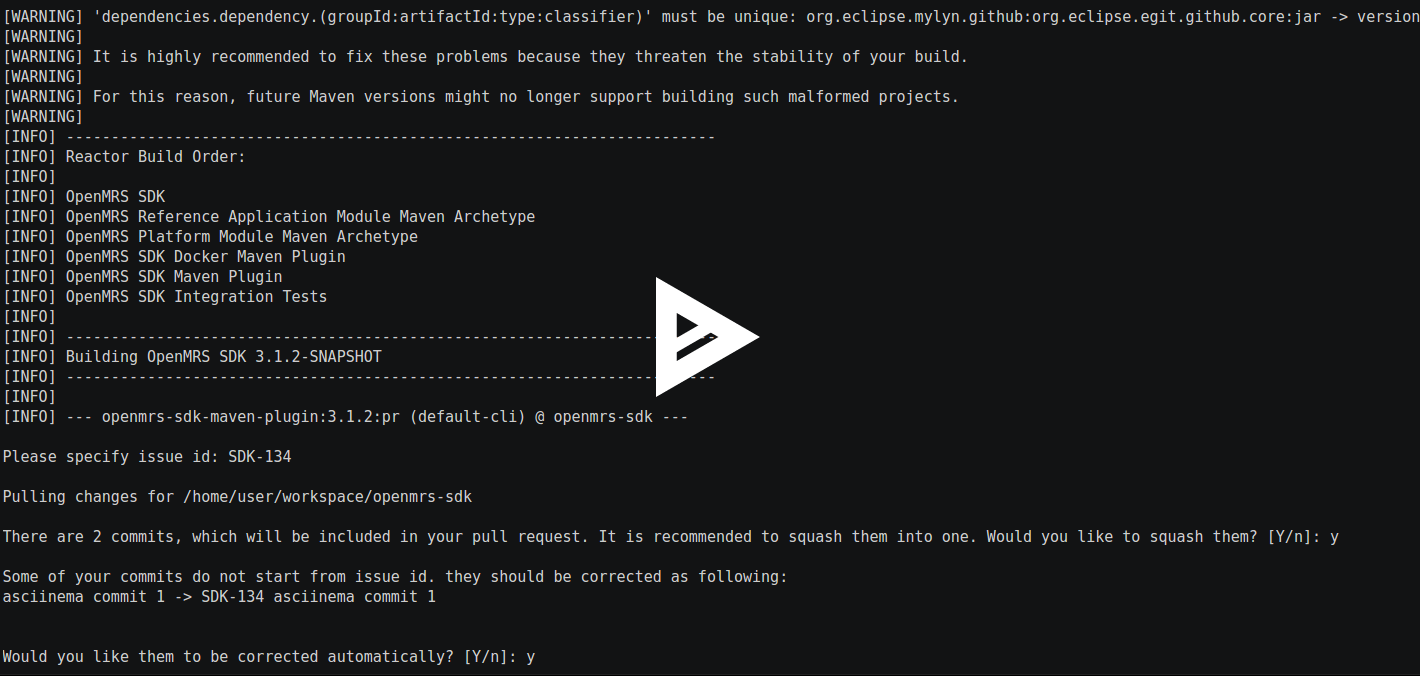
Creating Pull Request
You can create or update pull request to any OpenMRS repository using command:
mvn openmrs-sdk:pr
Before, ensure that you don't have any uncommited changes in local repository, otherwise SDK will show proper message and abort process.
Valid pull request should address issue from JIRA, so you will be asked to specify issue id:
Creating docker configuration for distribution
SDK offers convenient way to create docker configuration for distributions with command:
mvn openmrs-sdk:build-distro
If current directory contains openmrs-distro.properties file, SDK will use it to setup docker instance, similarly as setup command. If current directory is base directory of Maven project, SDK will build it, and look for openmrs-distro.properties file in created jar file. Trying to build distribution in project not containing openmrs-distro.properties file will fail. If neither of mentioned conditions are met, SDK will offer you to build one of latest OpenMRS Reference Application distributions from remote repository.
You can deploy the following versions of distribution:
1) Reference Application 2.11.0-SNAPSHOT
2) Reference Application 2.10.0
3) Reference Application 2.9.0
4) Reference Application 2.8.1
5) Reference Application 2.7.0
6) Other...
Either way, you will be asked to specify directory for generated files:
Specify build directory for generated files (-Ddir, default: 'docker')
Similar to openmrs-sdk:setup, you can point to openmrs-distro.properties file, by using the -Ddistro property, as shown in the following command:
mvn openmrs-sdk:build-distro -Ddistro=/path/to/openmrs-distro.properties
SDK will create ready to use configuration based on provided openmrs-distro.properties file. All you have to do is enter specified directory and run instance with:
docker-compose up
And go to http://localhost:8080/openmrs in your browser. Naturally docker and docker-compose are required.
Created configuration consist of 2 containers: one for OpenMRS server deployed on Tomcat, another for MySQL 5.7. Besides, volume for database files is created. Database port is not exposed on host machine.
Updating openmrs distribution for docker config
To update distribution that has been originally setup by build-distro goal run the same command and specify when prompt folder name where current setup exists. SDK will update only war file, modules, sqldump and openmrs-distro.properties file. Make sure to run docker-compose build before running the containers. All existing docker config files will remain the same.
Releasing new SDK Versions
New SDK versions are released via Travis CI following the steps at https://github.com/openmrs/openmrs-sdk#releasing
Feedback
Please help us improve SDK. We kindly ask you to report any problems in JIRA. Please include the output of openmrs-sdk:help in your problem description.
Acknowledgments
The project is currently maintained thanks to developers funded by the SolDevelo company and lead by raff (Regenstrief).
In 2016 SolDevelo developers Adam Grzybkowski, Paweł Gutkowski, Tomasz Marzeion lead by raff worked on OpenMRS 3.0.0 and OpenMRS 3.1.0 release.
In GSoC 2015 the OpenMRS SDK was reworked by Dmytro Trifonov mentored by raff to support OpenMRS Reference Application 2.x and provide better integration with IDEs by the mean of a maven plugin.
The SDK 1.x was developed by Chris Niesel mentored by raff as part of Google Summer of Code 2013 (GSoC 2013).
Resources
Found Bintray access configuration with username: username and API key: APIKEY
Would you like to use it?(if no, you will be asked for new credentials) [Y/n]: