Documentation
About Drawing Module
Physicians have been using hand drawn sketches to document their physical exam findings and link it to their patient's medical record. Drawing Module provides physicians the means to upload or draw patients anatomical outlines/pictures and annotate their comments directly on the picture
Requirements
- HTML FormEntry 2.0 or Higher
- Openmrs 1.9.0 or Higher
Browser Compatibility
- Google Crome
- Fire Fox
Installation
- Download Drawing module from here and upload it into your system .
- Create a new concept (You can do this by clicking on Dictionary and Add new Concept)
- If there is a class 'Drawing' in the list , set the class of concept to 'Drawing'. if not create a new class 'Drawing' and set the class field of the concept to the same(you can create new class from administration ->Manage Concept Classes )
- Set the data type to complex
- Set the handler to DrawingHandler
Optional Configuration
The Question Concepts for Drawing can be limited only to a selected Concepts by filling the Global Property drawing.questionConcepts . If the value of Global Property drawing.questionConcepts is not set then user will be able select the concepts having complex datatype and Drawing class
How To Use Drawing Module
The main object of interest in drawing module is the Drawing Editor. In this editor you can upload images ,paint on it or write text on the image using the tools provided in the Editor and save them as Observations .You can also make Annotations on the editor just by Double clicking on it .This is how the drawing Editor looks like this
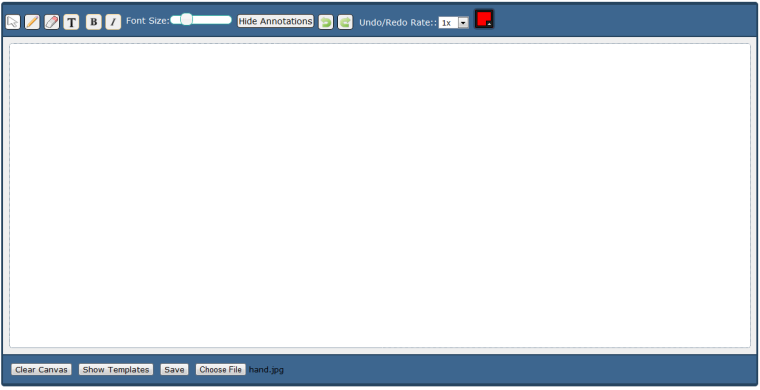
Tools Available In Drawing Editor
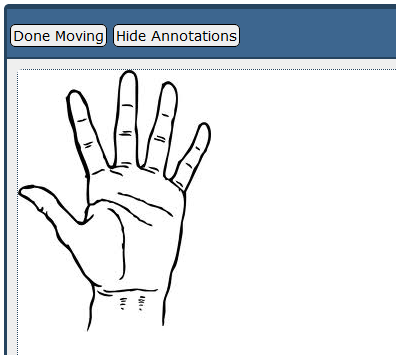
- CURSOR: You can upload an image and move it to the desired location with the help of the cursor.When you upload an image it will be placed on the top left corner of the editor and the cursor tool will be selected automatically.All the other tools will be hidden and only button "Done Moving" will be shown.Once you click Done Moving you won't be able move the image again.As shown in the below figure you can move it to your desired location using the cursor tool
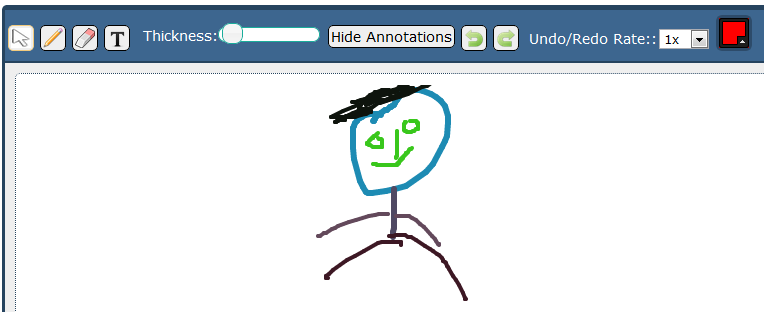
- PENCIL: You can draw with the help of the pencil tool.You can change the thickness of the pencil using the thickness drop down box and you can change the color with the help of color picker,which is located at the last
- ERASER: Eraser can be used to erase drawing through pencil or text tool.you can use the Thickness dropdown to select the thickness of the eraser. you can even erase the uploaded image with the help of the eraser.
- THICKNESS: Can be used to set the thickness of the Pencil or Eraser(Only visible when Pencil or Eraser is selected)
- TEXT: This tool can be used to print text into the image.Select the tool and click anywhere on the Editor to get a textarea where you can enter text . As shown below you will get the new tools when you click on the text tool. These can be used to make you text Bold,Italic or both.you can select the font size with the help of font size drop down box.You can change the color of the text with the help of color picker.
- BOLD: Makes the text Bold
- ITALIC: Makes the text Italic
- FONT SIZE: Used to change the font size
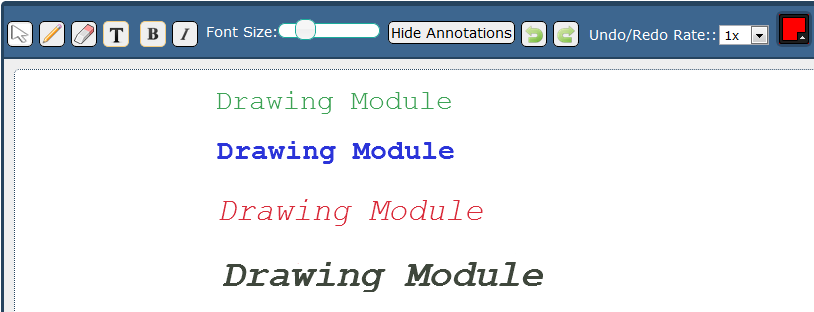
NOTE:THE TEXT ENTERED USING TEXT TOOL WILL GET PRINTED ON THE IMAGE
- SHOW/HIDE ANNOTATIONS: This button will toggle the visibility of annotation markers
- UNDO/REDO: undo/redo the drawing_ _
- UNDO/REDO RATE: rate at which undo/redo should be done (i.e when clicking on undo/redo depending on the selection it will go back/forward 1 or 3 or 5 or 10 or 20 steps at a time)
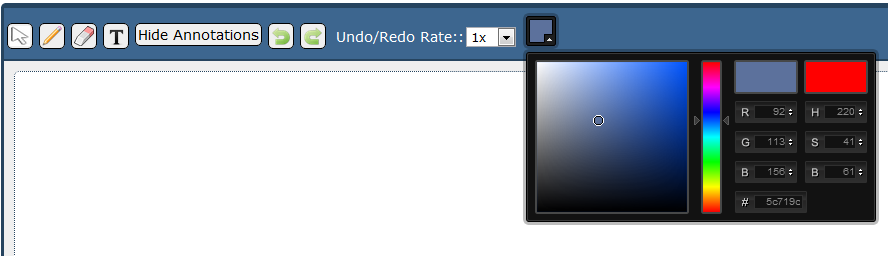
- COLOR PICKER: Can be used to change the color of Text,Pencil Tools.As shown in the below image you can move the circle to select the color you can directly enter the HexaDecimal code of the color to select it.you can even specify the rgb value to select the color
- CLEAR CANVAS BUTTON: This is located in the footer of the editor this can be used to clear the editor in a single shot
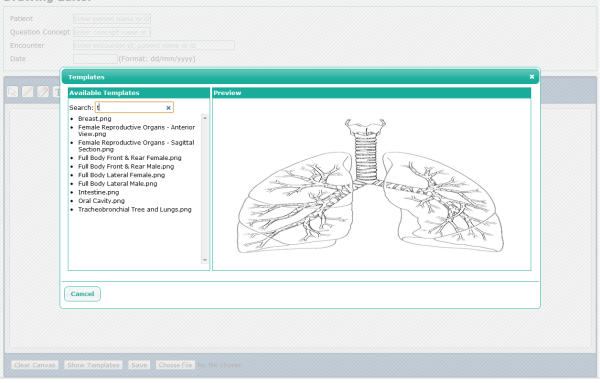
- SHOW TEMPLATES: This Button allows to view the templates.All the templates(uploaded and default) can be viewed from here .The list of templates is show on the right and the preview is shown in the left.Clicking on the template will place it on the editor at the left corner.New Templates can be uploaded from the manage templates link under Drawing Module in Administration page
- CHOOSE FILE: This is located in the footer of the editor this can be used to Upload Images
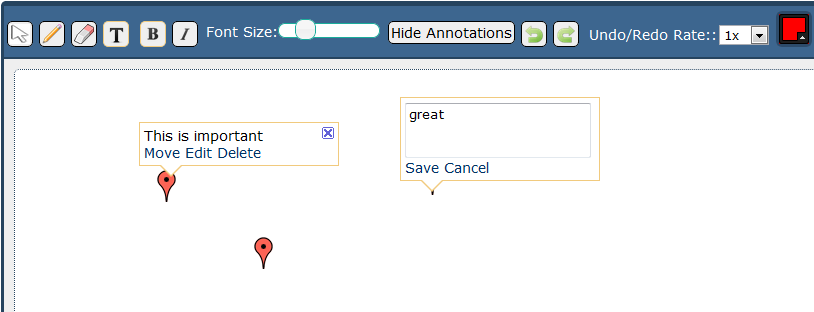
- ANNOTATIONS: Annotations can be made on the editor by double clicking on the Editor .when you do a double click you will get a marker and a text-area where you can make some notes you can either click save to save the annotation or click cancel to get rid of the annotation.To view the annotation just click on the marker a popup will fade in Here you can edit or delete the annotation.
Accessing Drawing Editor
Drawing Editor can be accessed from the following places
- Patient Dashboard
- Open Editor link under Drawing Module in Administration page
To create a complex Obs using Drawing Module you have to provide the patient , question concept which are required(patient is not required in patient dashboard) .The date and encounter are optional fields .Date defaults to the current date if left blank.
You can view the created obs from Administration->Manage Observations link.Type in the patients name and you will be shown all the observations . Select the required observation and you will be directed to the obs page. There you will be provided a link which opens the current observation in a new tab
Uploading New Templates
New Templates can be uploaded and existing templates can be viewed or deleted from Mange Templates link under Drawing Module in Administration page.To upload a new template choose the file enter the name of the template If no name is entered the name of the image will be used as template name.(If you want to add a lot of images just goto the openmrs App Directory and add the images into Drawing Templates folder but be sure to properly name the images)
HTML FORMENTRY SUPPORT
To get the Drawing Editor in Html Forms the following tag should be included in the Html Form.Here the questionConceptId should be the id of concept you have created . You can find the sample Htmlform here .
<drawing id="drawingEditor" questionConceptId="6109" />
NOTE:IF YOU NEED MULTIPLE EDITORS IN YOUR FORM MAKE SURE THAT THE ID IN THE DRAWING TAGS ARE UNIQUE